The Jellyfish
- What is The Jellyfish?
- Video Tutorial
- System Requirements
- Understanding Granular Synthesis
- Getting Audio Into The Jellyfish
- Drone v Event
- Waveform Area
- Primary Controls
- Secondary Controls
- Playback Settings
- Live Audio Input
- MIDI Markers
- Tempo Sync
- Presets
- MIDI Mapping
- Frequently Asked Questions
- Audio Input for Common DAWs
What is The Jellyfish?
The Jellyfish is a granular synthesis engine with the ability to receive a live audio input. Live-record your voice or instruments and then repurpose that audio using the The Jellyfish to create drones, soundscapes and pulses in real-time. The Jellyfish is available on both Mac and Windows platforms, as an Audio Unit, VST3 and as a standalone plugin.
Video Tutorial
System Requirements
Operating System
|
Mac OS v10.13 or later
|
|
|
Windows 10 or later |
DAW Compatability
NOTE: The following DAWs have been tested - if you do not see a DAW on this list, it may still be compatible but we have not tested every possible DAW. Additionally, these results are only our experience and we may be mistaken or the DAWs may have implemented support since the time of writing this document
Understanding Granular Synthesis
Granular synthesis is the process of taking short slices of audio - or 'grains' - from a longer section of audio. These short grains are typically less than 1 second in length, often much shorter. They are then triggered at certain intervals, sometimes overlapping each other
What is a Grain?
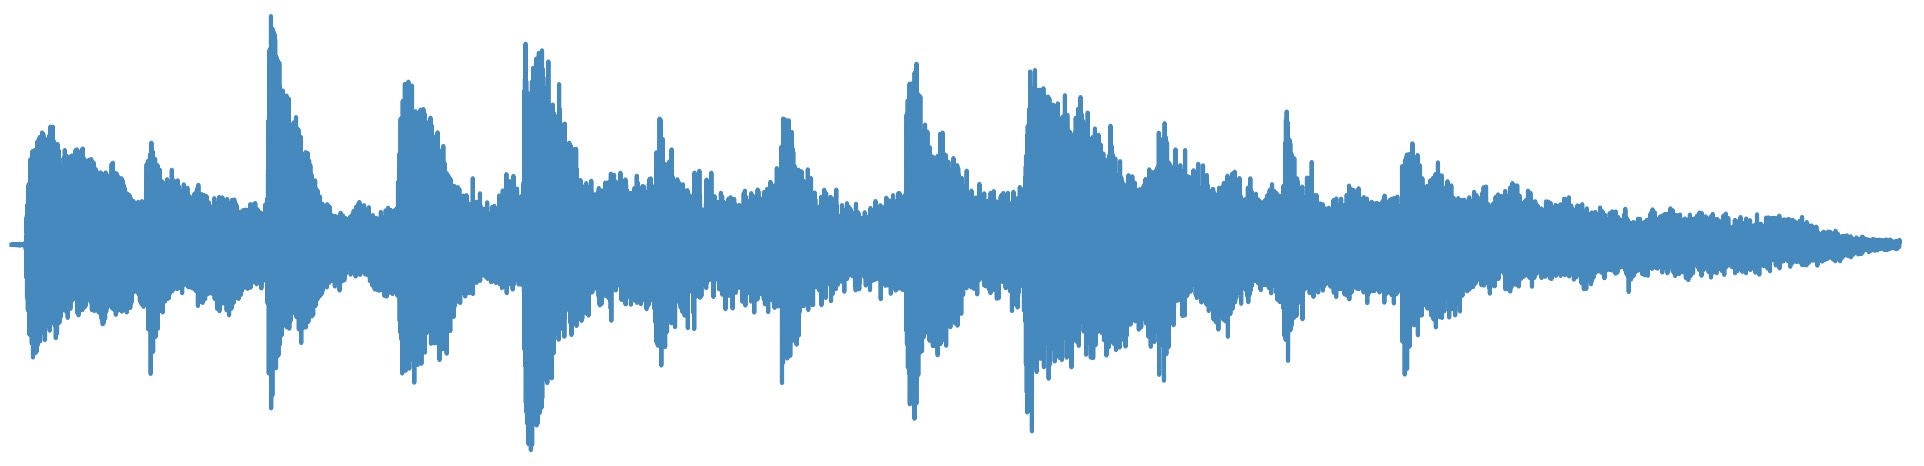
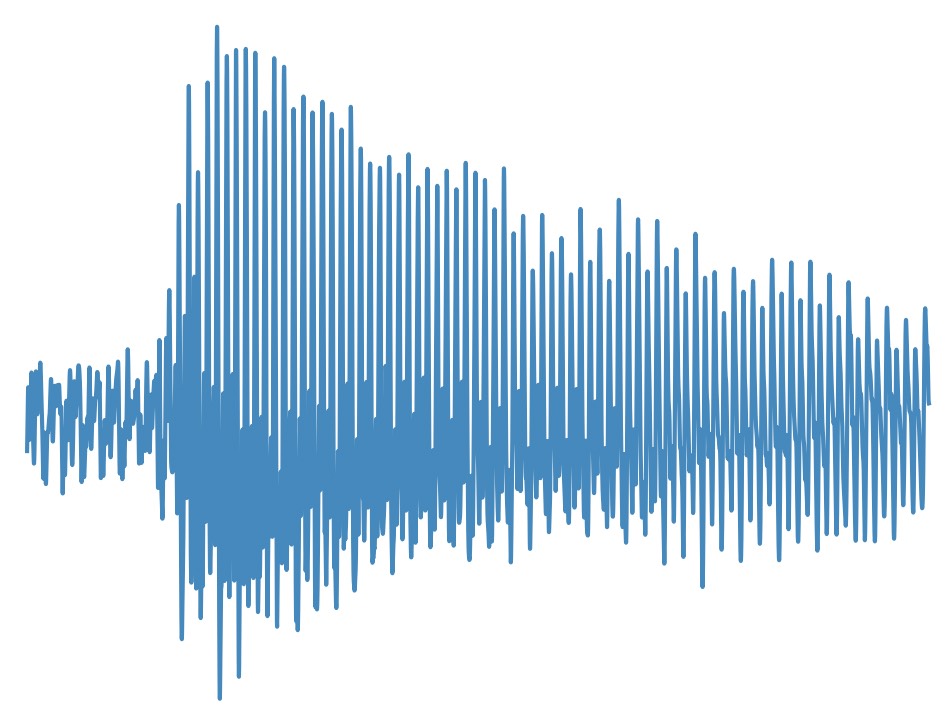
If we have a piece of audio:
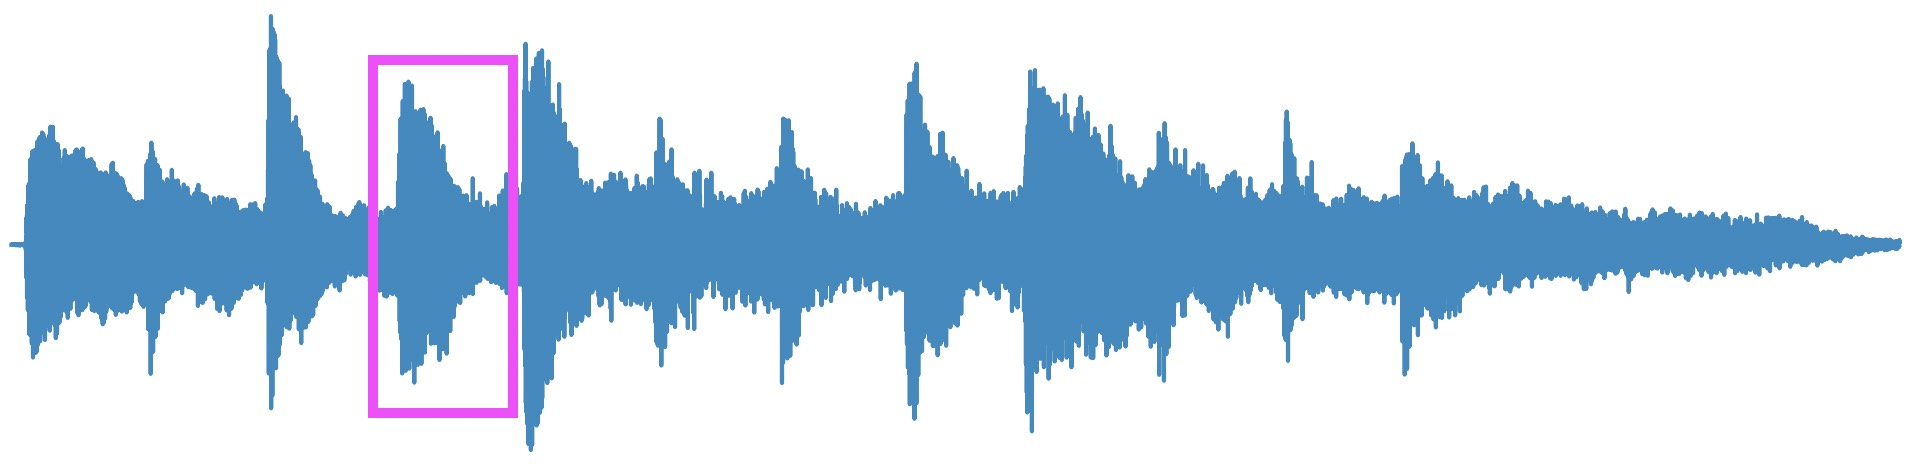
we can take a small slice of it (highlighted in pink):
which leaves us with a short section of audio like below:
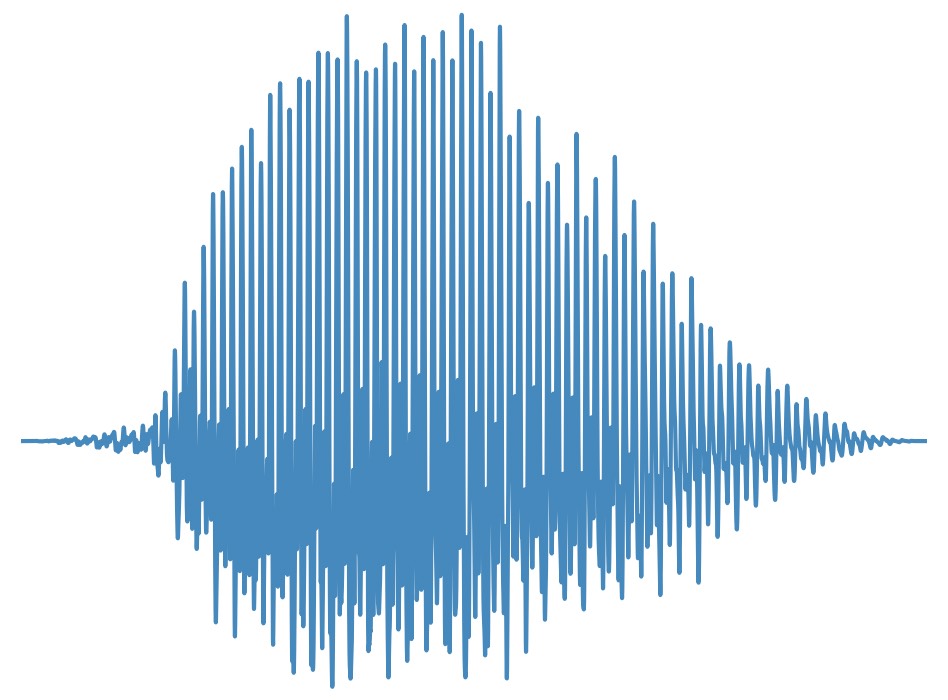
We then apply an 'envelope' - the red dotted line - to this audio slice:
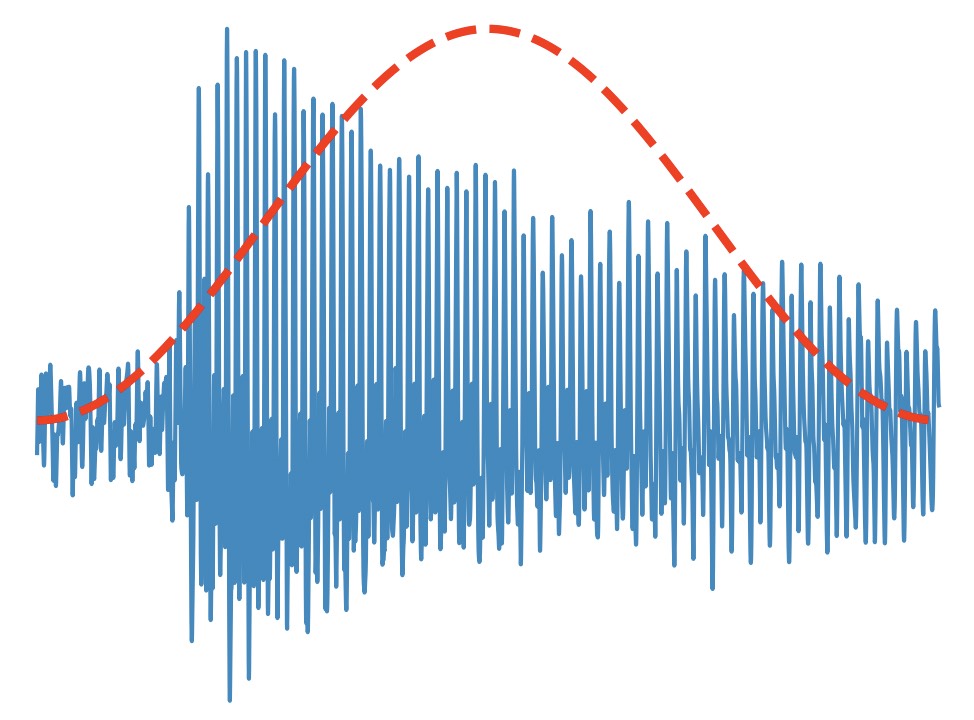
...and the result is a 'grain' of sound, as seen below
From Grains to Granular Synthesis
We can trigger grains at different time intervals, which allows us to have either a sequence of 'pulses', or if the grains are triggered very quickly, overlapping grains resulting in a drone.
We can then vary some parameters of the grain, for example:
- the position in our audio file that we use for the grain
- the length of the grain
- the shape of the envelope
- the pitch at which we playback the grain
This approach makes granular synthesis a very powerful way to generate interesting new sounds from your audio files
Getting Audio Into The Jellyfish
You can get audio into The Jellyfish in a number of ways:Audio Library
Load an audio file from The Jellyfish's built in audio library using the 'Audio Library' button on the toolbar

Drag and Drop
Drag and drop audio to the waveform area
Load Button
Load an audio file via the 'Load' button on the toolbar

Load Preset
Load one of the presets bundled with The Jellyfish using the Presets button

Live Record
Record directly into The Jellyfish using the 'record' button below the waveform (see more detail on this in the live audio input section)

Supported Audio Formats
Supported audio formats include:
- WAV
- AIFF
- FLAC
- OGG
Drone v Event

A very important control is the 'Grain Trigger' switch on the toolbar (see above). This puts The Jellyfish into one of two different modes:
- Drone - The Jellyfish will continously produce audio output
- Event - The Jellyfish will only output sound when you interact with it either via the plugin interface or via MIDI control
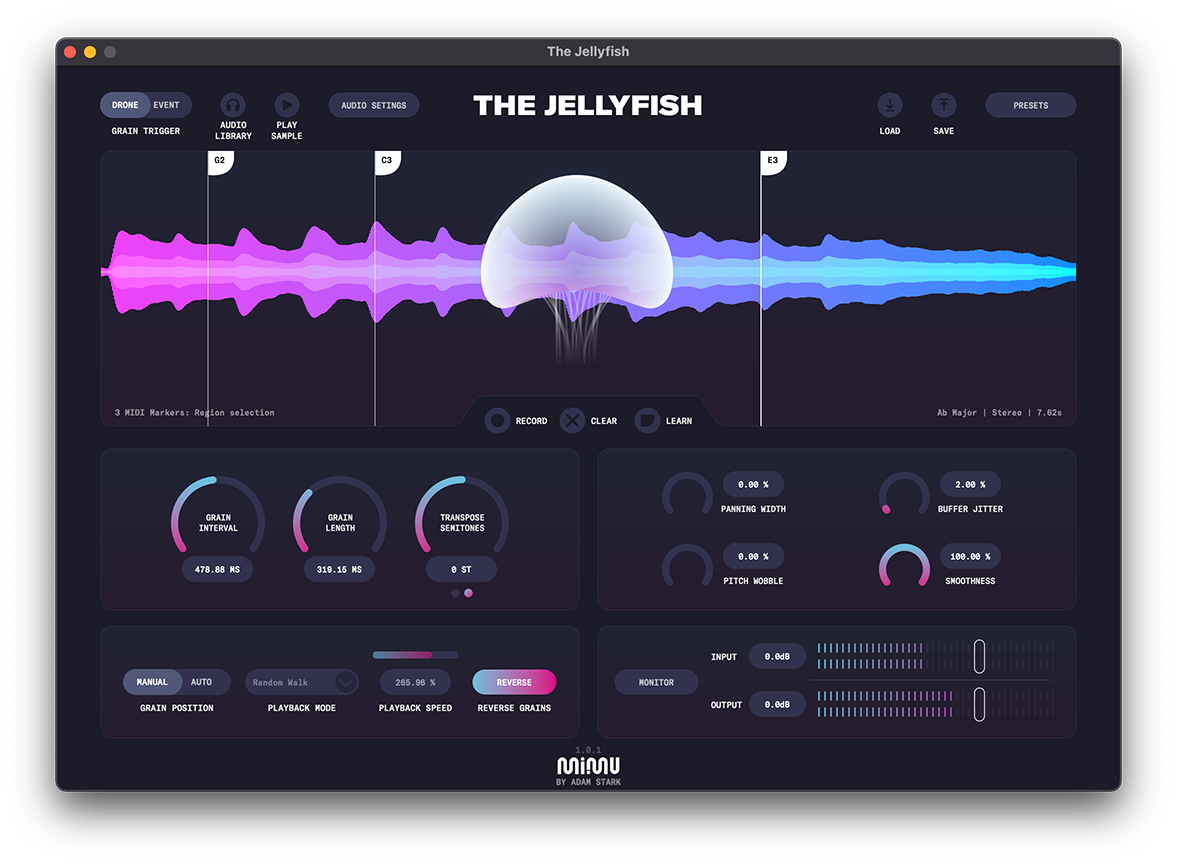
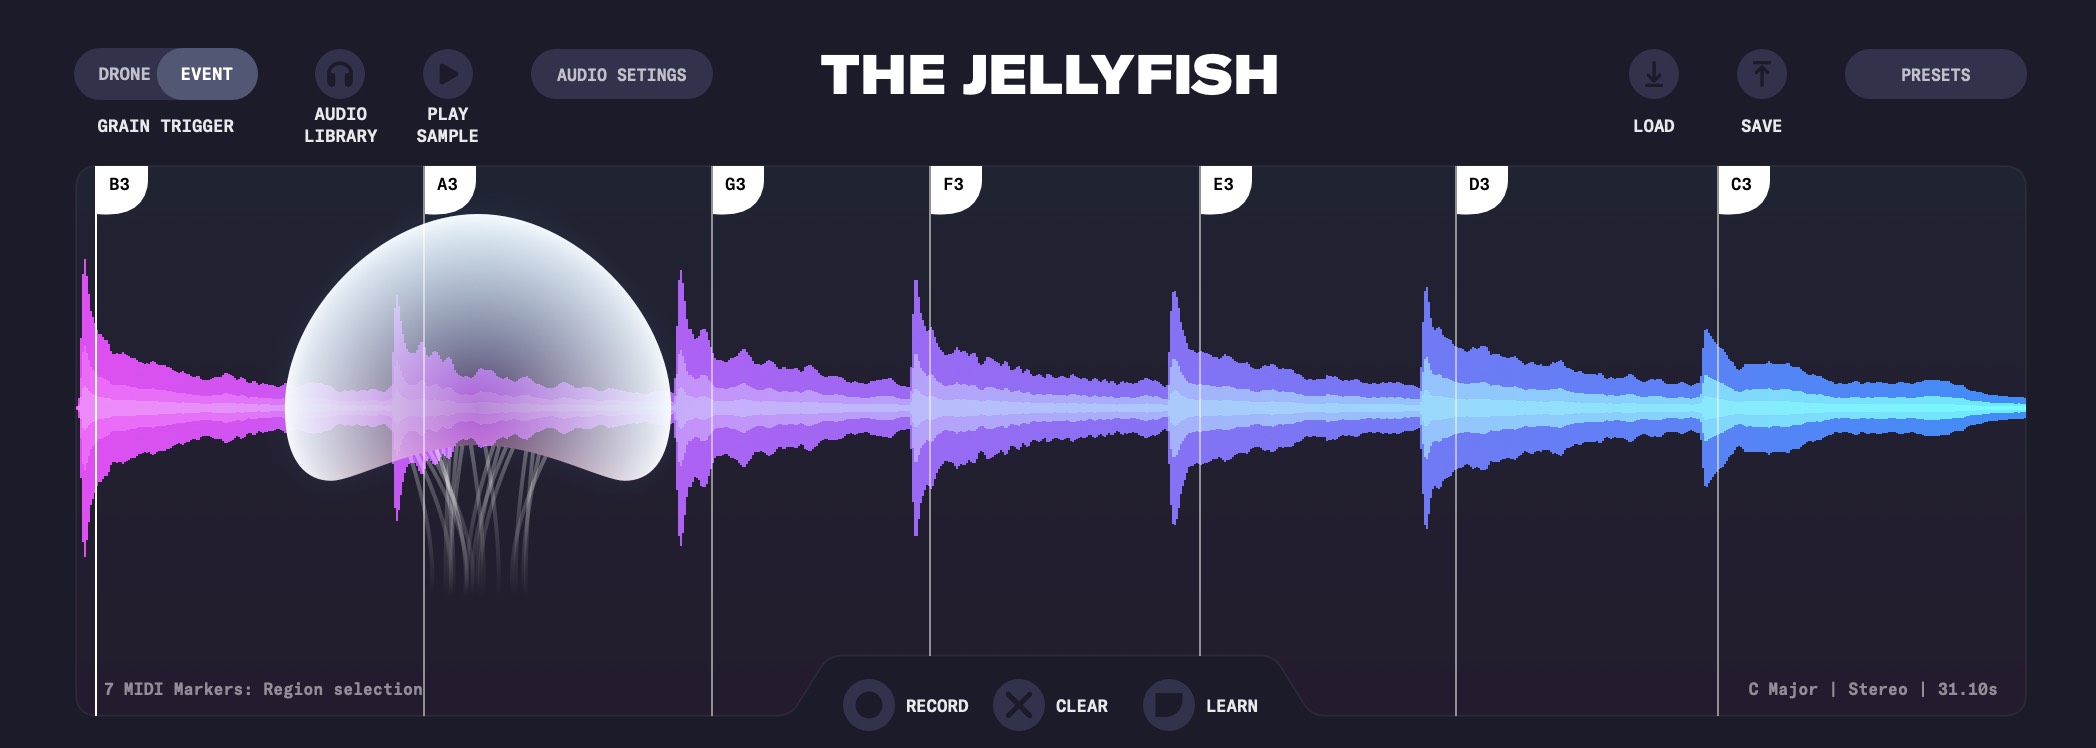
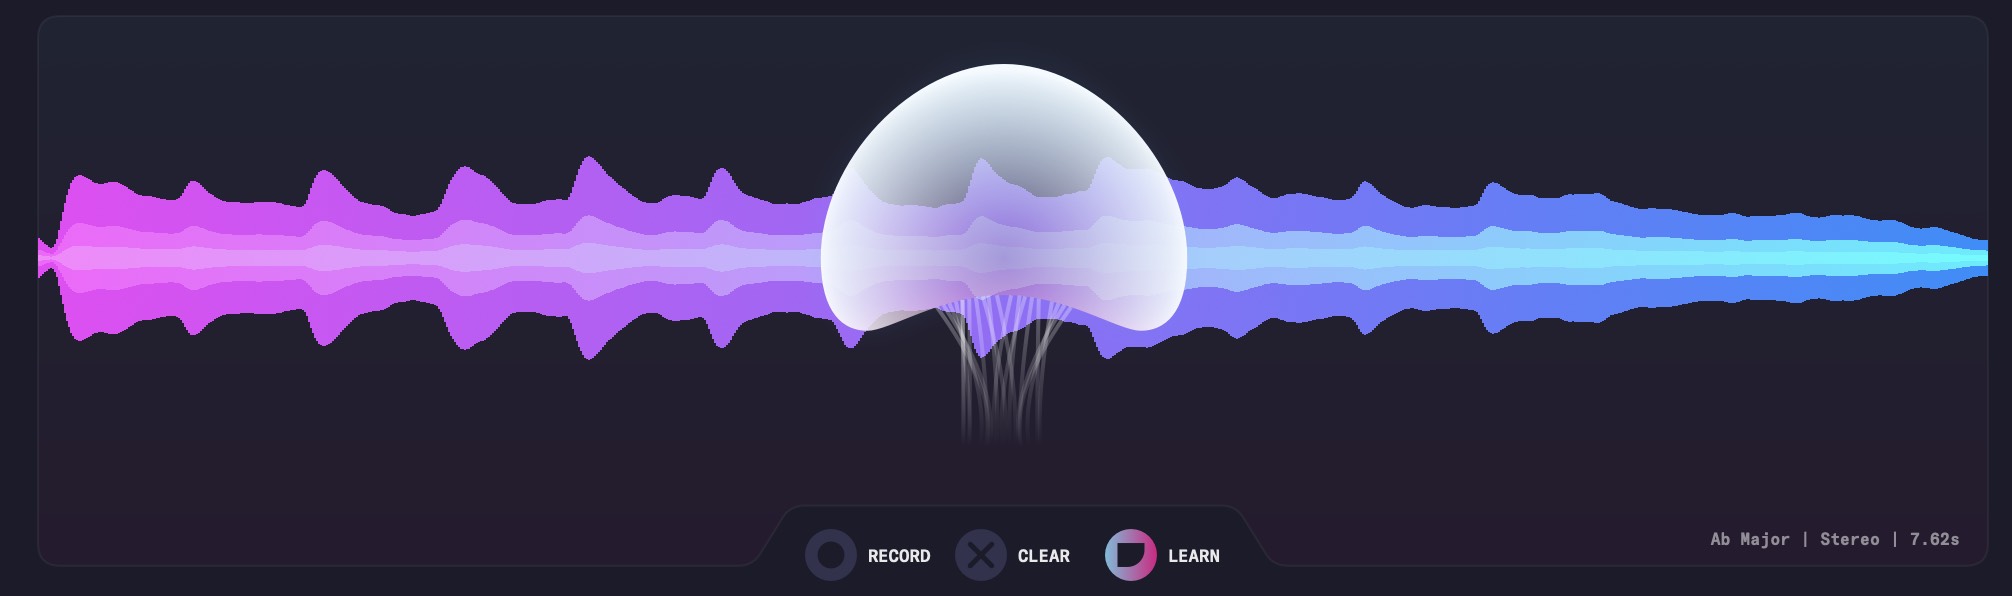
Waveform Area
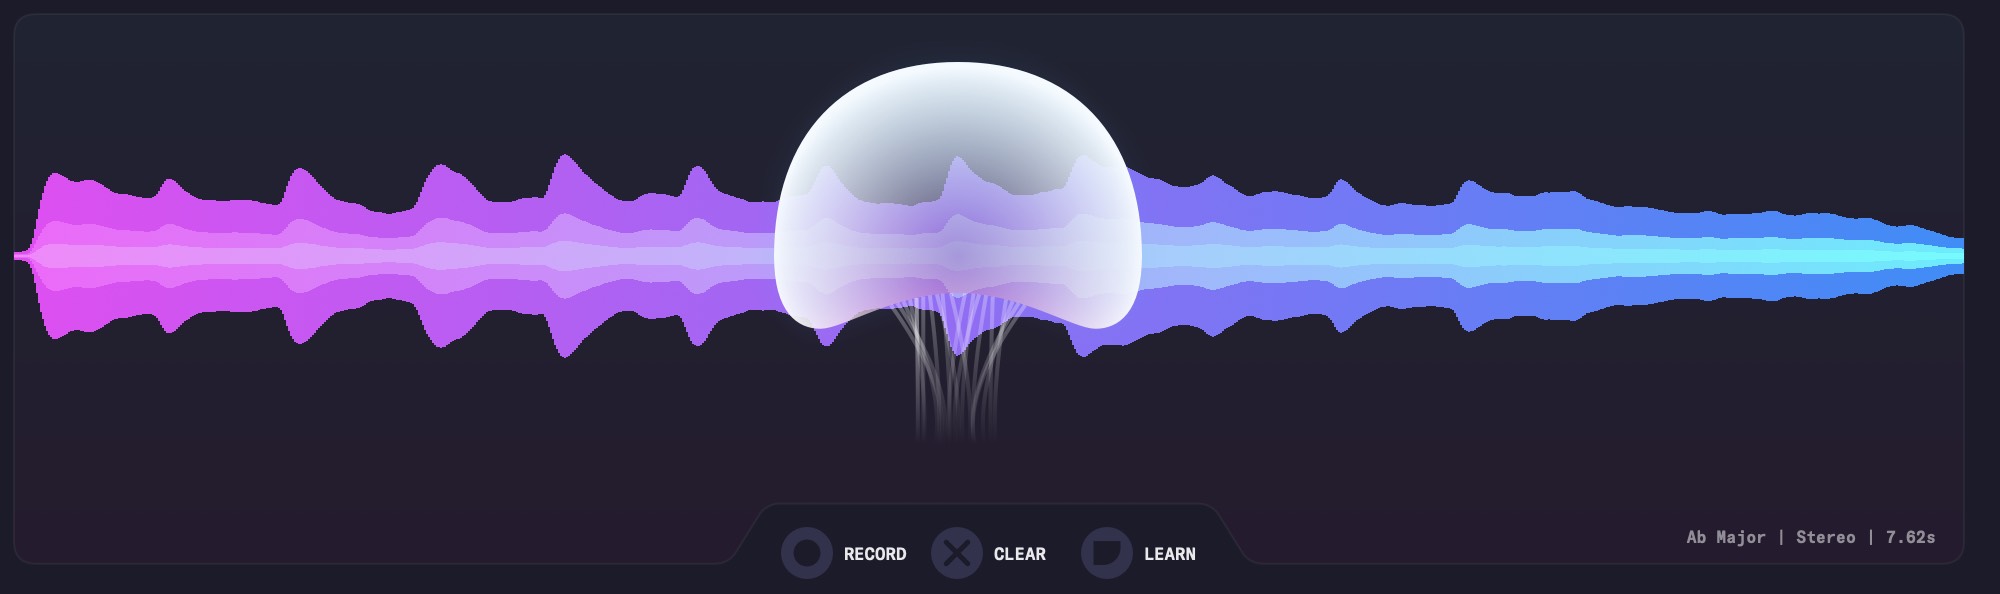
The waveform area shows the currently loaded audio, and the 'jellyfish' which is the positional control for the plugin.
Click and drag the jellyfish to move its position on the waveform. This will change the place — or 'buffer position' — from which grains are sampled.
There are also three buttons at the bottom of the waveform area:
- Record - record into the The Jellyfish from the audio input. More details here
- Clear - delete the currently loaded audio
- Learn - enable/disable the MIDI markers learn feature
Primary Controls
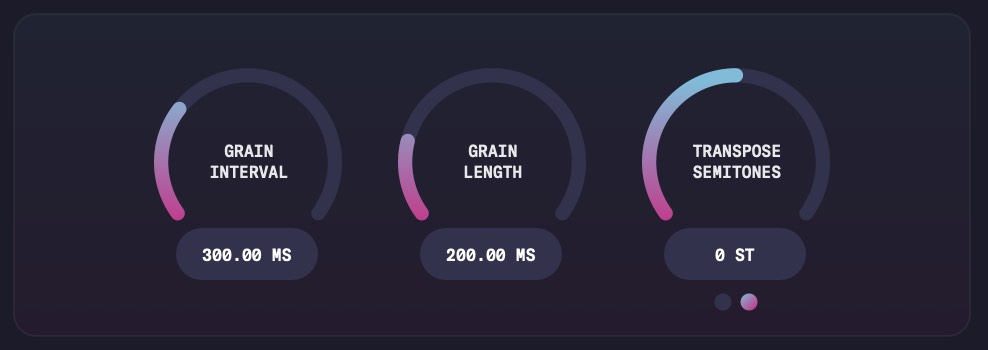
Grain Interval
The time between grains, in milliseconds (range: 10ms to 1,000ms). Larger grain intervals will create a slower pulsing sound, while smaller grain intervals will likely lead to overlapping grains which result in more of a drone sound.
In tempo-sync mode, the time between grains is instead measured in terms of the metric subdivision (1/4 note, 1/8th note, etc.)
Grain Length
The length of each grain, in milliseconds (range: 1ms to 1,000ms).
Transpose
The transpose control allows you to change the pitch of each grain. The buttons below the transpose slider switch between:
- Semitone transpose: transpose pitch in whole semitones
- Microtonal transpose: transpose pitch in fractions of a semitone
Secondary Controls
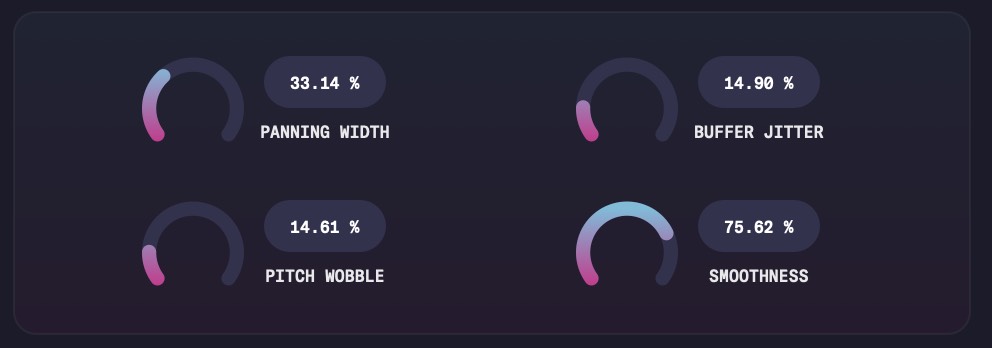
Panning Width
Range: 0 - 100%
Each grain is given a random panning position. The panning width control determines how wide that panning is. If it is 0%, no panning is added. If it is 100% then panning positions can be up to 100% left or 100% right. Values in between reduce the amount of panning.
Buffer Jitter
Range: 0 - 100%
A random variation in the position of each grain in the buffer. Small amounts add light variation that adds to the complexity of the sound. Larger values cause much more wild variations as the grains are selected from a wider range of locations in the audio
Pitch Wobble
Range: 0 - 100%
A random pitch variation added to each grain. If a short grain interval is used, leading to a drone, then small amounts of this pitch variation can add an effect similar to a chorus
Smoothness
Range: 0 - 100%
This parameter controls the shape of each grain. Smooth grains will have a soft, slow attack. Less smooth ones will have a faster attack, leading to a sharper sound
Playback Settings
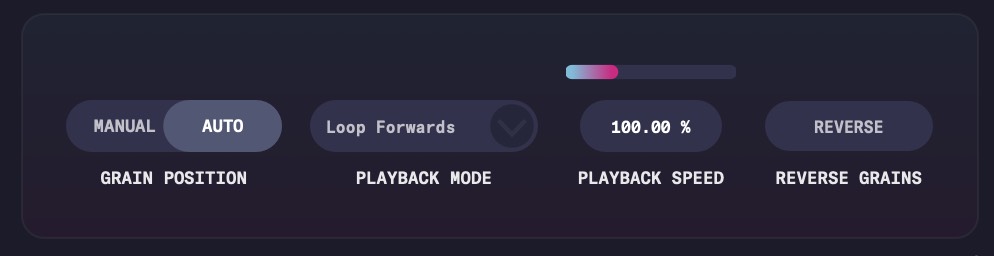
Grain Position
Switches between 'manual' and 'auto' grain position modes:
- Manual - The Jellyfish will remain in the same position, unless moved by the user
- Auto - The Jellyfish will move according to the current playback mode and speed
Playback Mode
Selects the movement behaviour of the Jellyfish when the 'auto' grain position switch is active:
- Loop Forwards - The Jellyfish will loop forwards over the waveform
- Loop Backwards - The Jellyfish will loop backwards over the waveform
- Random Walk - The Jellyfish will move to a random area of the waveform and then select a new random area and move towards that, and so on.
- Random Jump - similar to Random Walk except The Jellyfish will jump to a new random position as it reaches each destination
- LFO - Low Frequency Oscillator (LFO) movement of The Jellyfish according to a sine wave
Playback Speed
Controls the speed of the movement of The Jellyfish when it is in 'auto' grain position mode.
Reverse Grains
When active, each individual grain is played in reverse rather than forwards
Live Audio Input
You can record live audio into The Jellyfish, and then immediately explore the newly recorded sound using The Jellyfish's creative tools. (NOTE: This feature is only available in DAWs that support routing audio to instrument plugins)
How to Record Audio
1. Route Audio to The Jellyfish - The Jellyfish is an instrument plugin, and so in a DAW it receives audio via a sidechain input. The way that you will get audio into the plugin will depend on the DAW you are using. You may find the section Audio Input for Common DAWs useful. Please note that some DAWs won't support routing sidechained audio to instrument plugins.
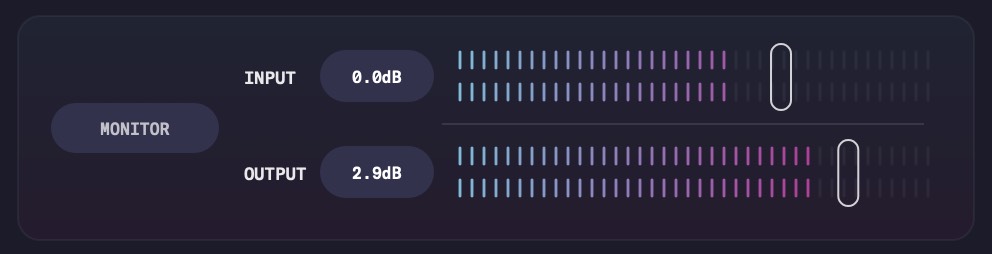
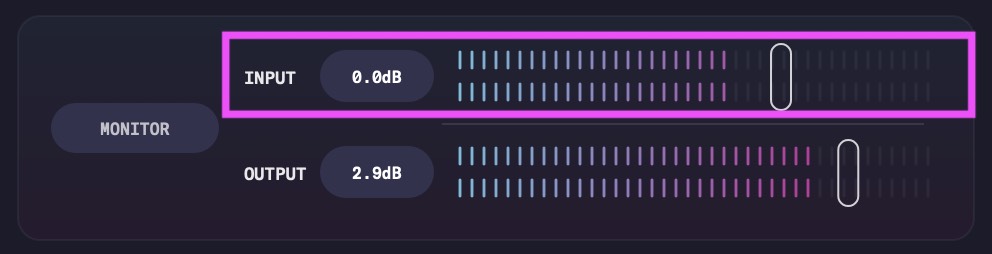
2. Verify Audio Input - You can check that audio is being received by the plugin on the audio input meter as highlighted below:
3. Use the 'Record' Button - Below the waveform you will find the 'record' button. Click once to start recording and once to stop:
Monitor Audio
You can monitor the input audio by enabling the 'monitor' button below (this will add the input audio to the output of the plugin):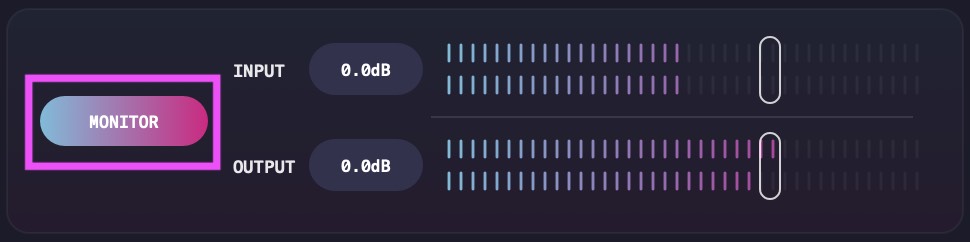
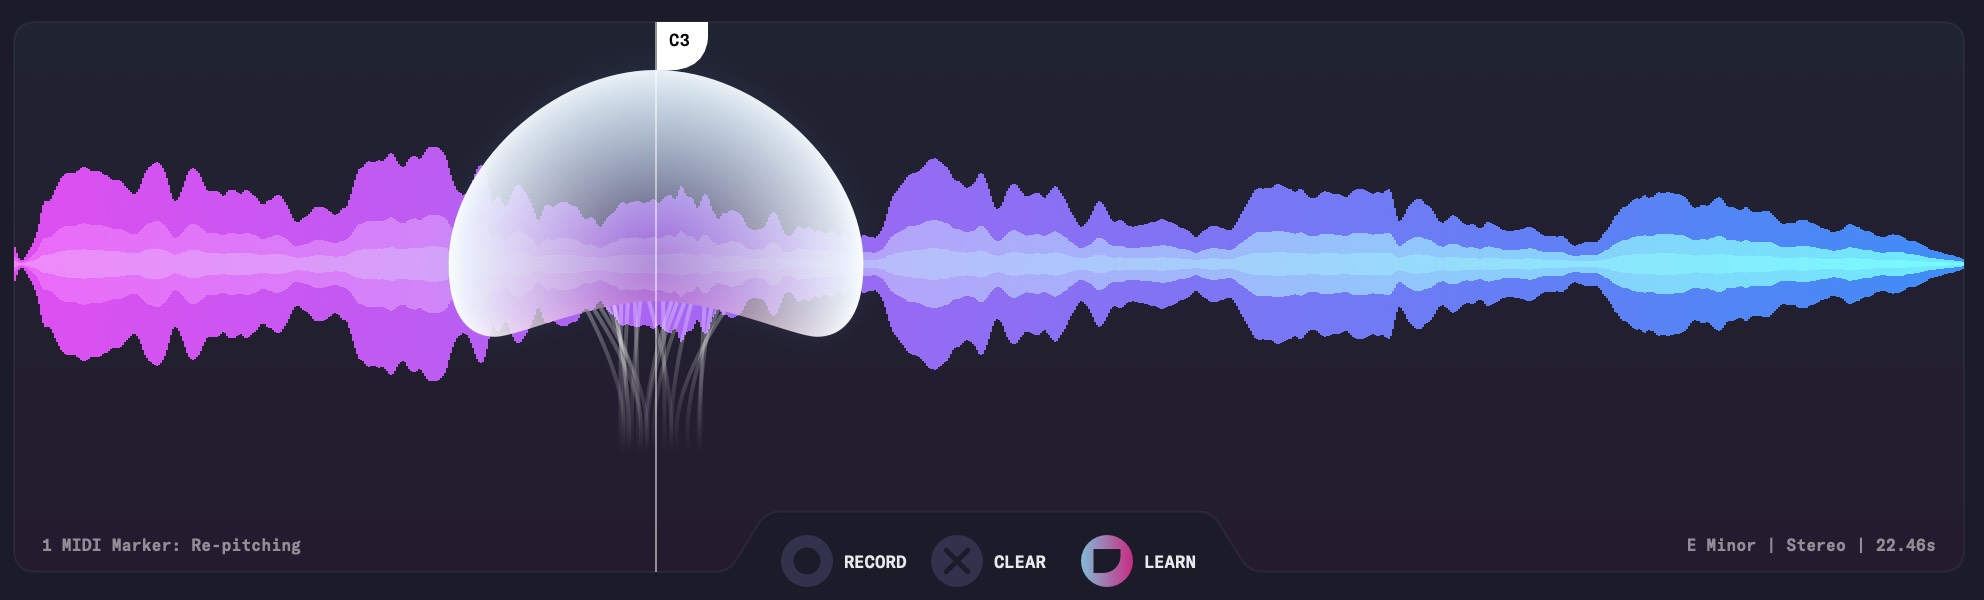
MIDI Markers
To play The Jellyfish with a MIDI keyboard, you can assign MIDI markers to parts of the waveform, as can be seen in the image below:
MIDI Marker Modes
There are two modes of behaviours with MIDI markers, depending on the number of markers:
- Re-pitching (1 MIDI Marker) - The Jellyfish will re-pitch each key depending on its position relative to the MIDI marker key. In the bottom left of the waveform area you will see an indication that 1 MIDI marker is selected and that The Jellyfish is using the re-pitching behaviour
- Region Selection (2+ MIDI Markers) - The Jellyfish will only respond to the keys for the assigned MIDI markers, so that the markers can be used to 'play' different parts of the waveform. In the bottom left of the waveform area you will see an indication of the number of MIDI markers created and that region selection is enabled
Creating a MIDI Marker
1. Ensure that you have a MIDI controller connected that is able to send note messages (e.g. a MIDI keyboard)
2. Ensure that this device is enabled in your DAW or in the standalone version of the plugin. If using a DAW make sure that MIDI is reaching the channel on which you have The Jellyfish loaded
3. Click the 'Learn' button below the waveform to enter 'learn' mode
4. Move the jellyfish control to the positon in the wavform where you want the marker
5. Play the MIDI note you want to be associated with the marker. A marker should appear with the note you used, similarly to the below image:
6. Move the jellyfish and create any extra markers you wish to create (if any)
7. Click the 'Learn' button again to exit 'learn' mode
Moving a MIDI Marker
1. Click the 'Learn' button below the waveform to enter 'learn' mode
2. Click and drag on the MIDI marker you want to move, until it is in the position you require
3. Click the 'Learn' button again to exit 'learn' mode
Deleting a MIDI Marker
1. Click the 'Learn' button below the waveform to enter 'learn' mode
2. Click on the MIDI marker you want to delete to select it
3. Use either the backspace or delete key to delete the marker
4. Click the 'Learn' button again to exit 'learn' mode
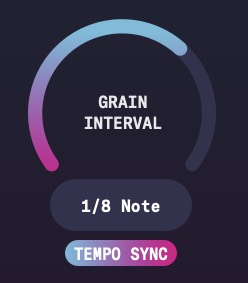
Tempo Sync
(NOTE: This feature is available in the VST3 / Audio Unit plugin only.)
In the VST3/AU version, below the Grain Interval slider is a button labelled 'Tempo Sync'. If you click this button, you will put the plugin into tempo sync mode.
In tempo sync mode, the plugin will trigger grains according to the host DAW tempo and transport information. It is important to understand that in tempo sync mode, if the transport is not playing in your DAW, The Jellyfish will not produce any sound.
When tempo sync is active, the grain interval slider will change behaviour to allow you to set the grain interval in metrical subdivisions, such as 1/4 note, 1/8 note, 1/16 note, etc.
Presets
The Jellyfish comes with a collection of 'core' presets that you can explore and enjoy. However, you can also create your own presets. This means any time you come across something you like, you can save it as a preset so it can be re-used in the future.
Creating a Preset
1. Click on the 'Save' button in the toolbar:

2. Choose 'Save Preset' from the menu
3. If this is your first preset, you will be prompted to create a new 'preset group':
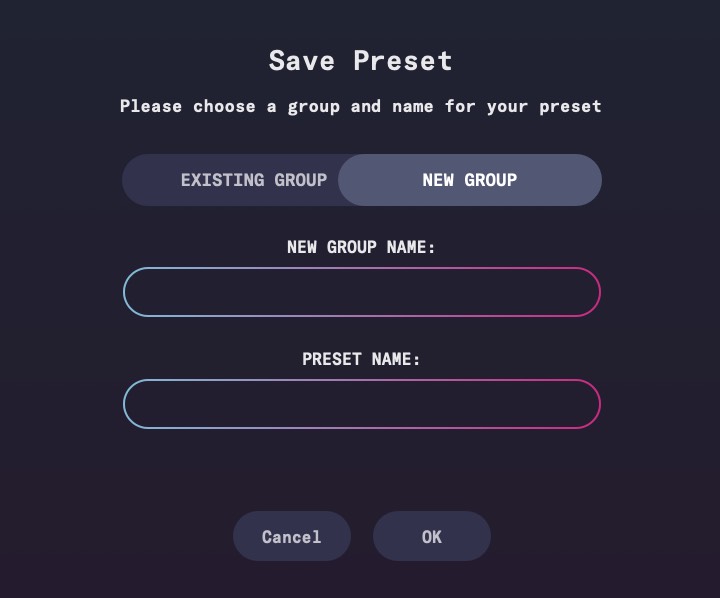
Preset groups allow you to create collections of presets of different types. Give it a name:

4. Now give the preset a name:
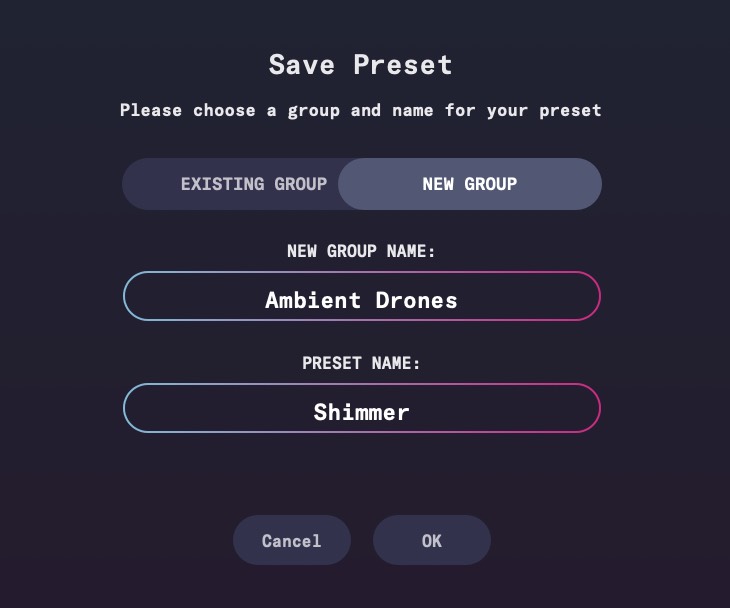
...and hit OK to save. That's it - preset created!
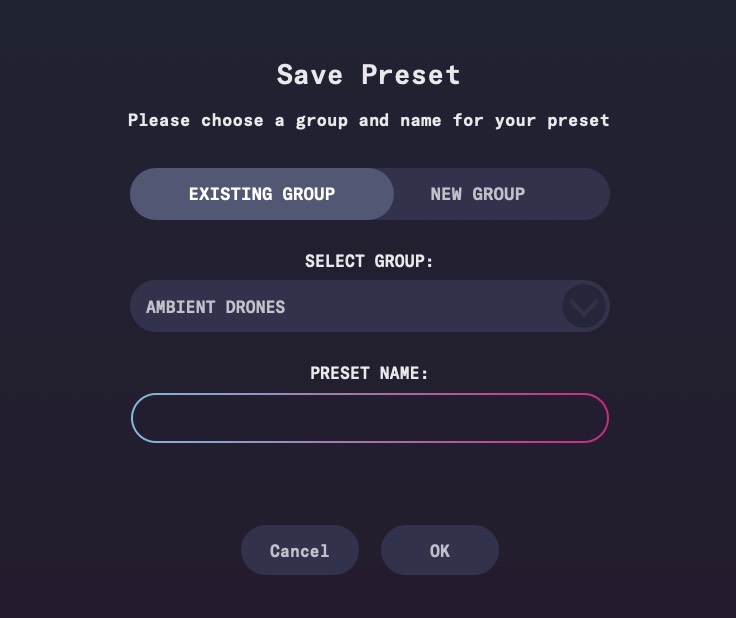
NOTE: next time you go to save a preset, your preset group will be available to choose from a drop-down menu. You can either use it, or create a new group by toggling to the 'New Group' mode at the top:
Loading a Preset
Click the 'presets' button in the toolbar:
In the preset browser that pops up, you will see all the preset groups on the left, and then the presets for that group on the right. Simply find the group you want and then the preset in that group and double-click to load it.
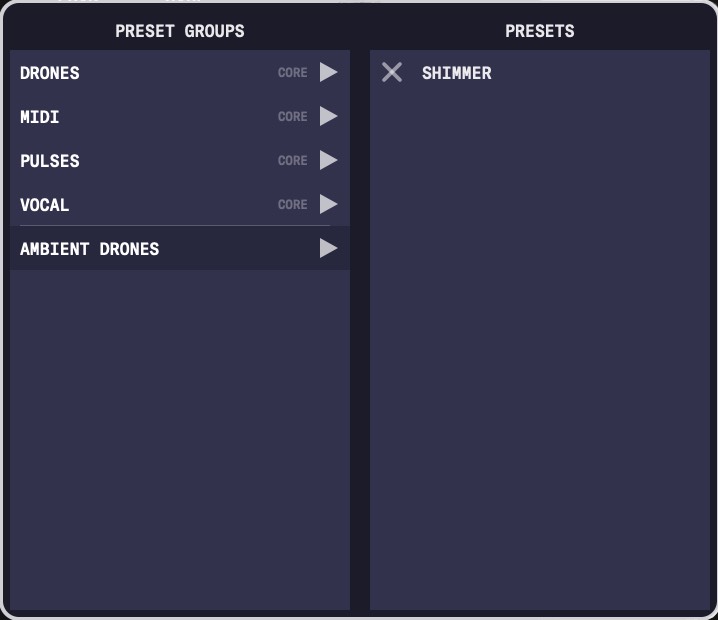
You can also delete a preset by clicking the 'X' to the left of its name.
MIDI Mapping
If your DAW supports it, you can MIDI map to each of the parameters of The Jellyfish.
While this behaves similarly as for other audio plugins, a couple of parameters are worth highlighting:
- Activate - if The Jellyfish is in 'event' mode then this parameter can be used to turn the audio processing of The Jellyfish on and off. This allows you to MIDI map a button to this control so you can engage The Jellyfish at any time
- Clear - this allows you to clear the buffer. By sending a message to clear the buffer (a MIDI CC with value 64 or larger), this parameter will turn 'on', clear the buffer and then automatically reset itself to 'off' again
Frequently Asked Questions
Where did the name 'The Jellyfish' come from?
The Jellyfish name was inspired by a piece of clothing created by designer Rachel Freire that looked like a jellyfish. This piece was being used during early development of the MiMU Gloves, at which time The Jellyfish was also in an experimental phase.Does The Jellyfish run natively on the Apple M1 chip?
Yes. Please see the system requirements section for more informationDoes The Jellyfish run on Apple computers with Intel processors?
Yes. Please see the system requirements section for more informationWhere are the presets and audio library for The Jellyfish stored on my computer?
MacOS
Core presets: /Library/Application Support/MiMU/The Jellyfish/Presets/Core
User presets: /Users/[your-username]/Library/Application Support/MiMU/The Jellyfish/Presets
Audio Library: /Library/Application Support/MiMU/The Jellyfish/Audio
Windows
Core presets: C:\Program Files\The Jellyfish\Presets
User presets: C:\Users\[your-username]\AppData\Roaming\The Jellyfish\Presets
Audio Library: C:\Program Files\The Jellyfish\Audio
How do I route audio to The Jellyfish?
See our section audio routing for some common DAWsAudio Input for common DAWs
Ableton Live: Audio input to The Jellyfish
Option A: Route Audio to The Jellyfish
On your audio input track, find the 'Audio To' drop-down menu and select 'The Jellyfish':

Option B: Sidechain Input
On the plugin in Ableton Live, find the 'Sidechain' input and select your desired audio track:

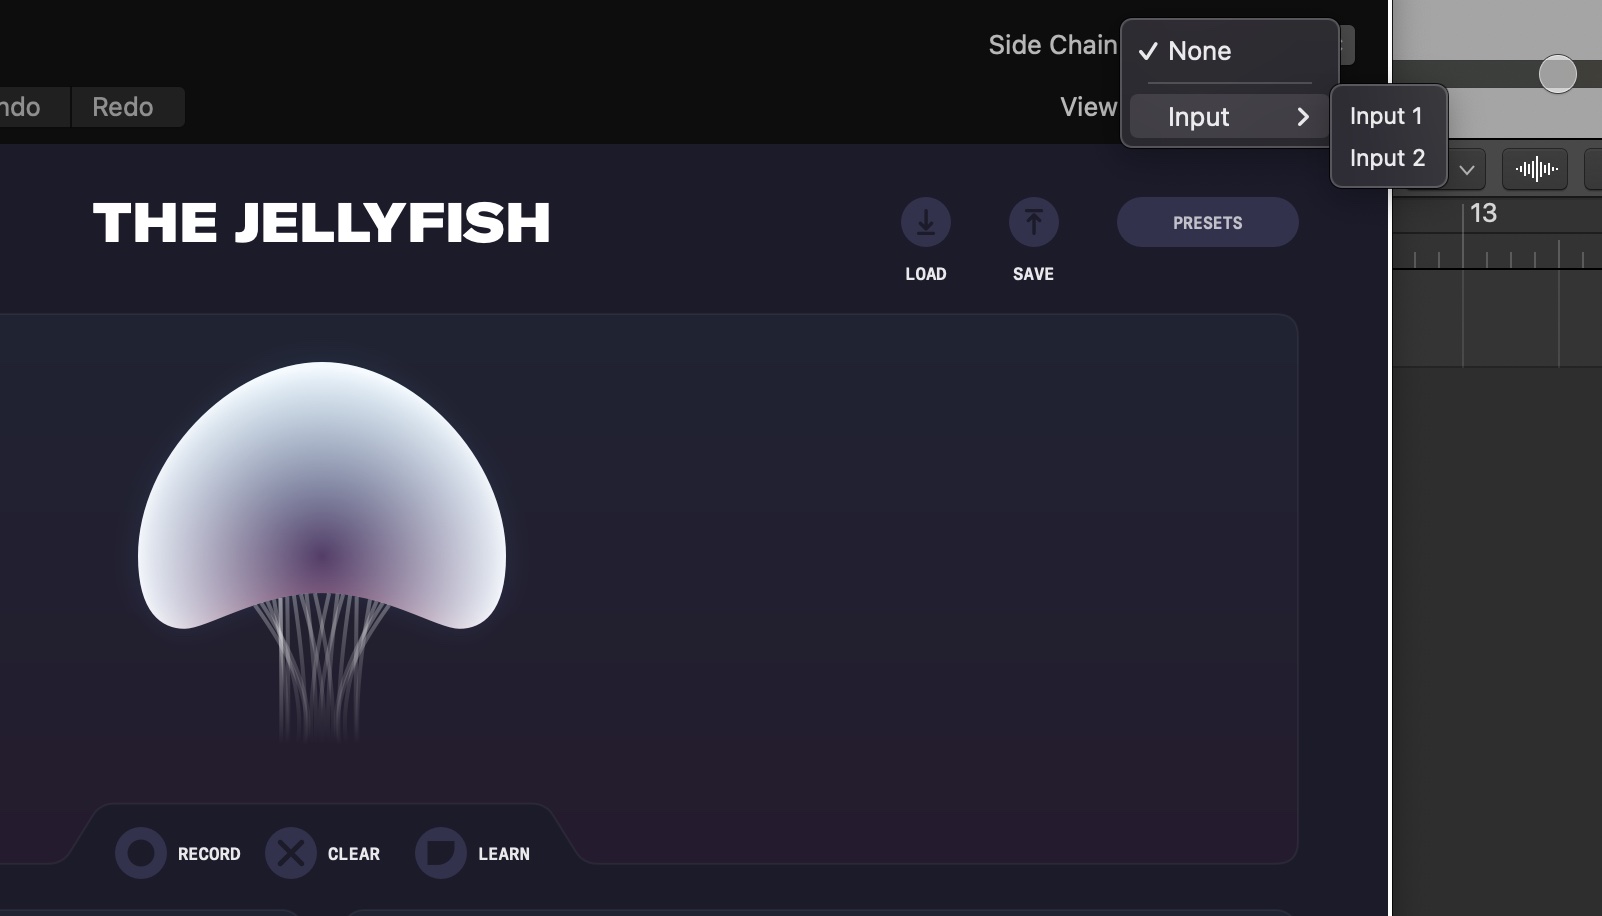
Logic Pro: Audio input to The Jellyfish
In the top right of the plugin, find the 'Side Chain' menu and select your input audio track: