Advanced Router Setup
- Recommended Routers
- Wireless Router Setup
- Wired Router Setup
- Configuring Your Gloves to an External Router
- Information about 'Network Service Order'
Recommended Routers
The instructions in this guide are specific to one of our two recommended routers, but they can be generalized to work with most routers that share the basic functionality. Some routers do not have the capacity to extend the internet, but almost all routers will be able to support glove communications.
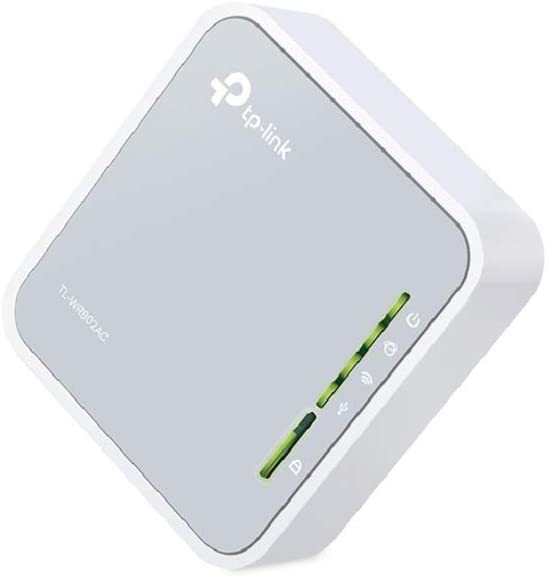
TP-Link AC750 Wi-Fi Travel Router
One of our favourite routers is the TP-Link AC750 Wireless Portable Nano Travel Router. We like it because it is relatively inexpensive, lightweight, dual-band, USB bus-powered, can extend Wi-Fi, and it is easy to purchase online in many countries.
Netgear Nighthawk
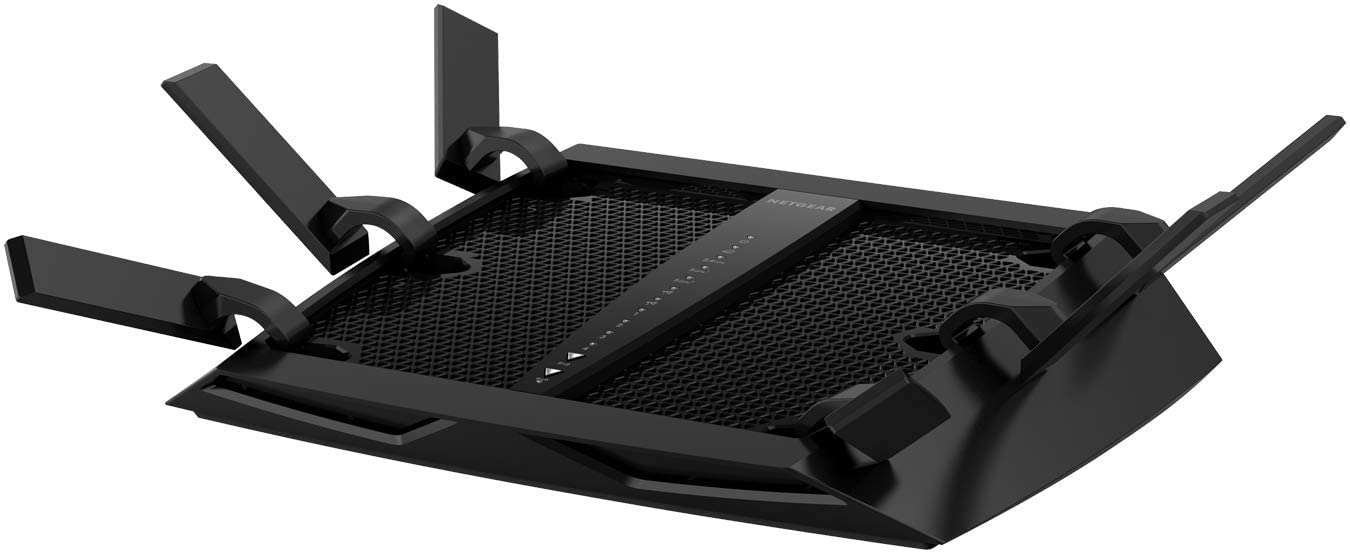
If you're performing in large venues or very busy Wi-Fi environtments and need a more powerful connection, we recommend one of the Netgear Nighthawk routers, such as the NETGEAR Nighthawk X6 Smart Wi-Fi Router (R8000) - AC3200. Note that most Netgear models do not wirelessly extend internet. They are well suited if you are able to use them without internet OR if the internet can be extended by ethernet cable from the internet router.
Router setup for streaming
If you follow these instructions exactly with a Mac and the TP-Link router, you will be able to connect your gloves, Gliss or other Glover devices while also streaming live or connecting to the internet. Configuration for Windows should be similar, but feel free to contact us if you need any support.
Physical setup
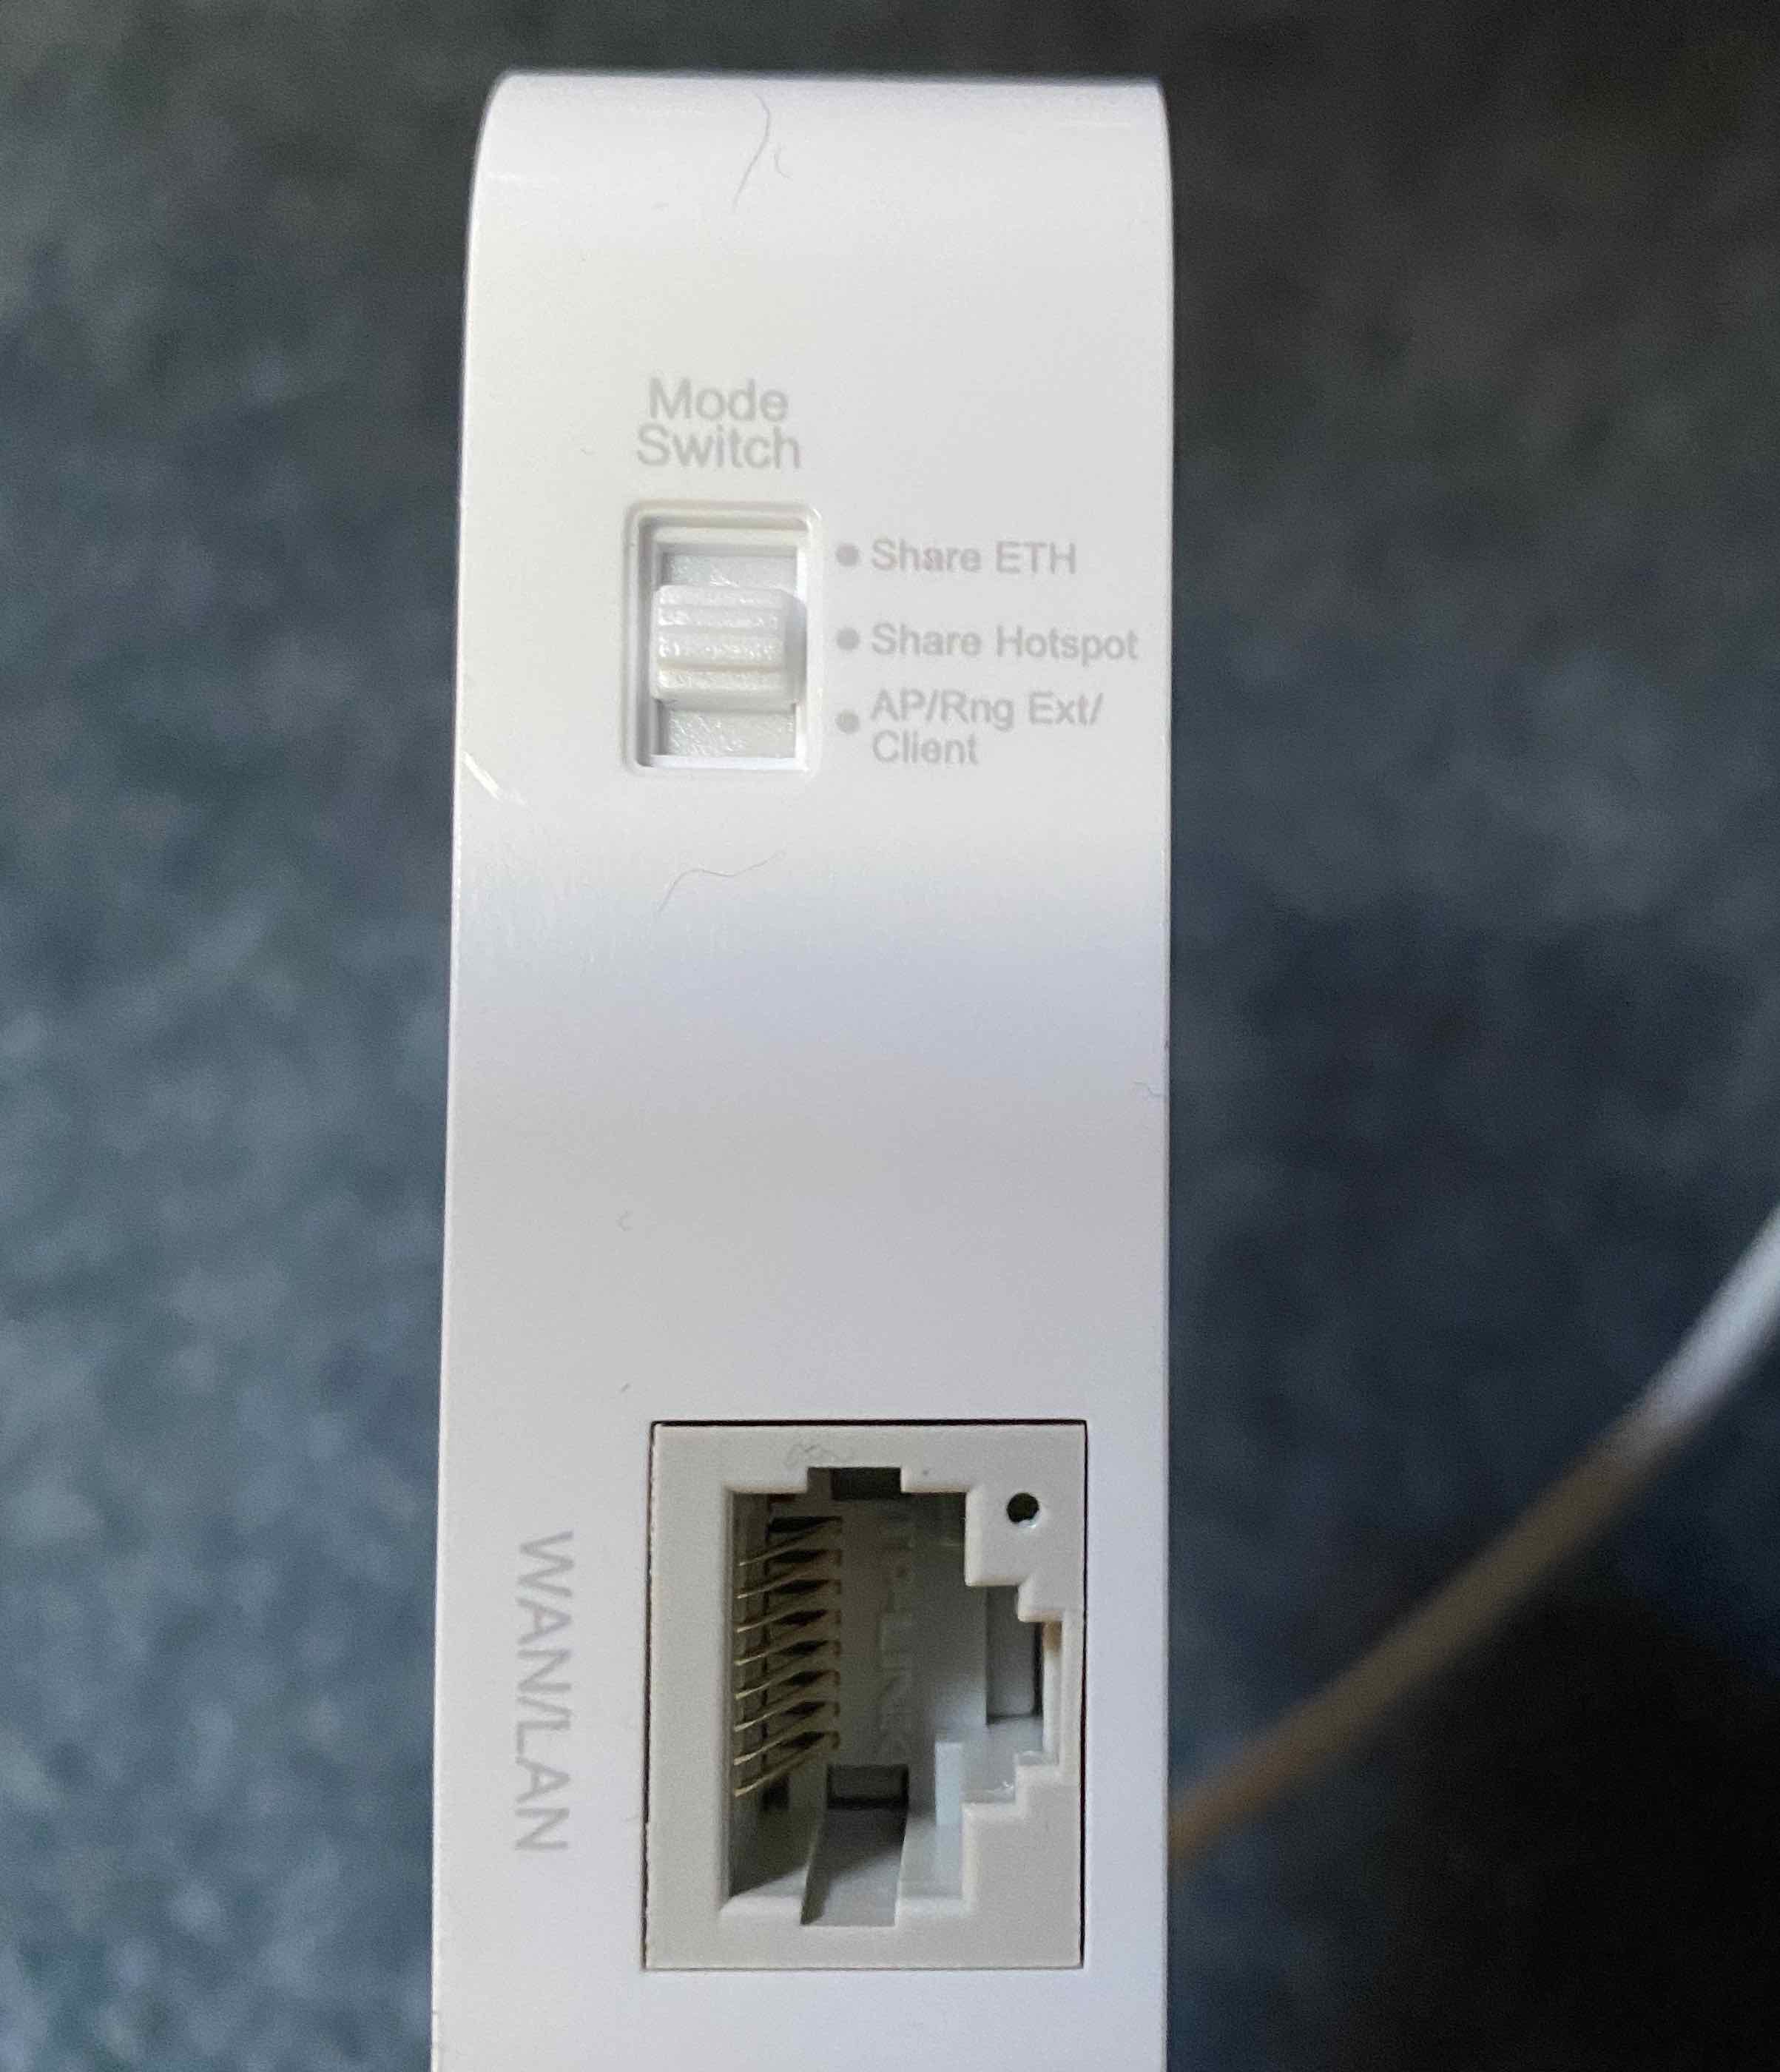
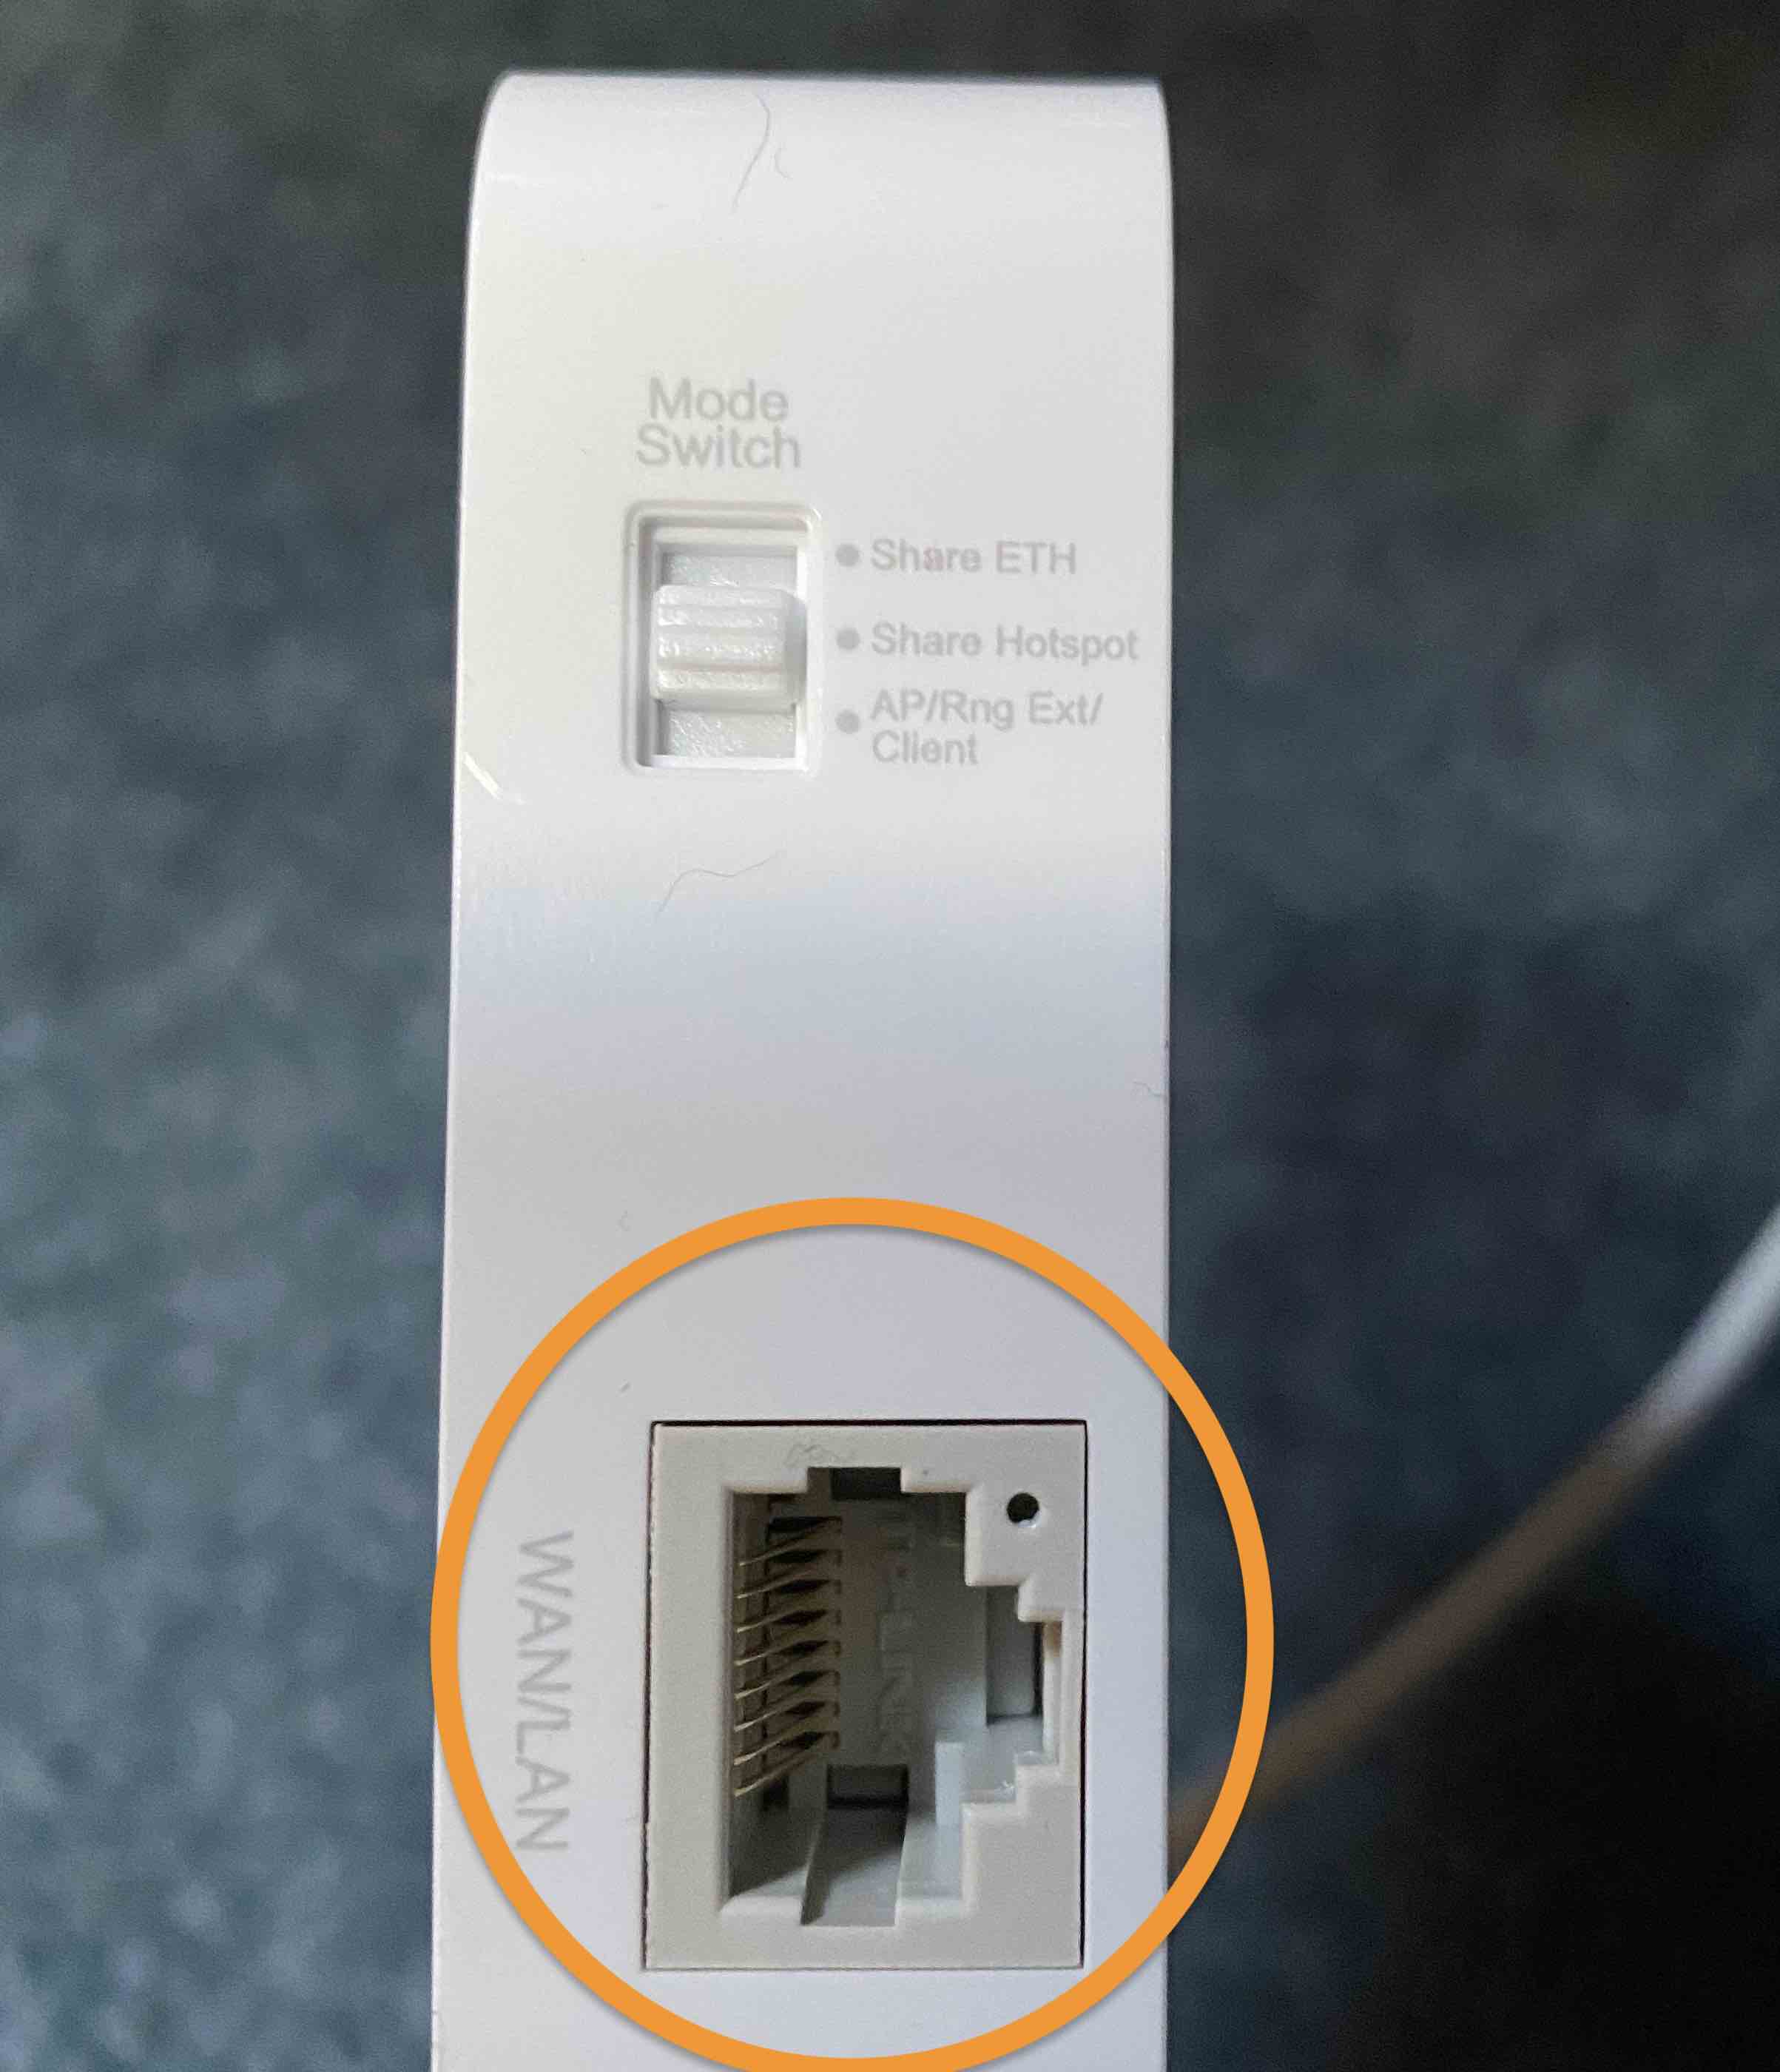
1. On your physical router, move the slider switch on the side to the middle setting marked Share Hotspot
2. Plug in usb power cable of the TP-Link router into any USB power source. this doesn't necessarily have to be on your laptop, although it's best if it's near your laptop
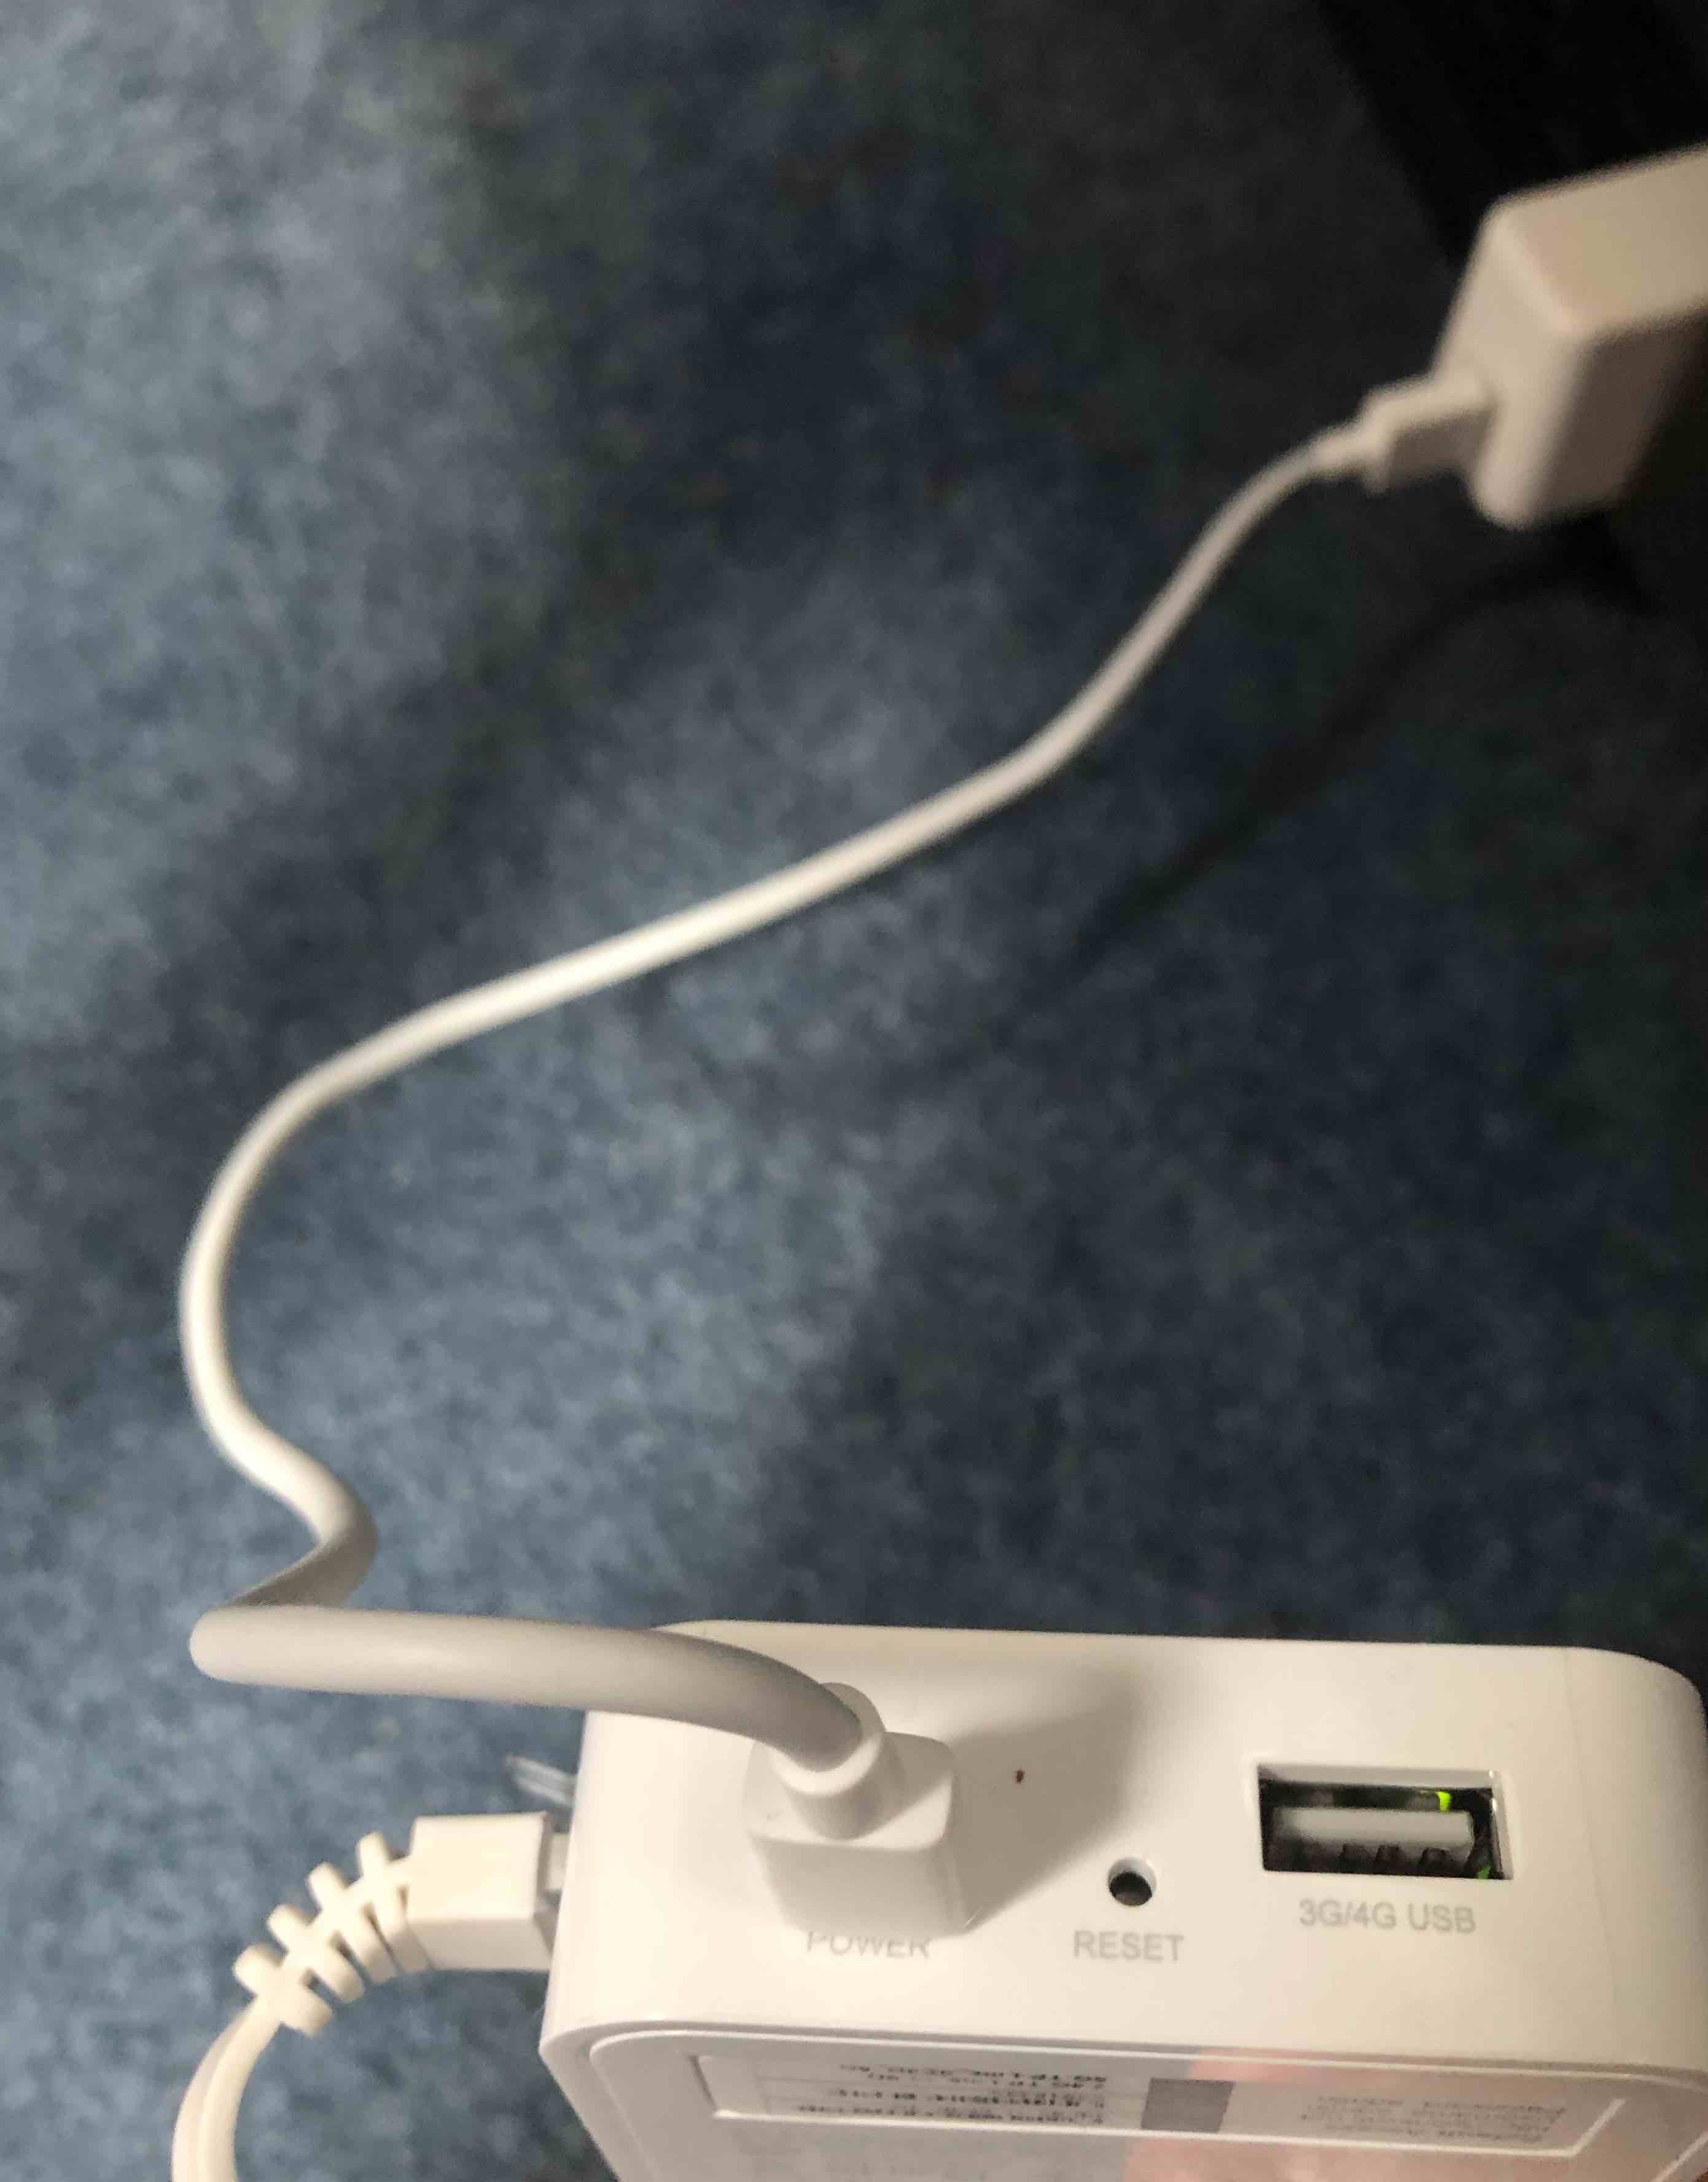
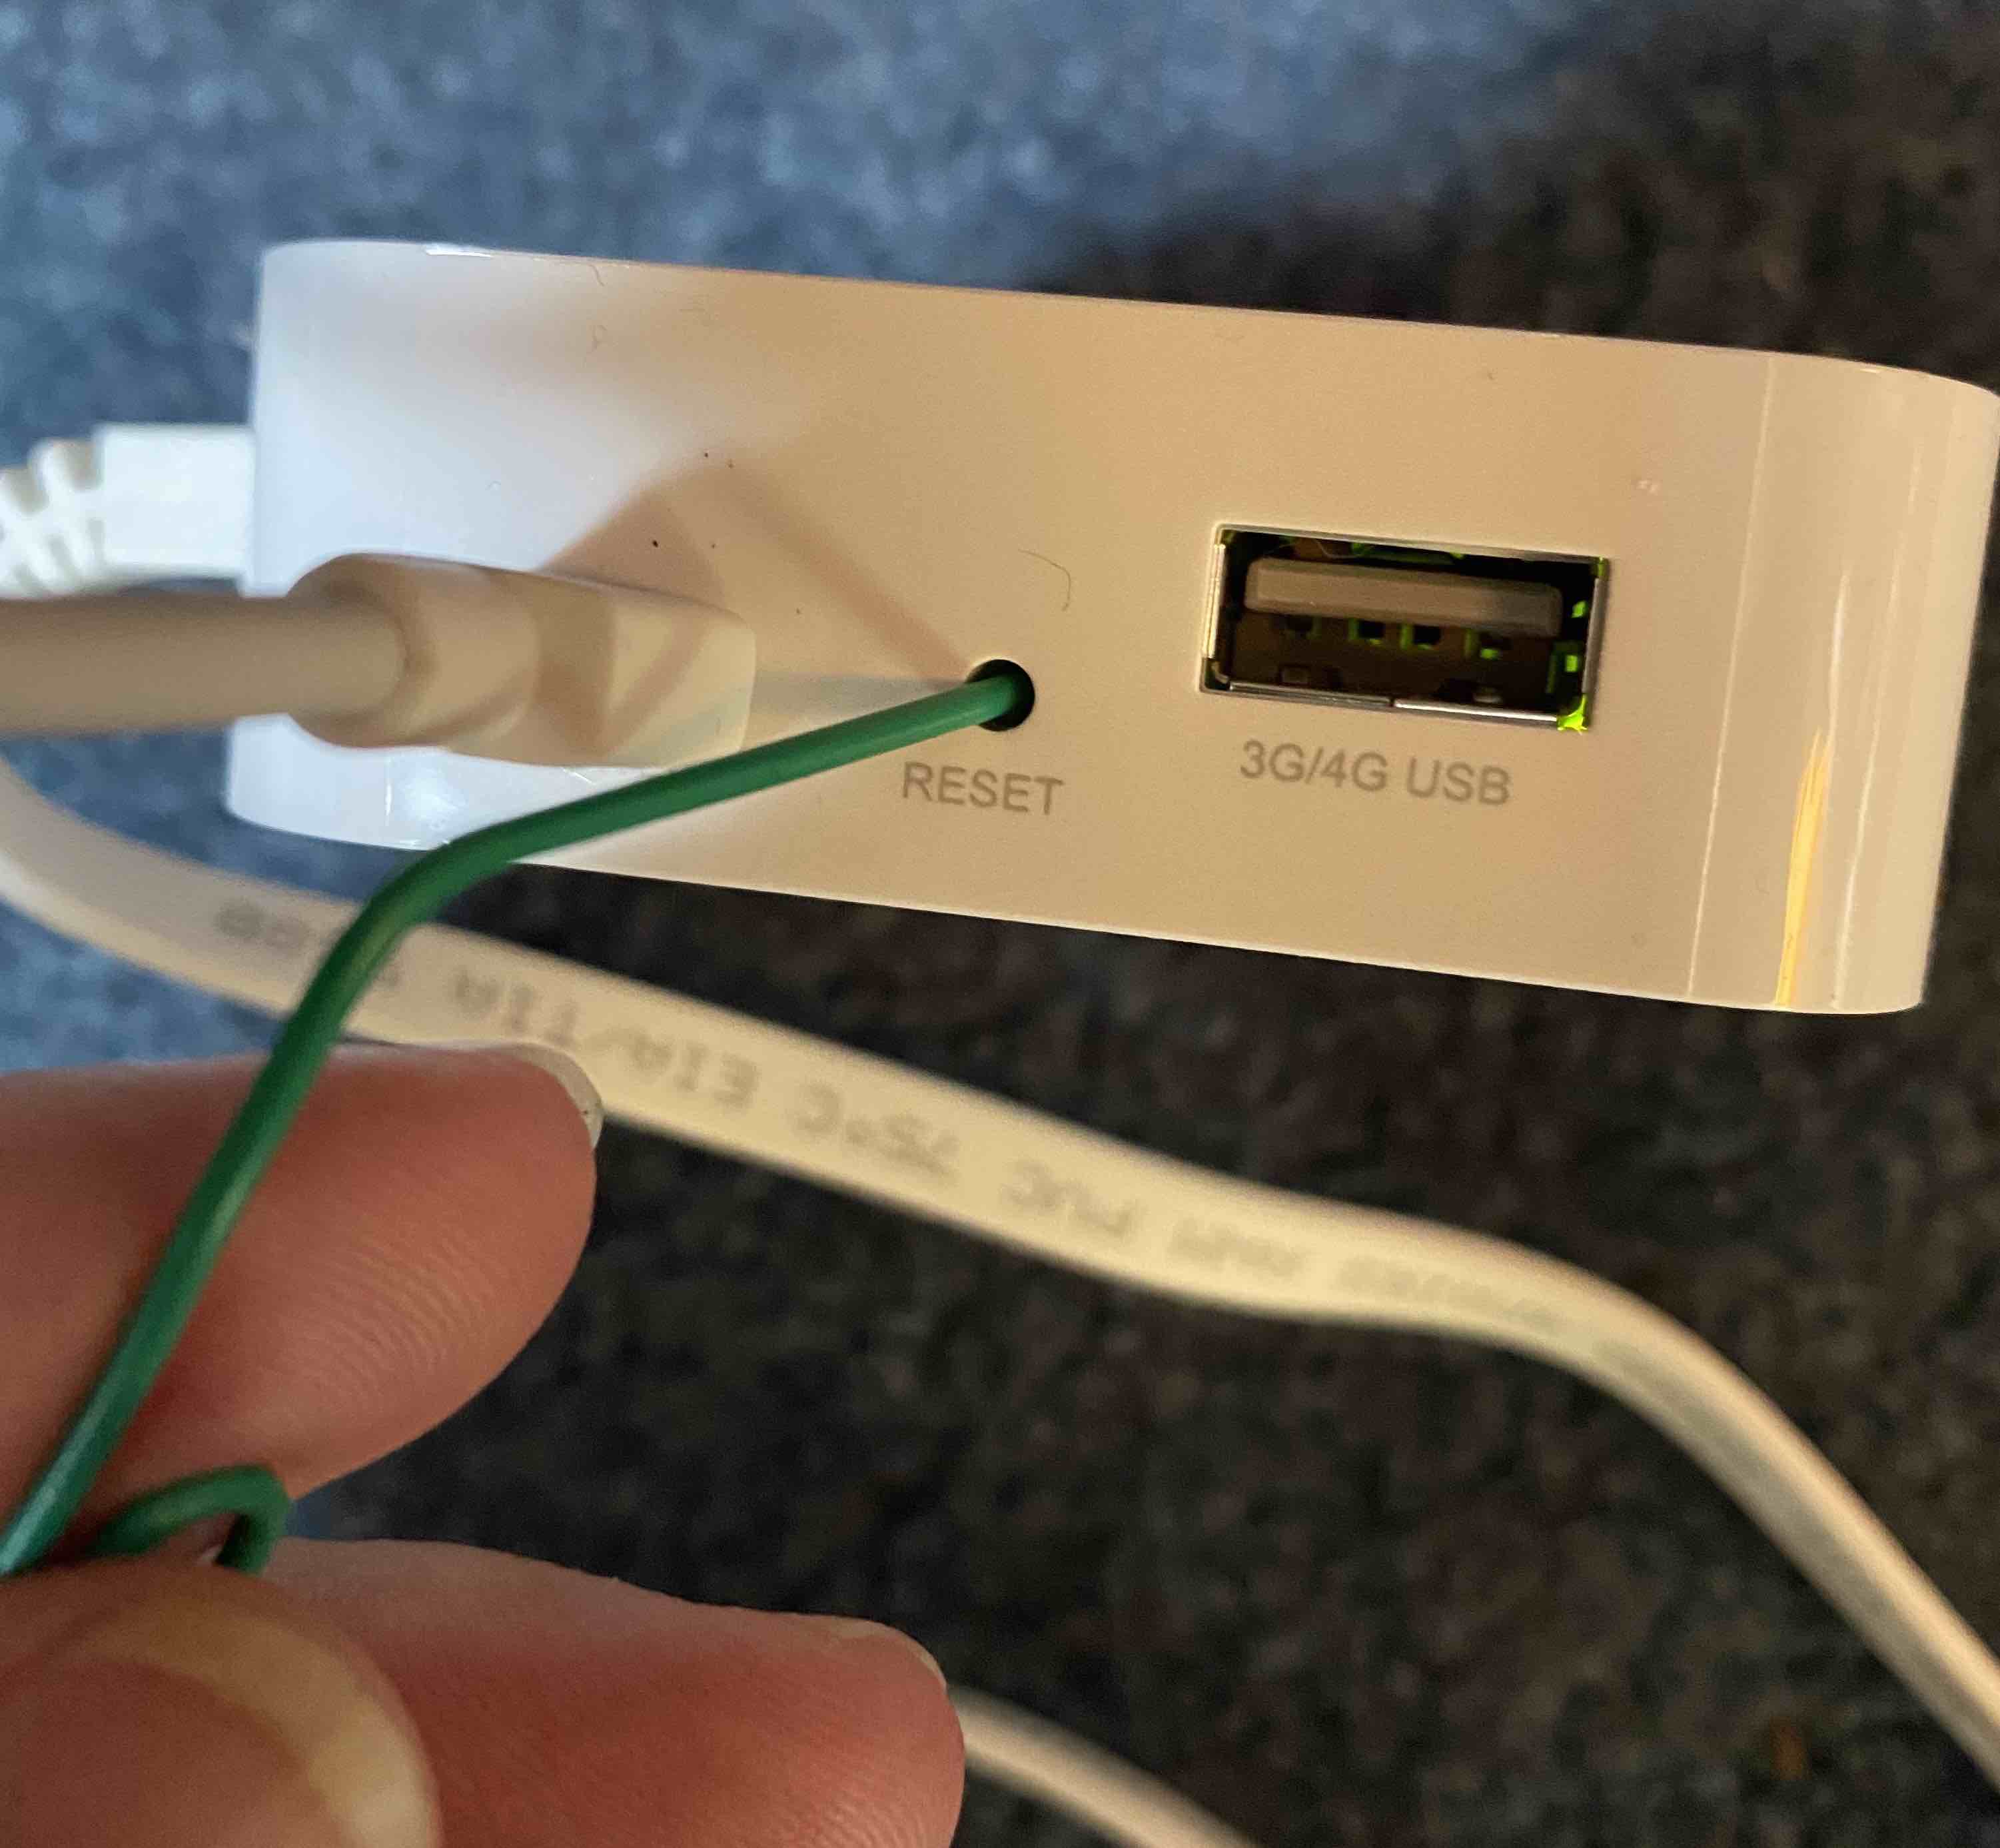
3. If you have previously changed any of the router settings, reset to factory settings with the reset button. With the power on, insert a long, thin implement such as a hairpin or paperclip into the hole marked RESET and gently press and hold the reset button until the lights change. Release.
Computer and Router Configuration Settings
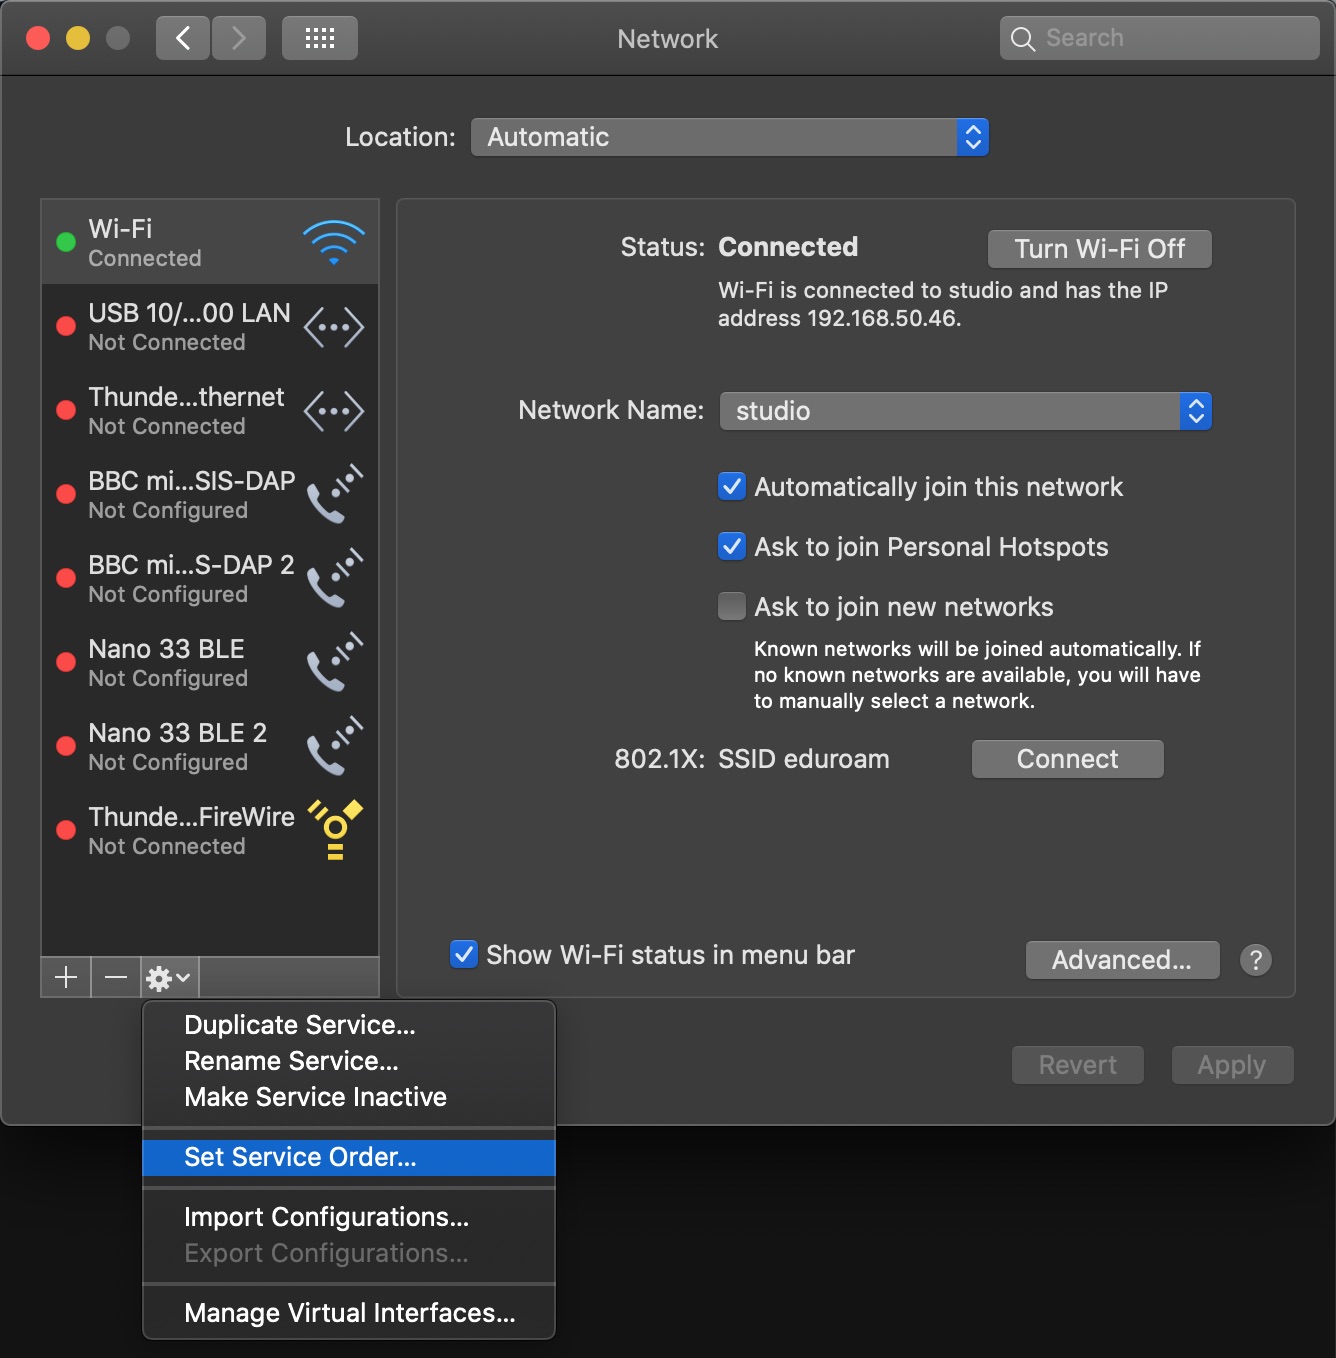
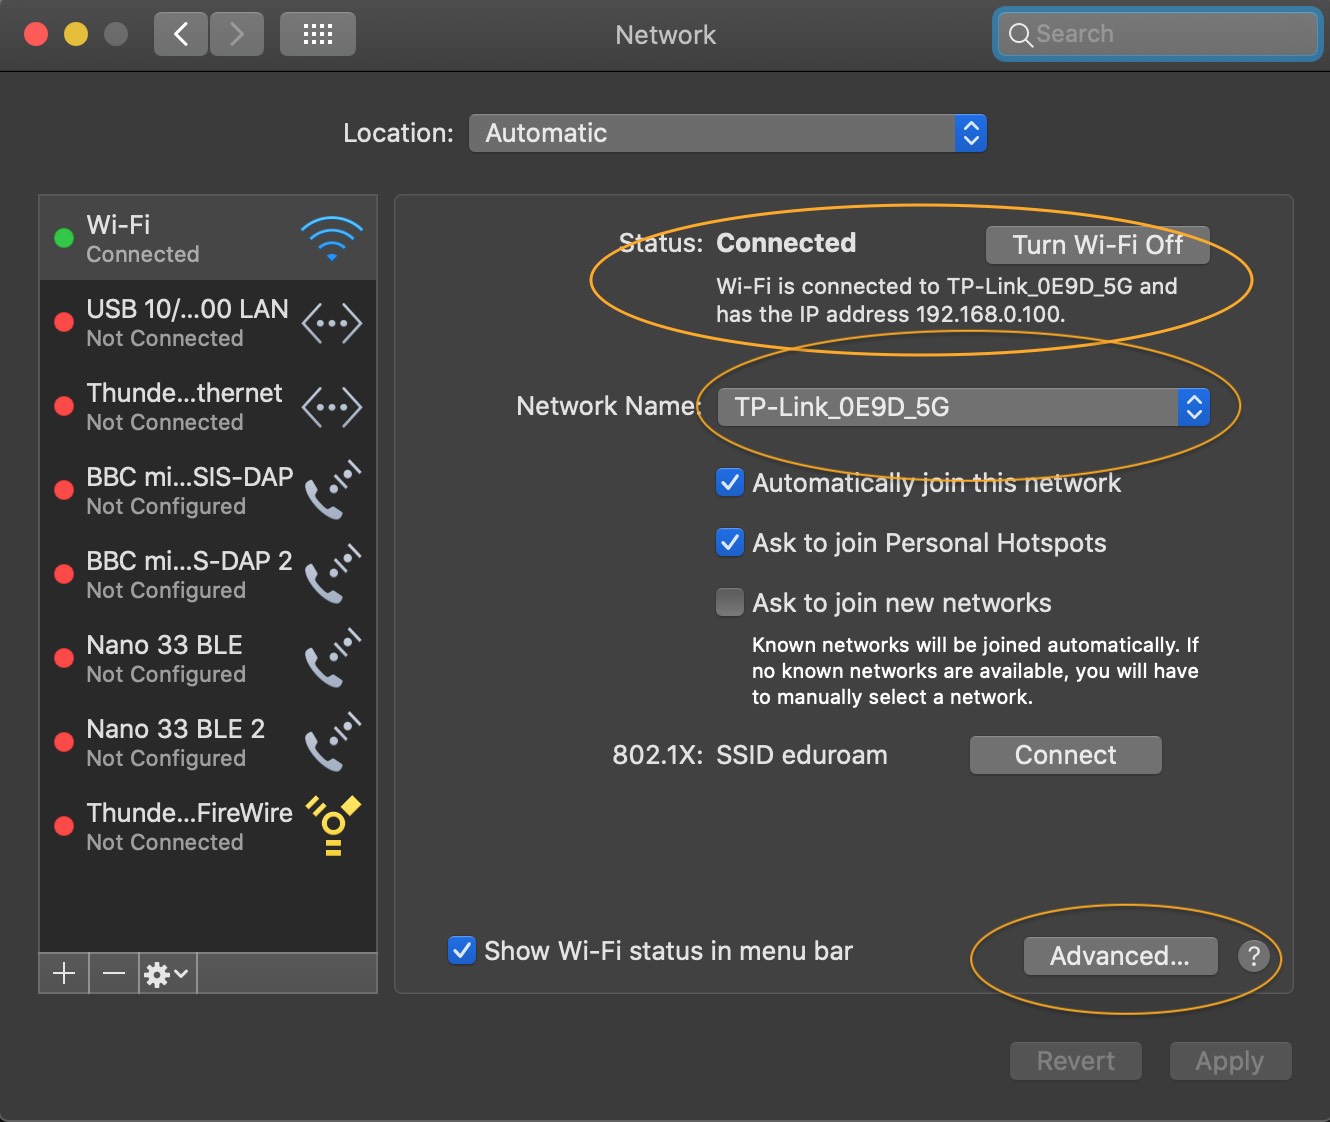
1. Check service order in computer network settings - should be Wi-Fi port first
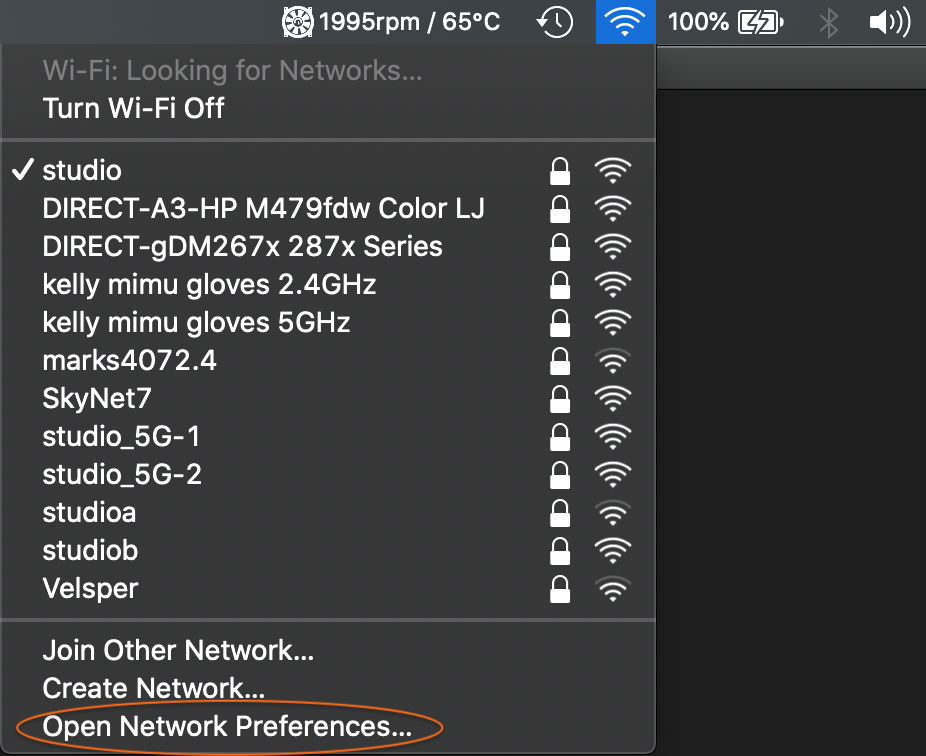
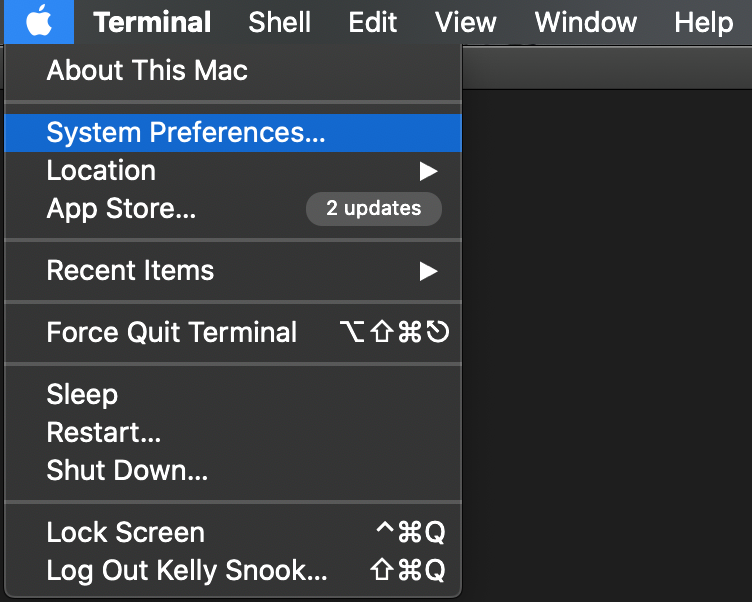
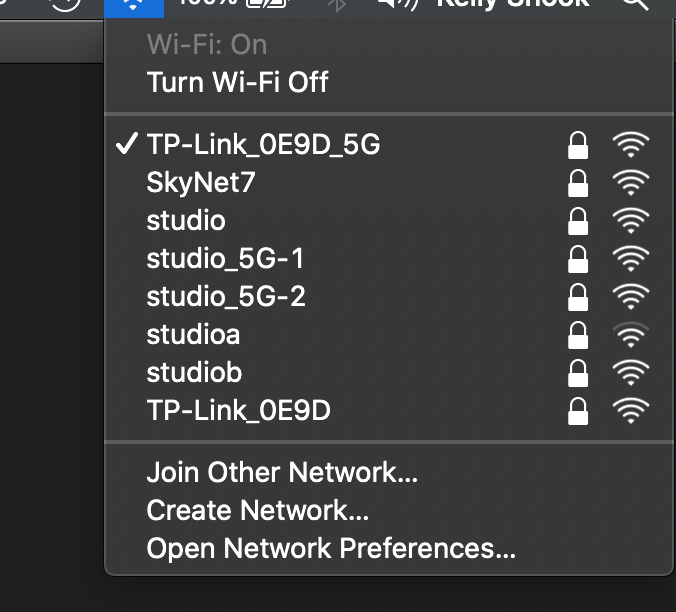
NOTE: There are several ways to open Network Preferences. The quick way is directly from the network icon in the upper right corner of your computer screen.
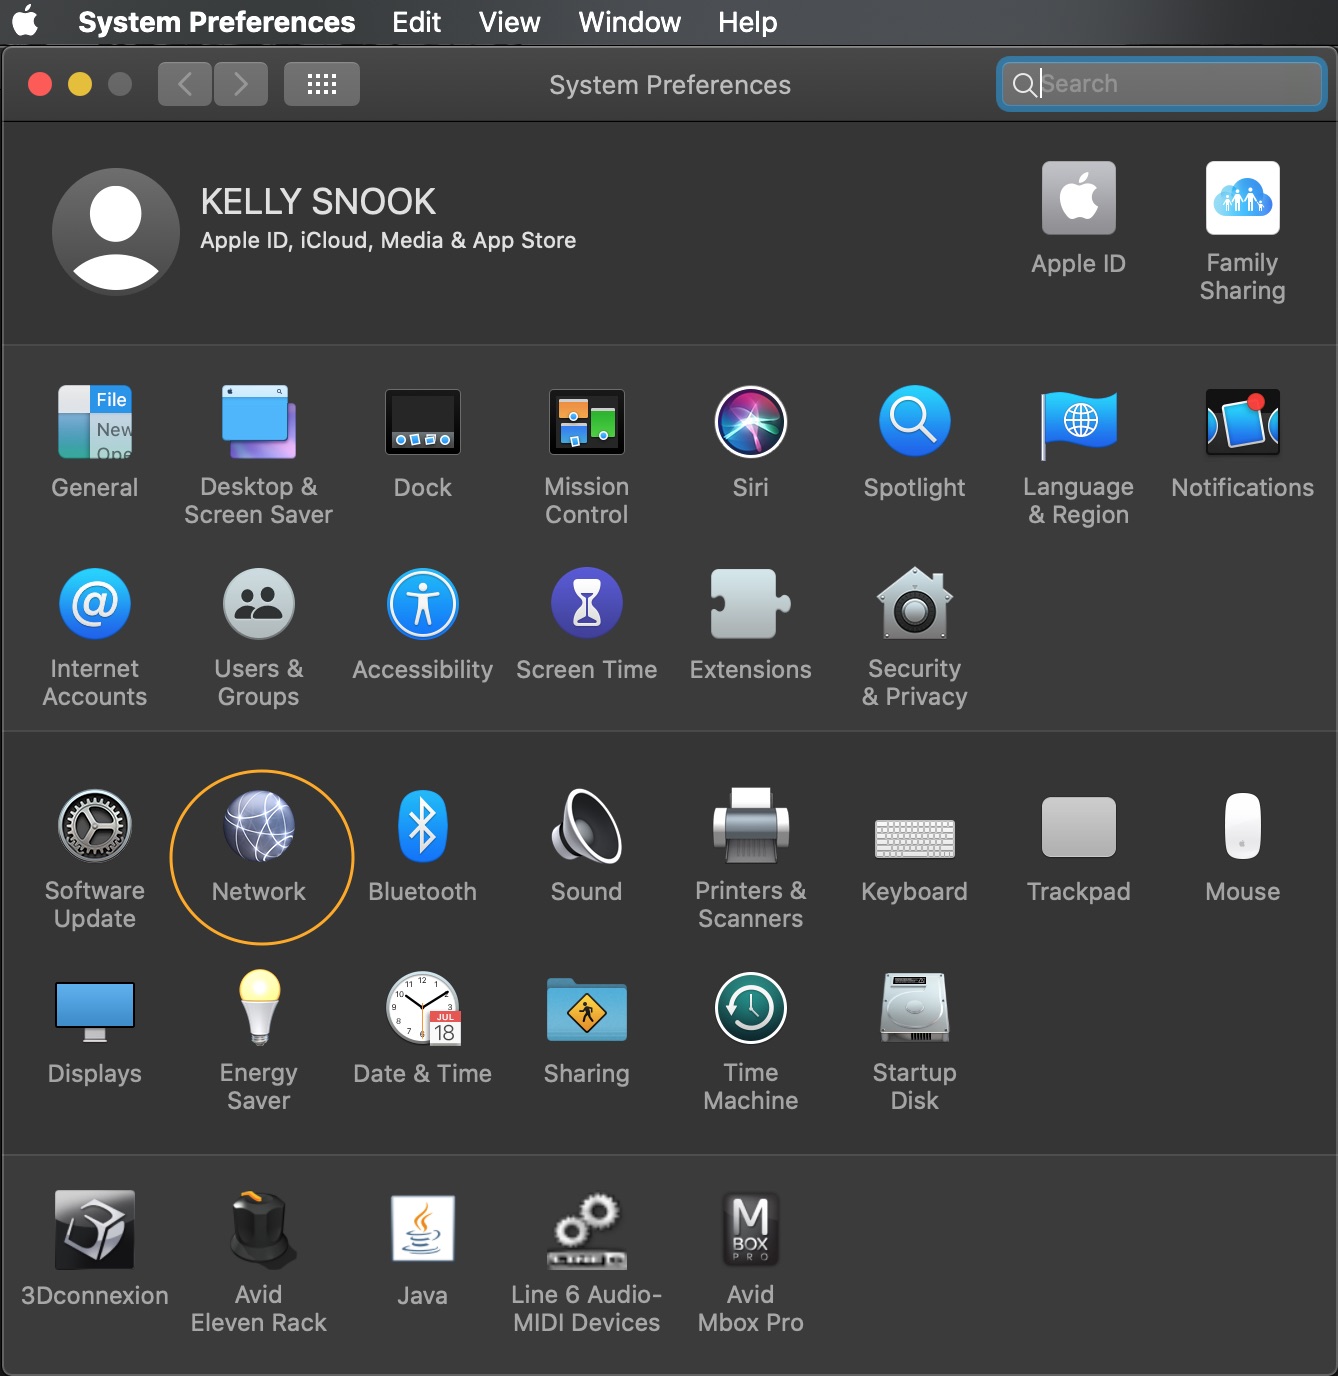
Alternatively, navigate to your Apple menu System Preferences and select "Network"
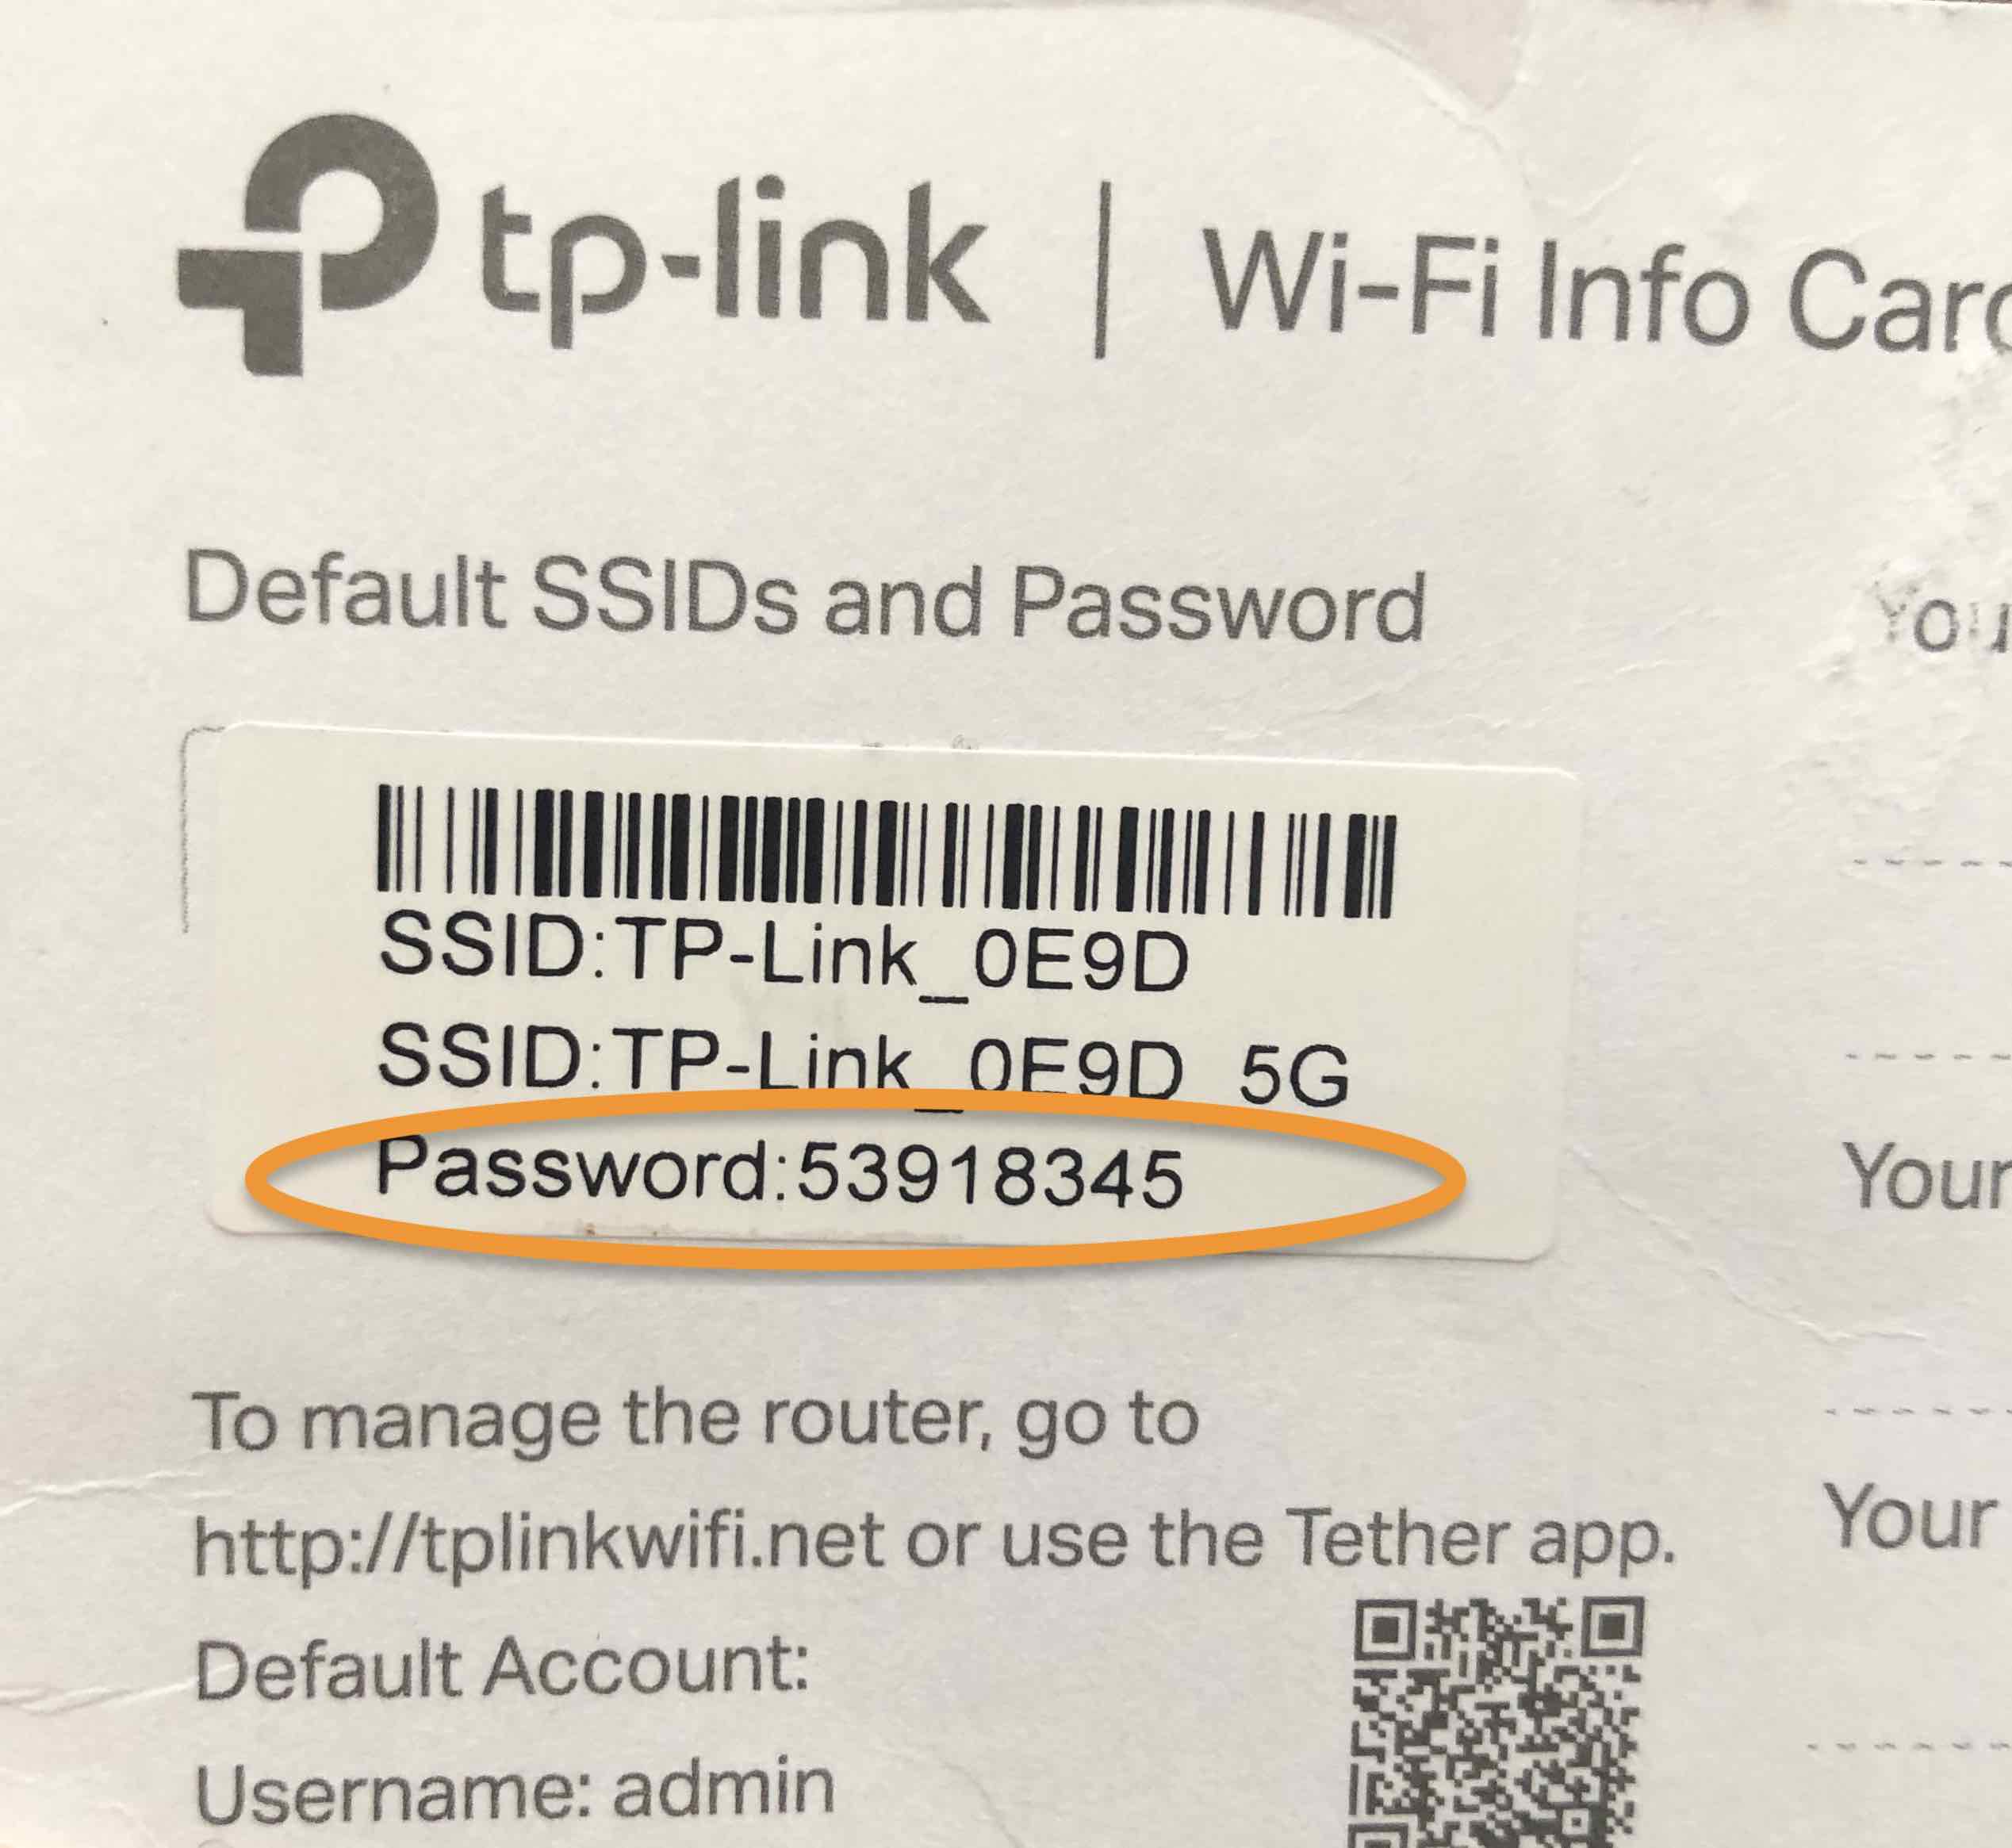
2. Locate TP-Link 5G in Wi-Fi list and connect to it using the password (probably a number) on the printed card included with the router. Be sure to choose the “5G” one.
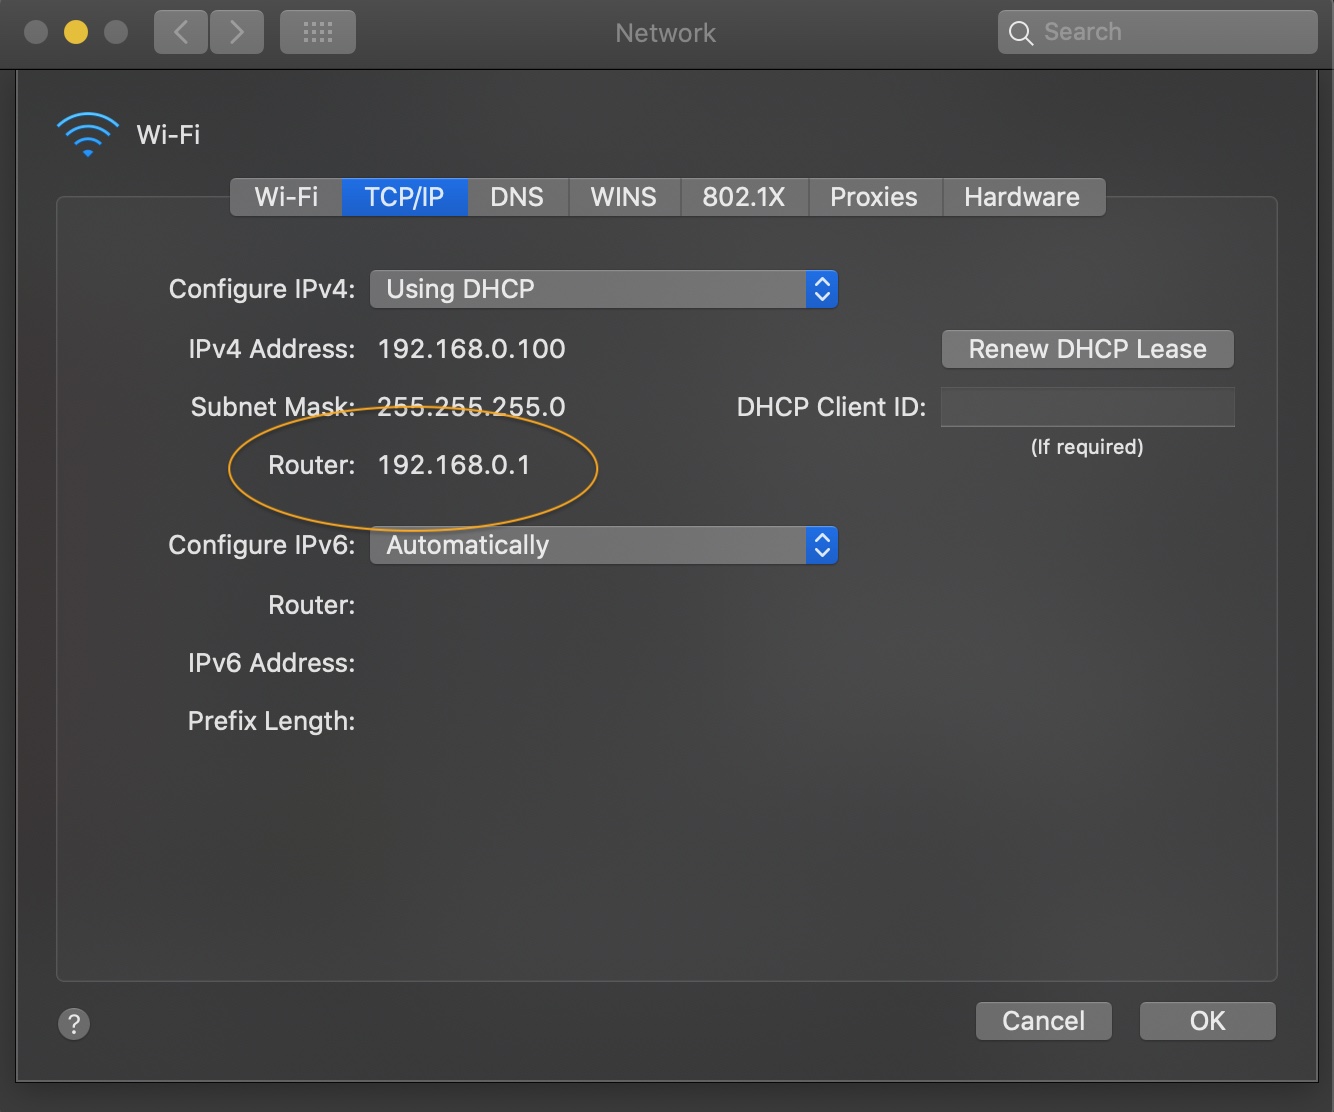
3. Once you are connected, open your network preferences and make a note of the router's address by ensuring your wifi is connected to the TP-Link5G router and by clicking on “Advanced” then navigating to the “TCP/IP” tab as pictured. The Router Address will likely be either 192.168.0.1 or 192.168.1.1. While you are here, also ensure that “Configure IPv4” is set to “Using DHCP.”
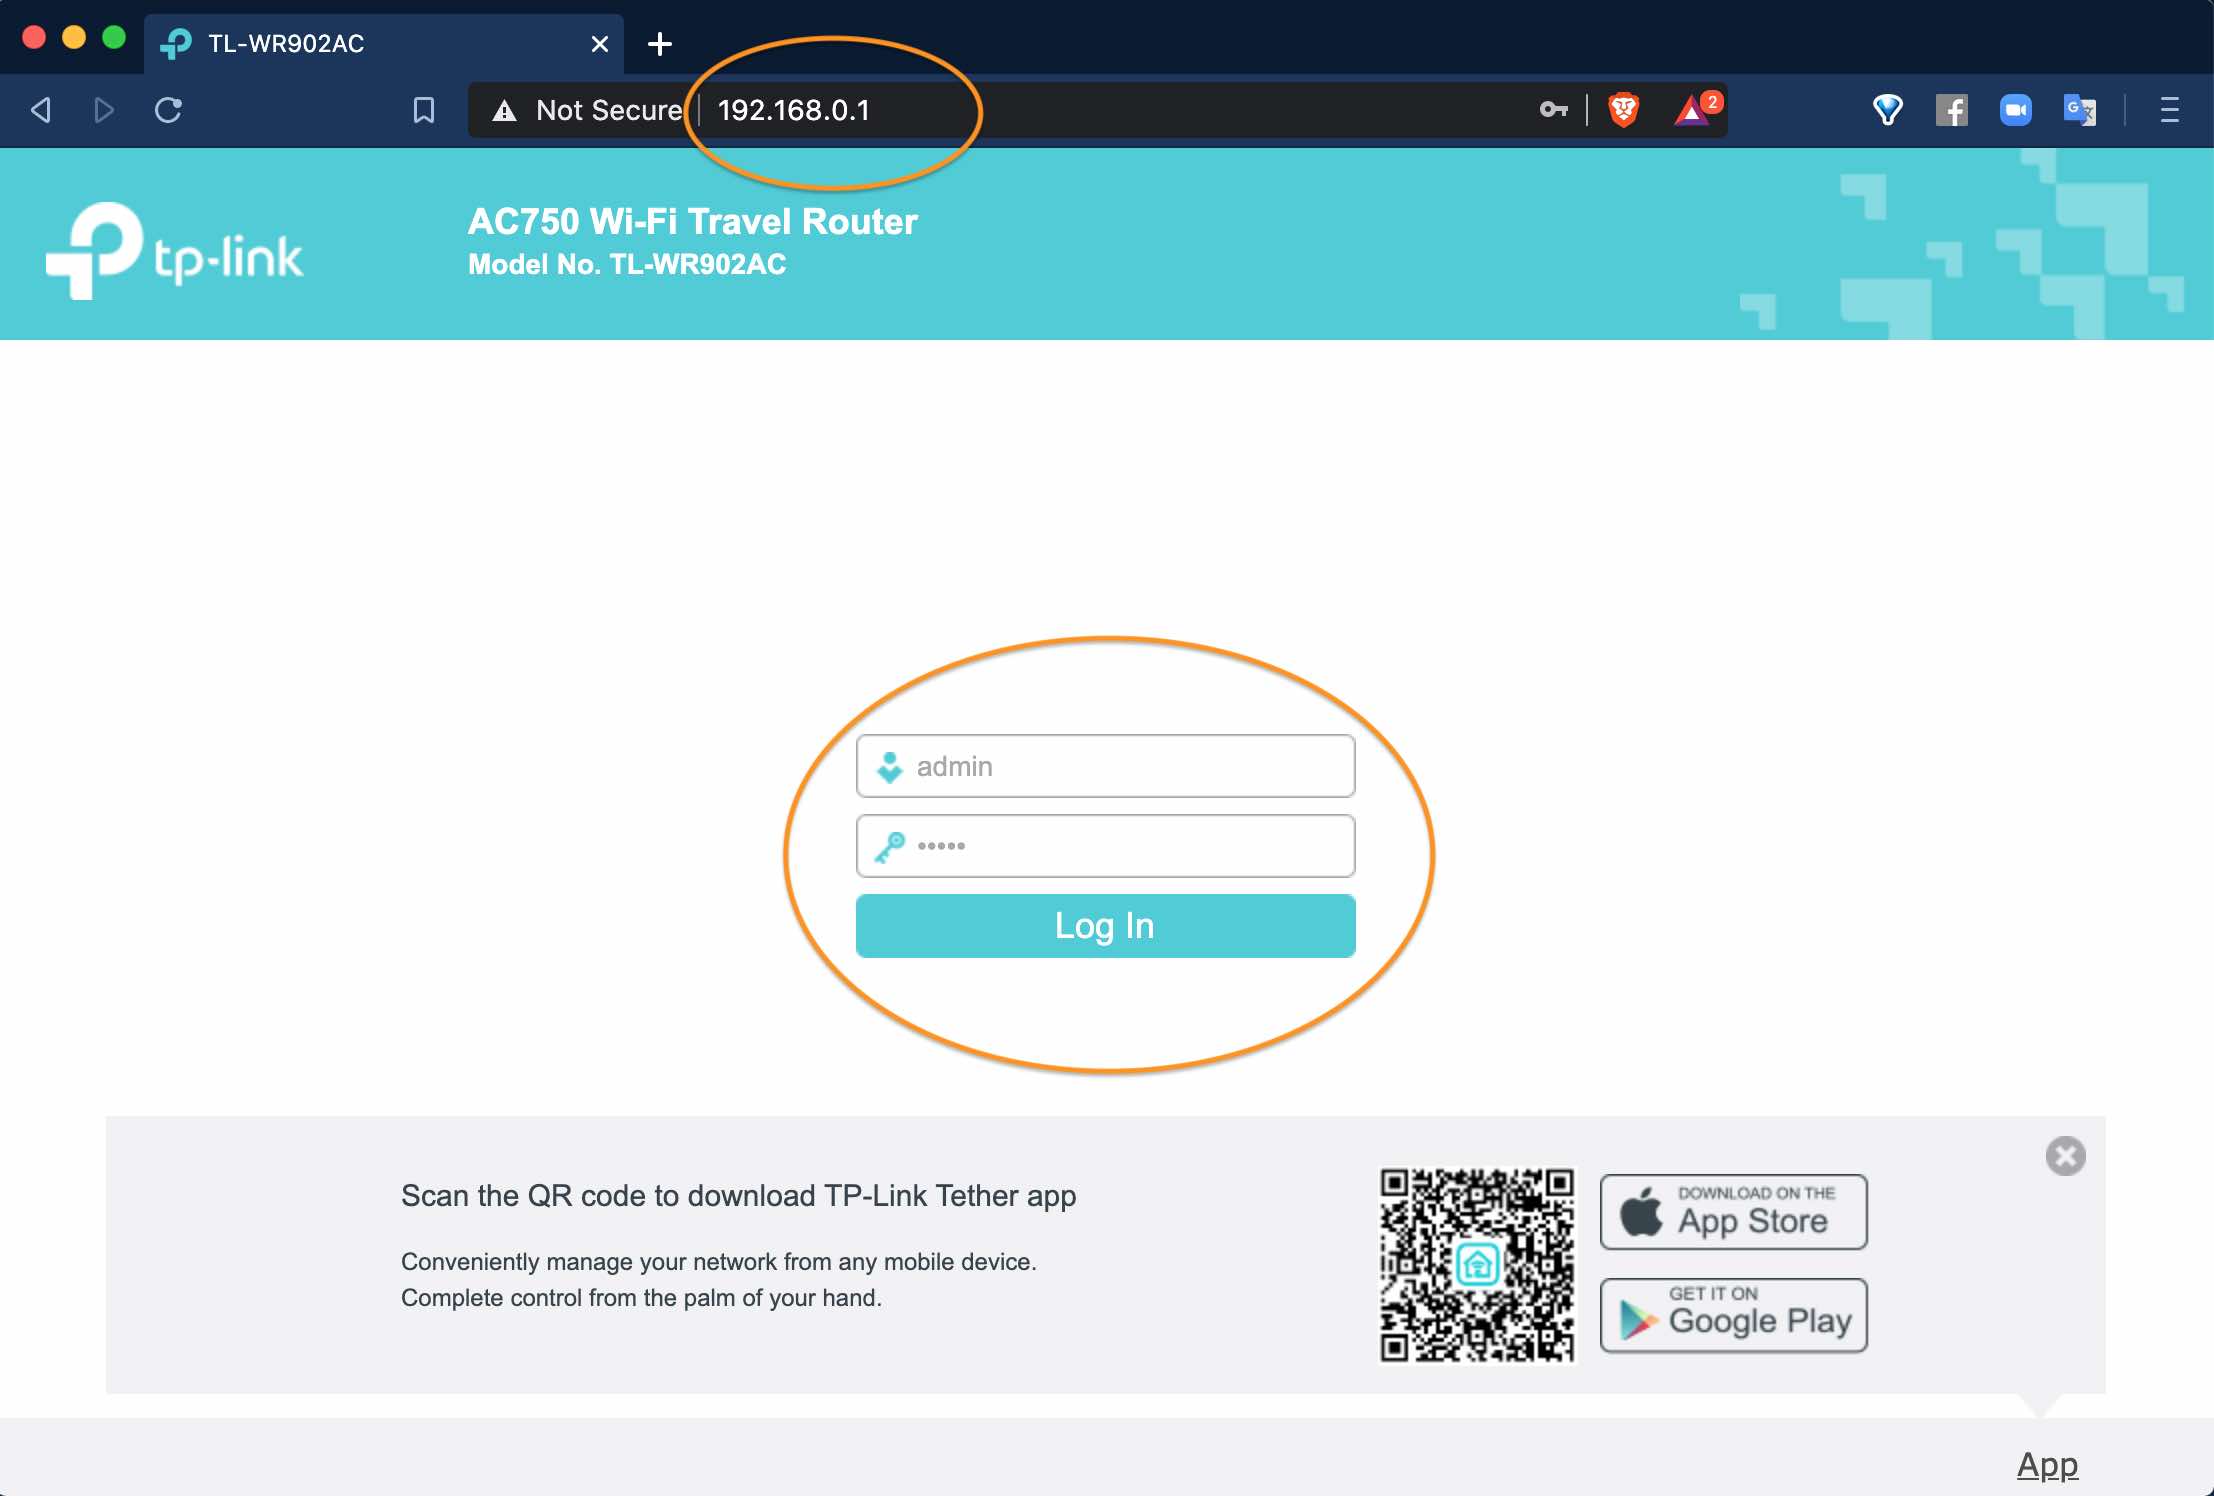
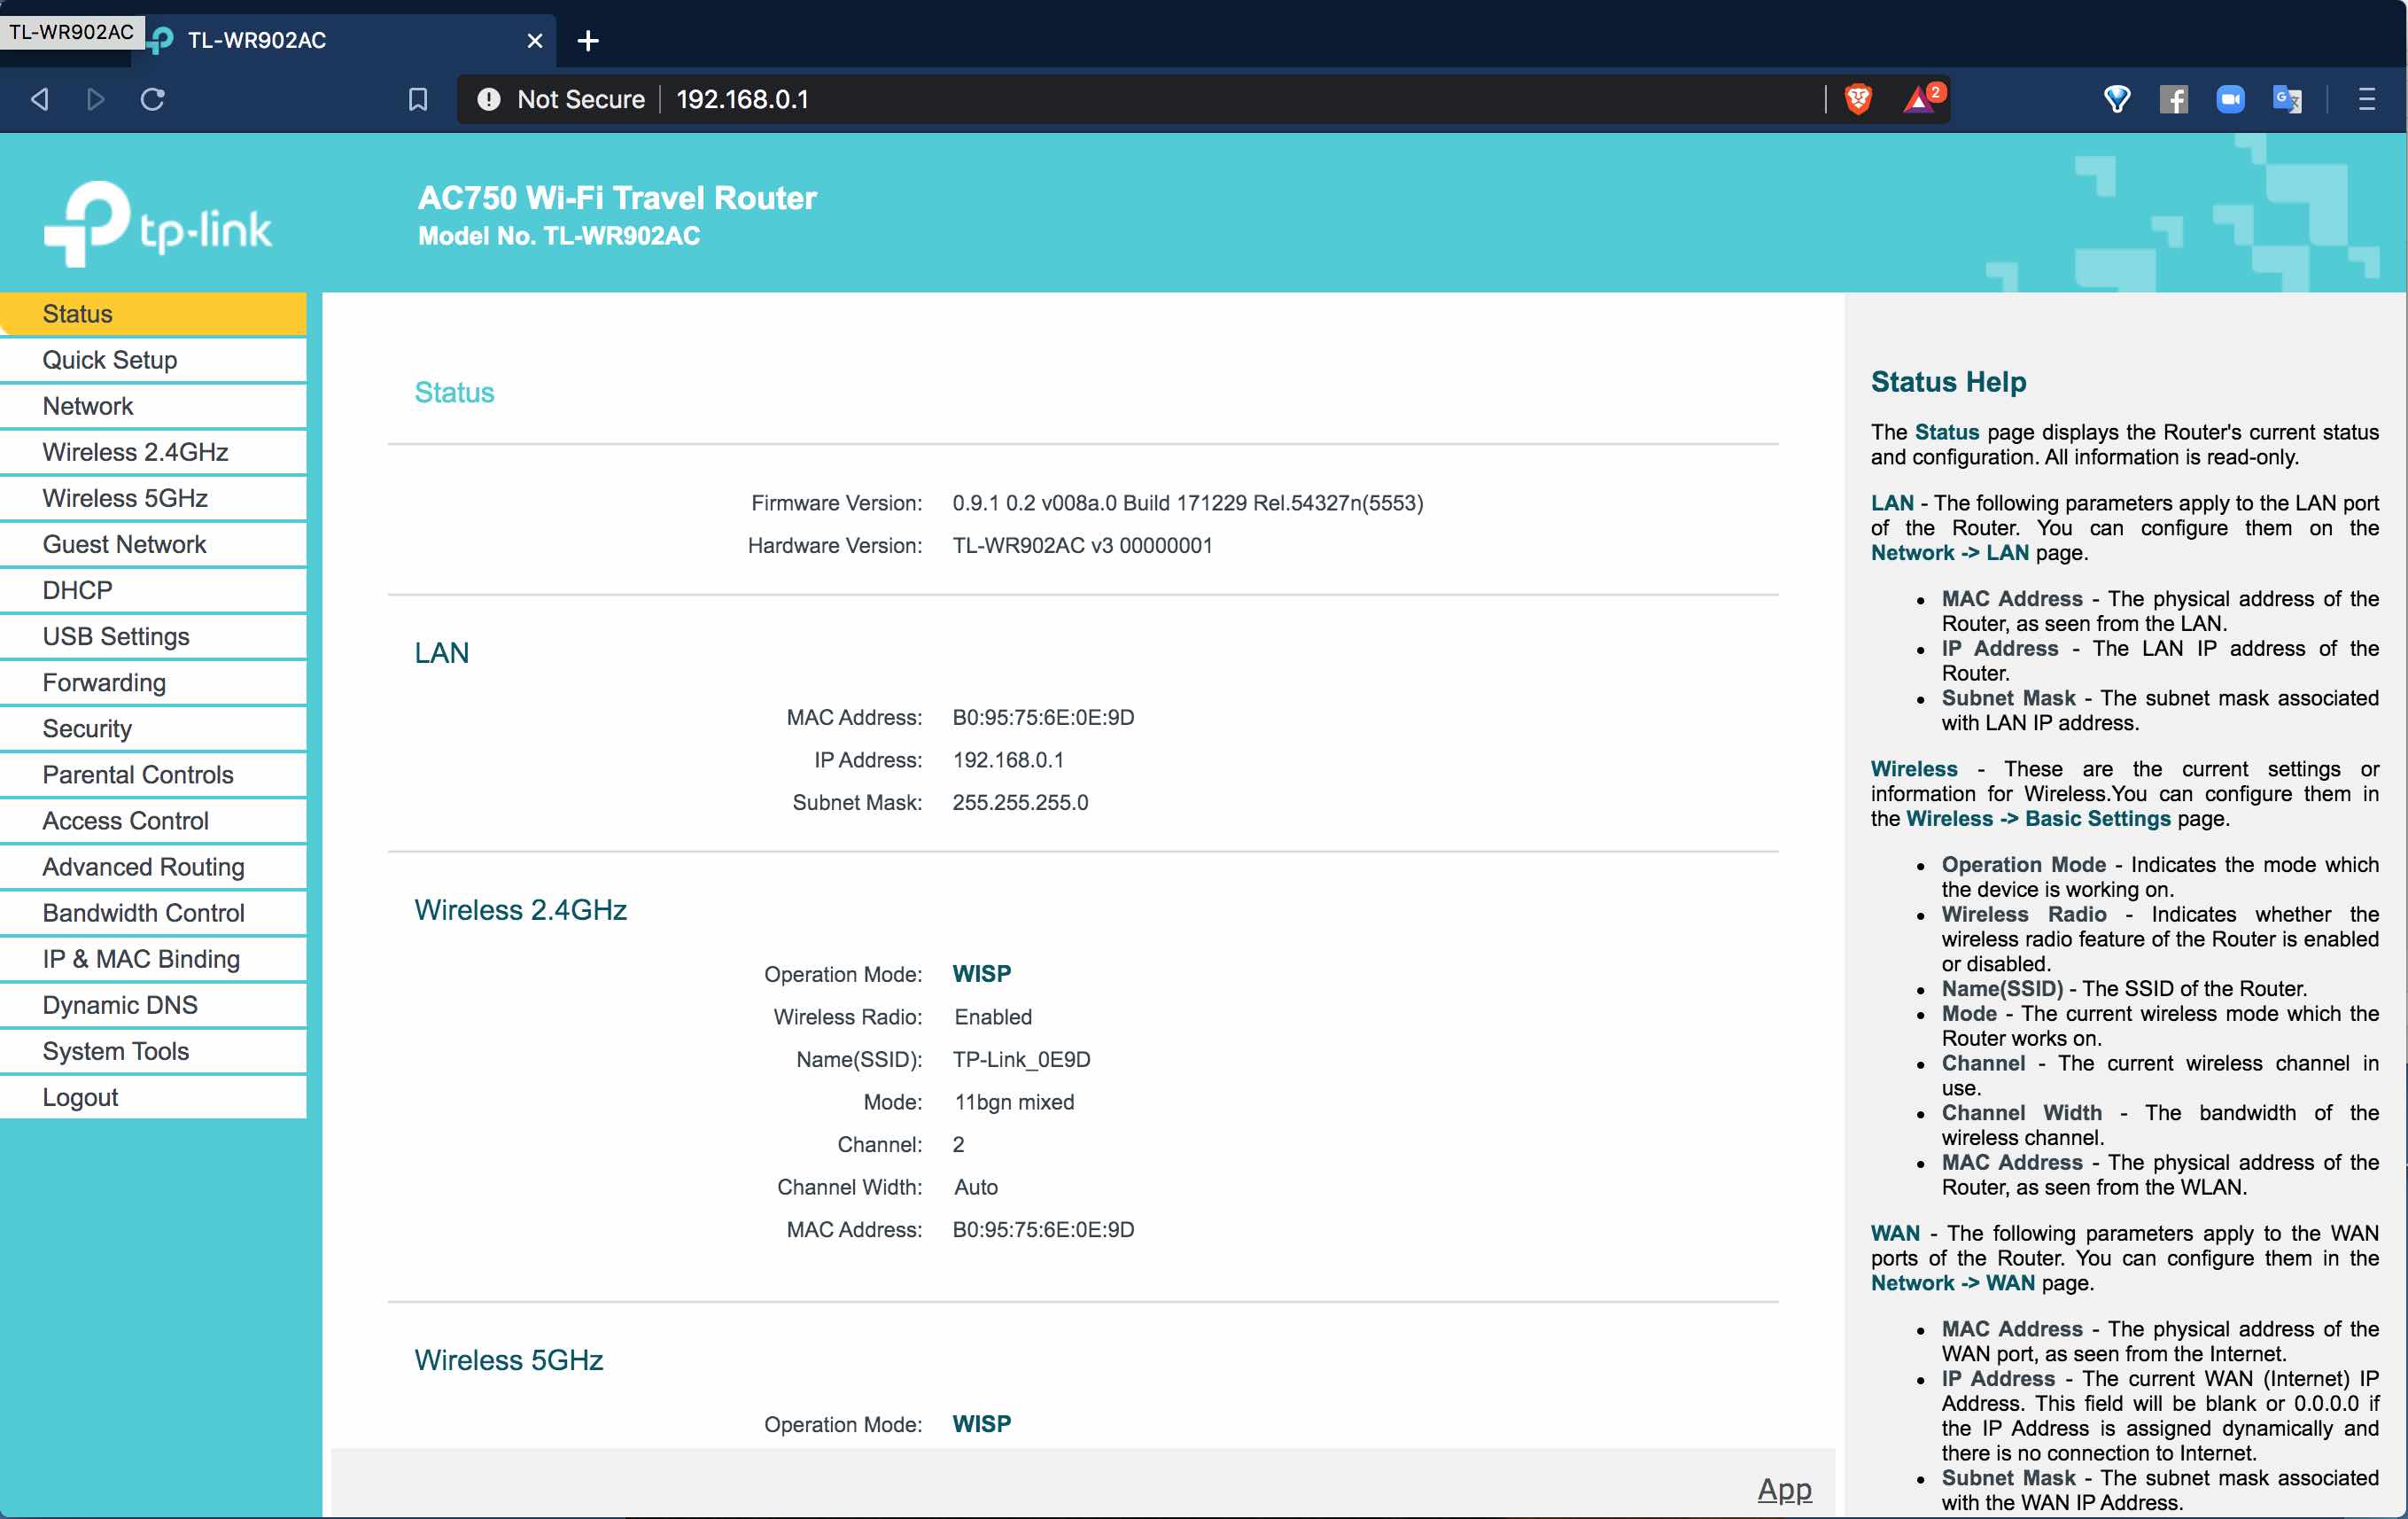
4. Open a browser, such as Safari or Chrome, and type EITHER the URL written on the back of your device (usually "http://tplinkwifi.net") OR the router's IP address found in Step 3 (usually "192.168.0.1") and wait for the router configuration tool login screen to come up. log in using the username and password that are printed on the back of the router (probably username: admin, password: admin).
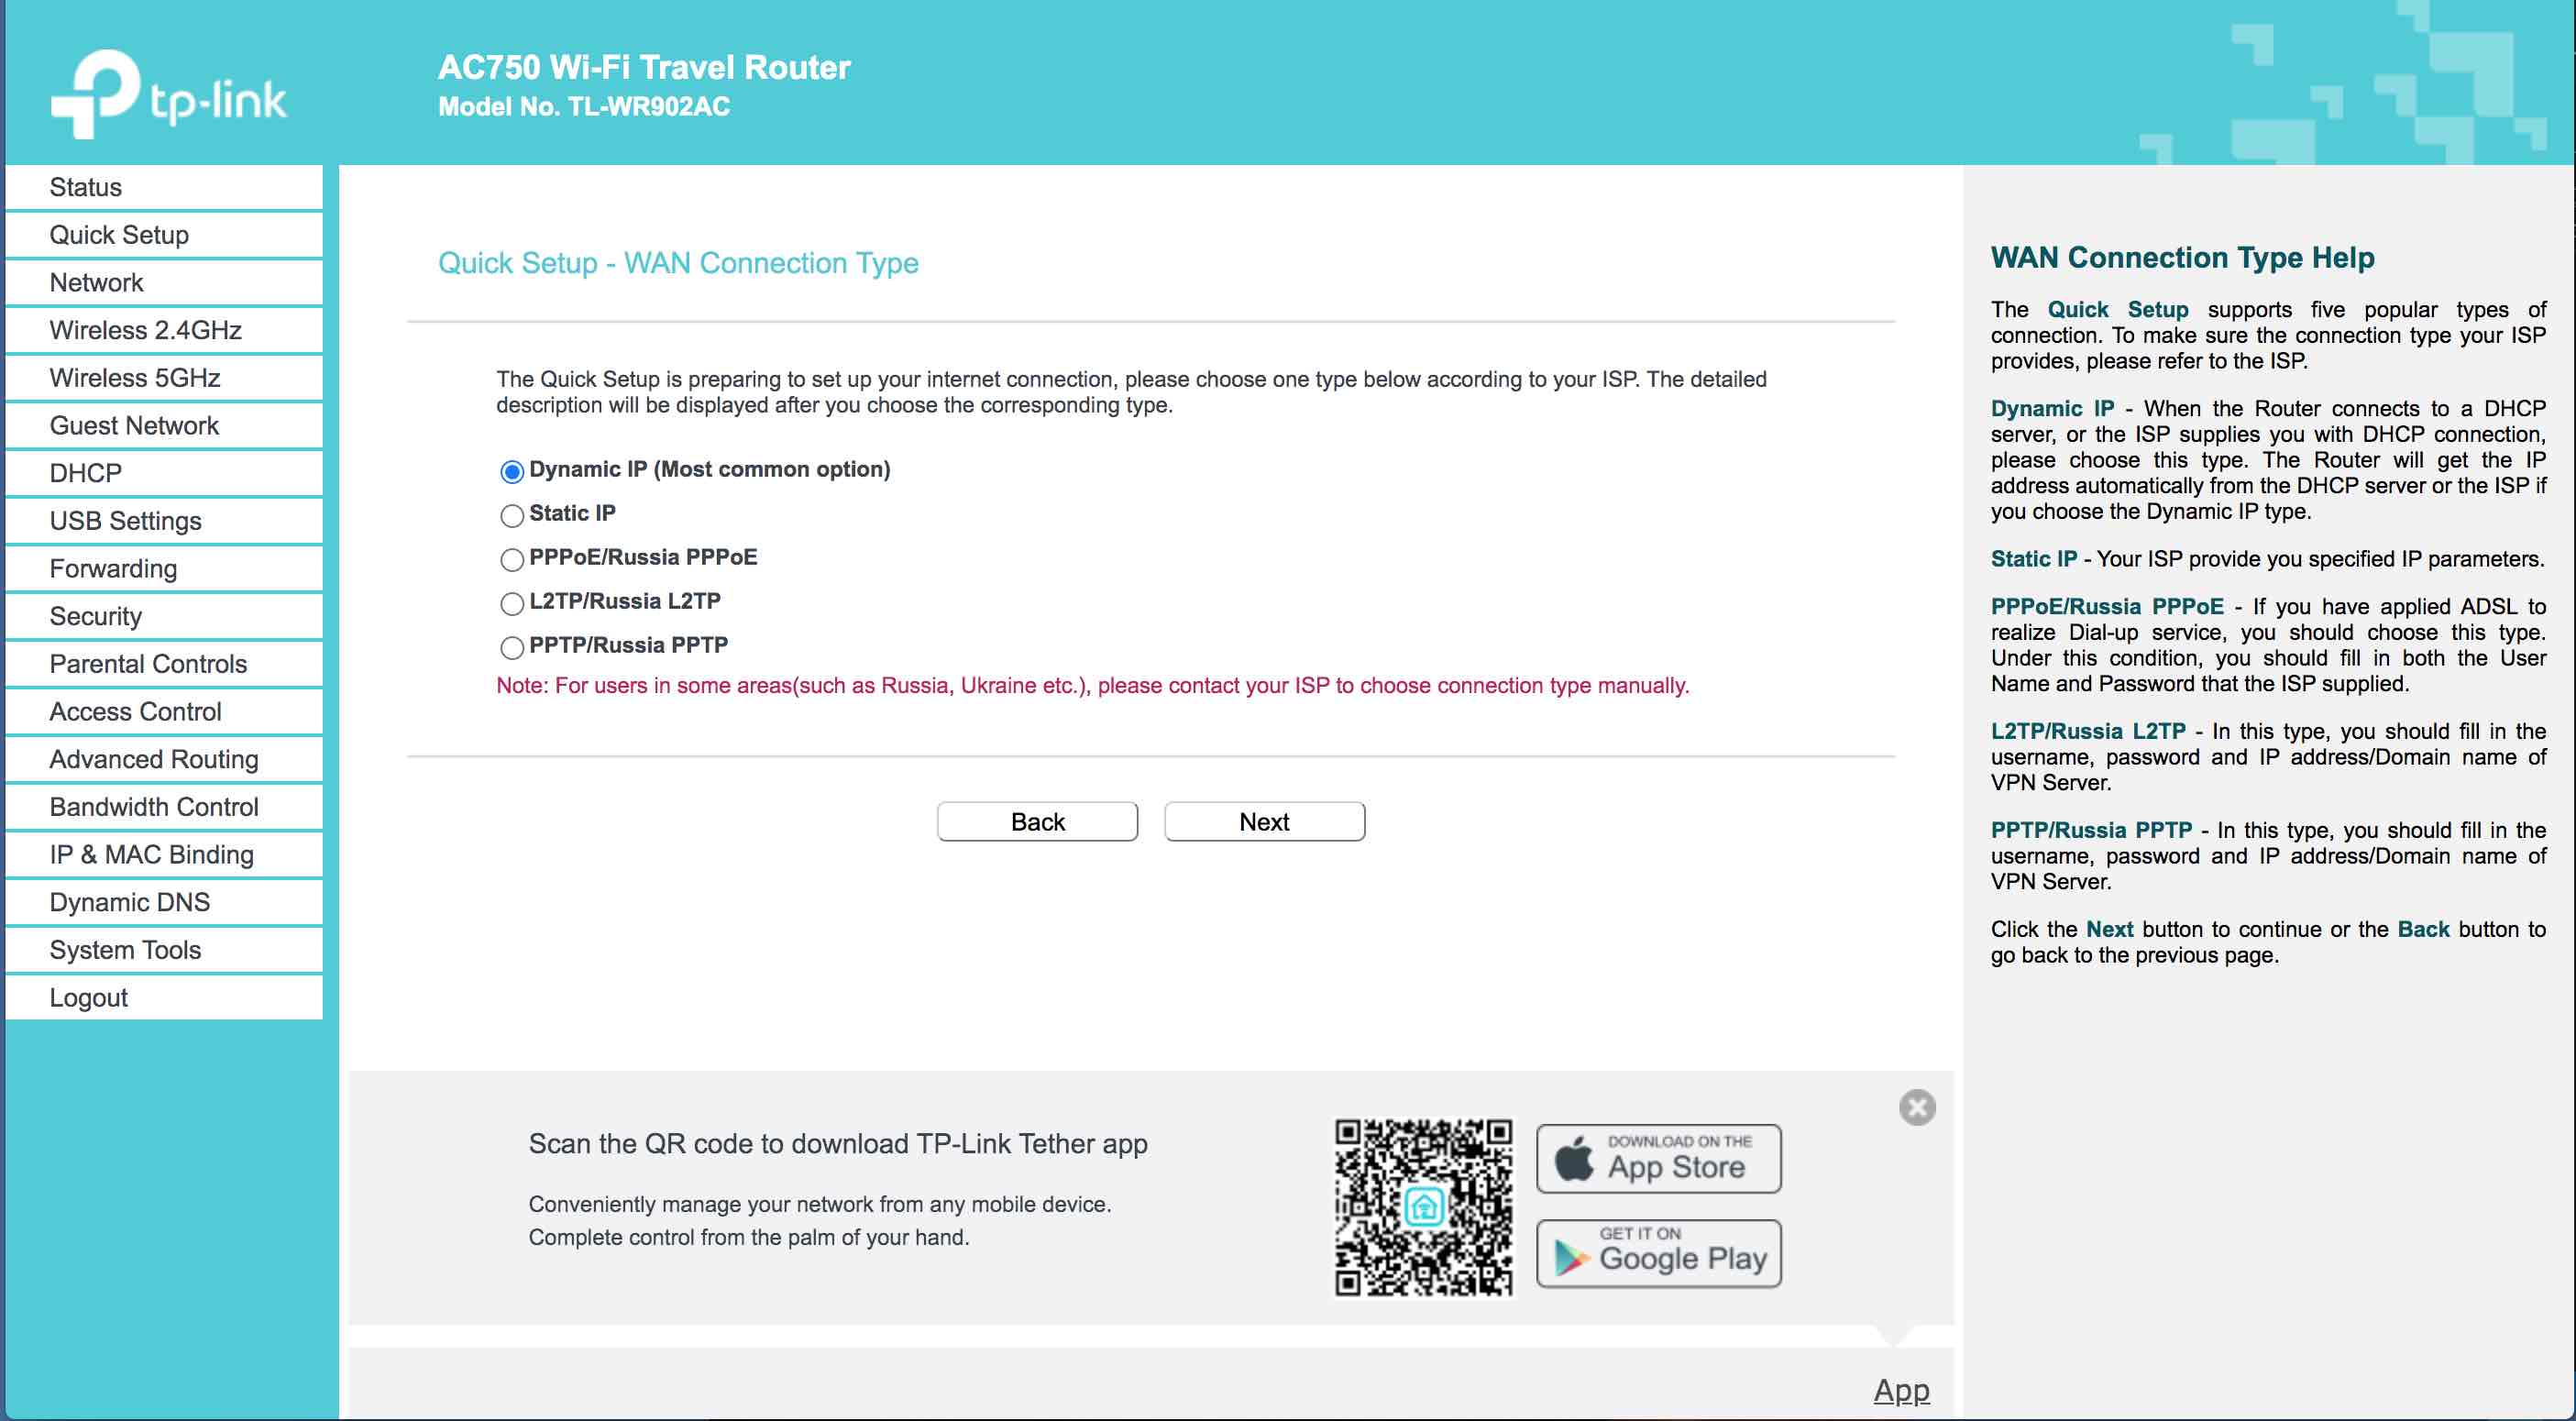
5. Follow the instructions by clicking through the Quick setup screens making the following selections and entries.

6. On the first screen Select "Dynamic IP (most common option)
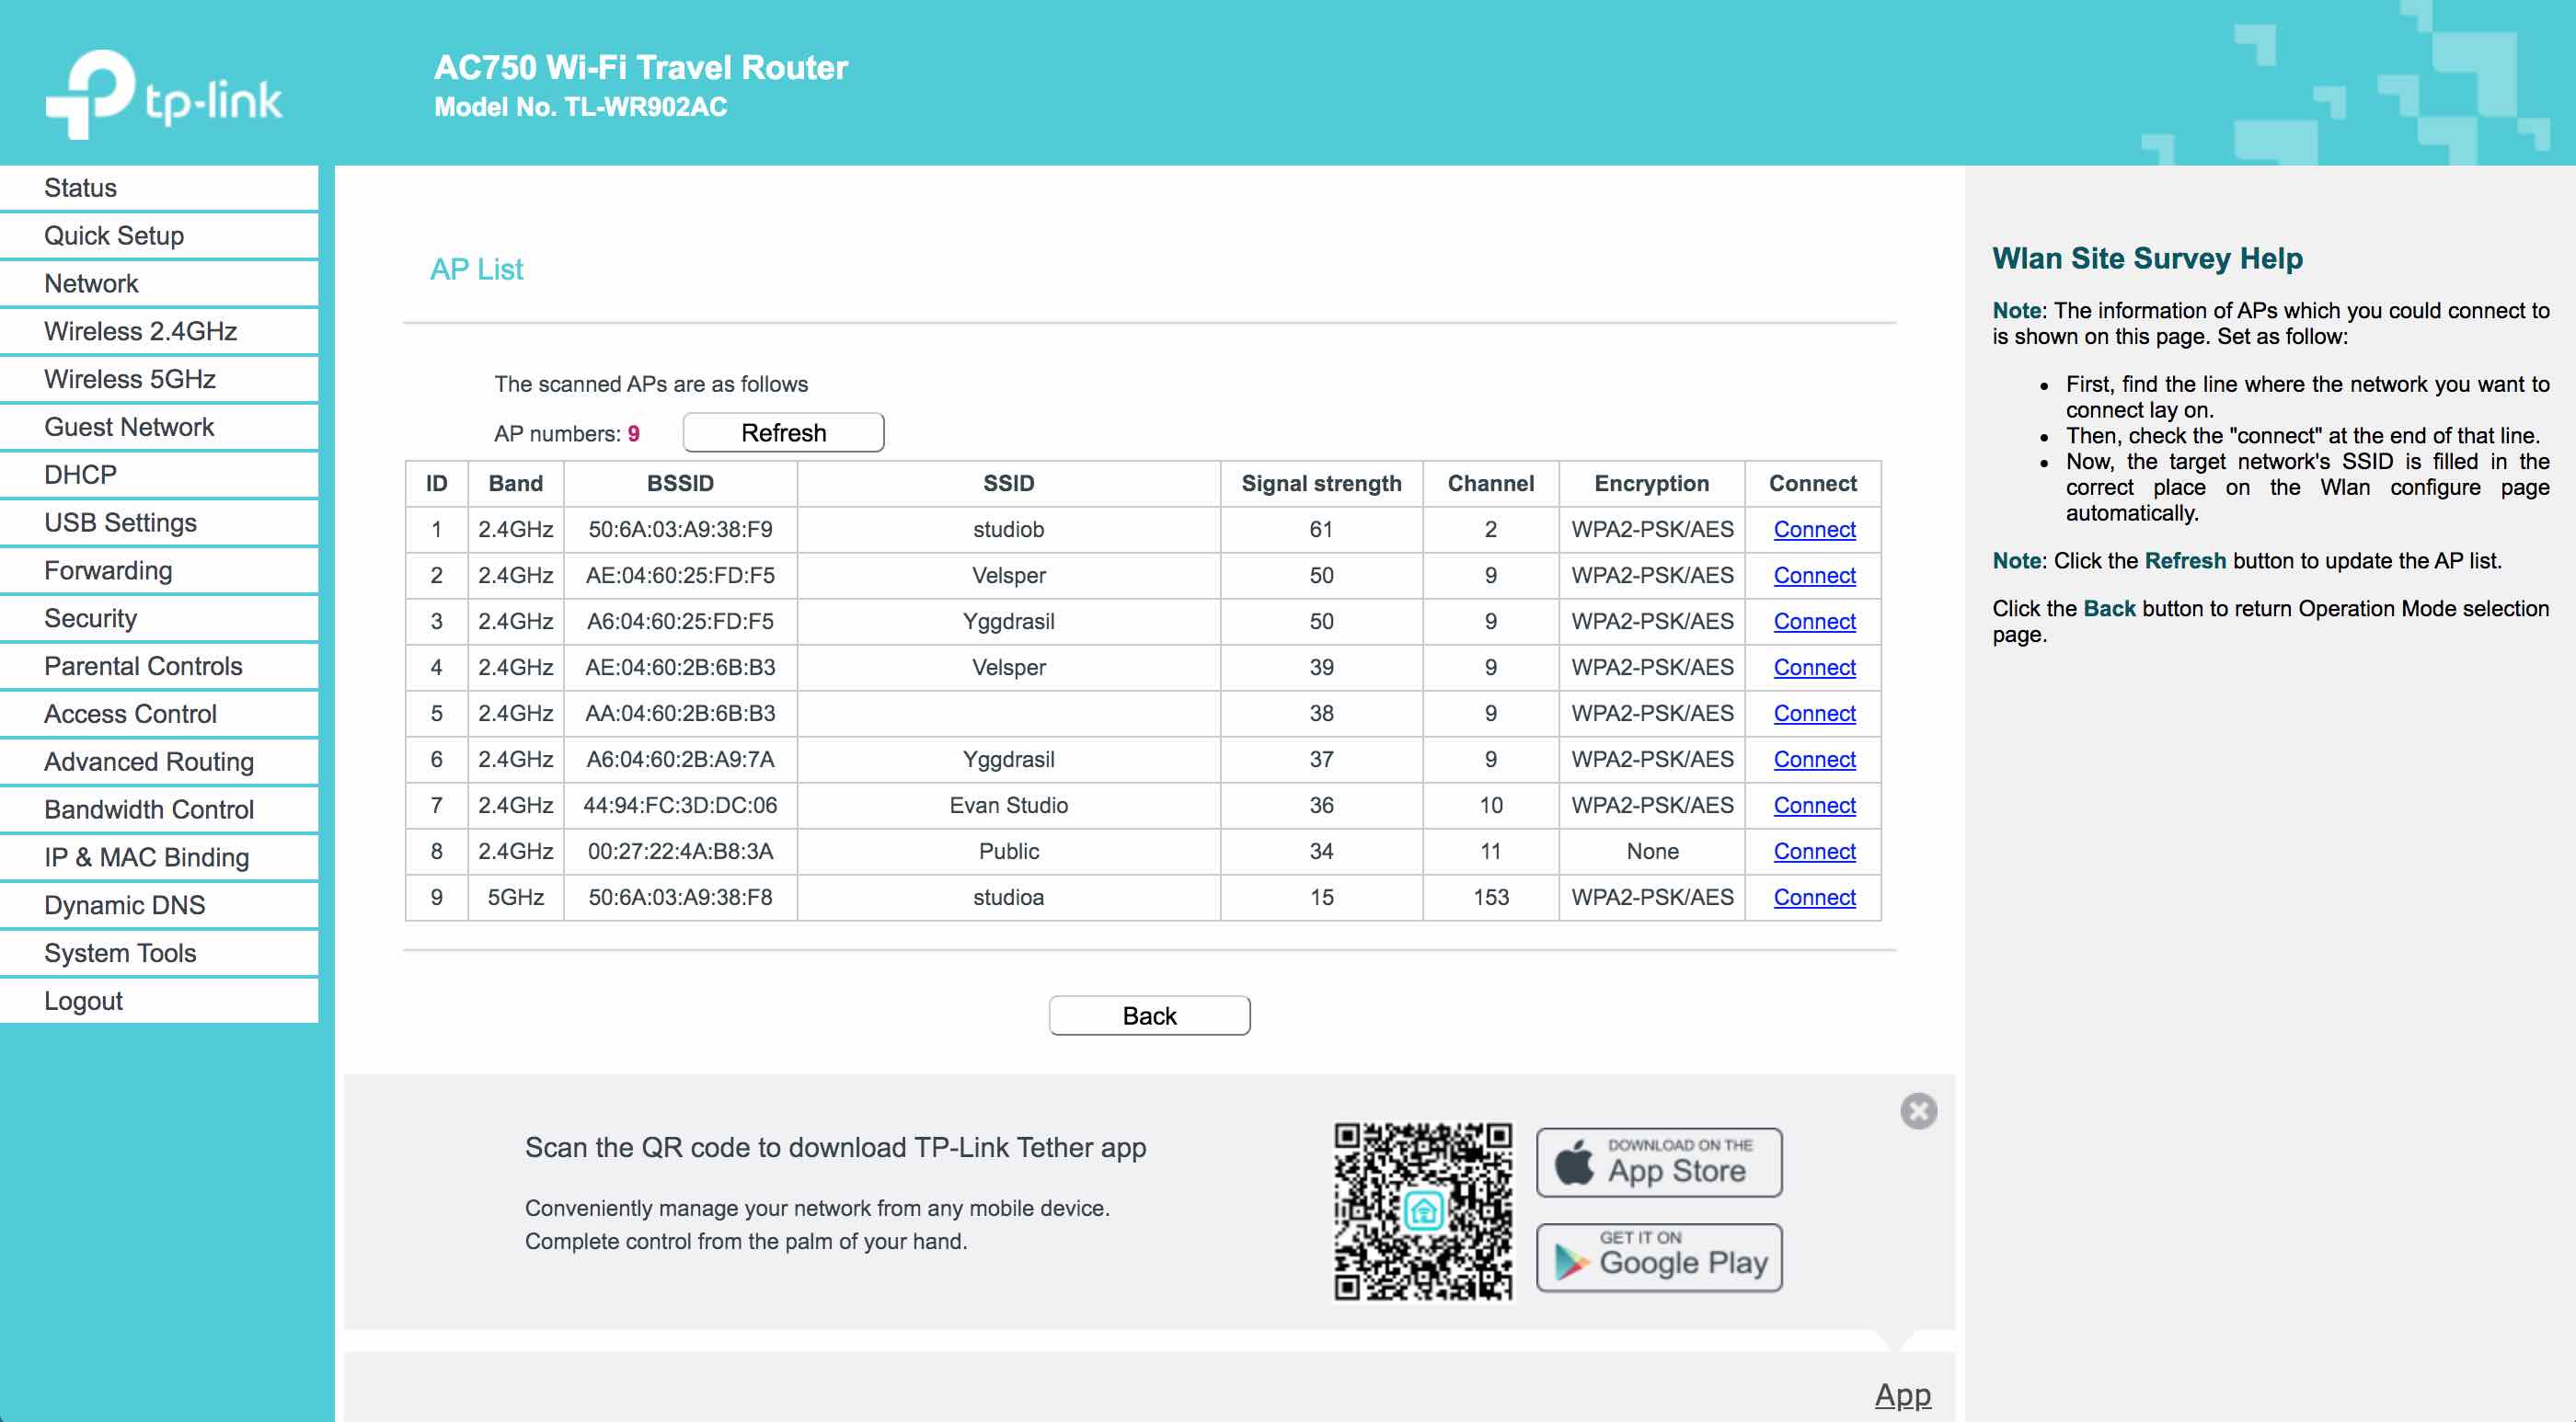
7. On the AP List screen, choose your internet Access Point. Look at the list and select the Wi-Fi network that you usually use to connect to the internet. It may take a moment and a couple of refreshes to see your AP pop up.
NOTE: If you don't need to use the internet while using the gloves, you can skip this step.
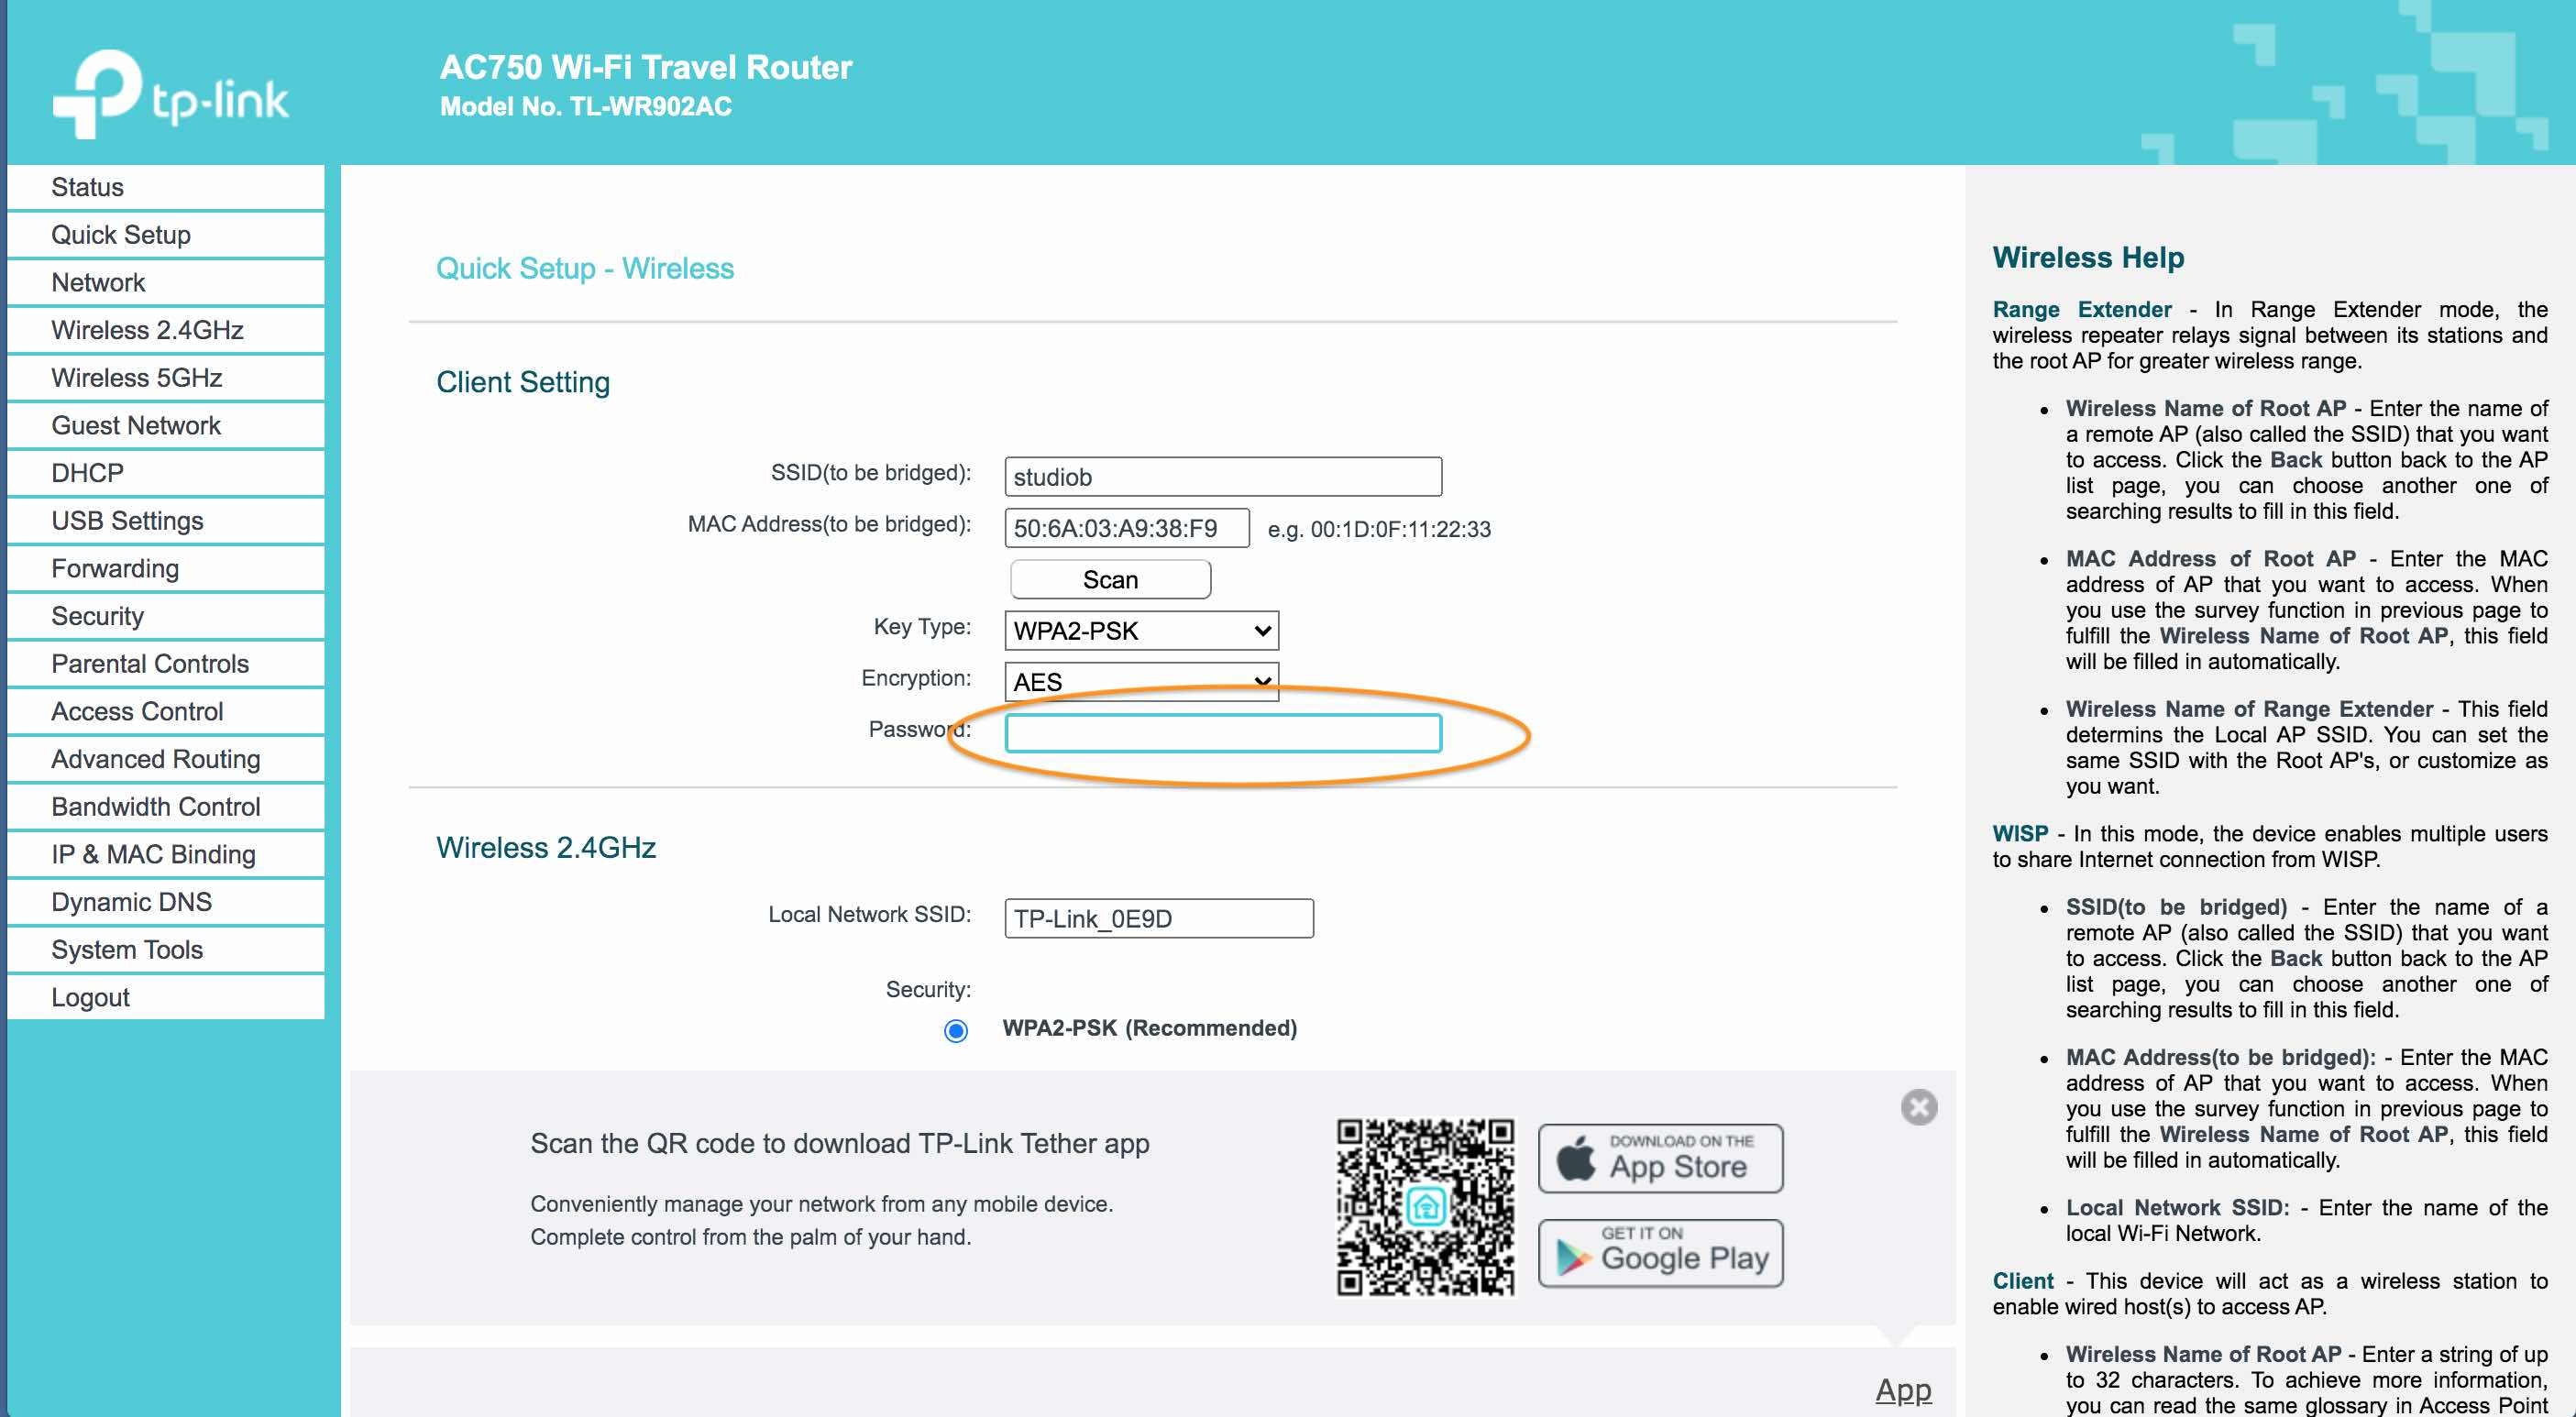
8. Next is the screen where you customize the name and password for your router.
a. In the first section marked "Client setting" enter the internet Wi-Fi password for your internet network
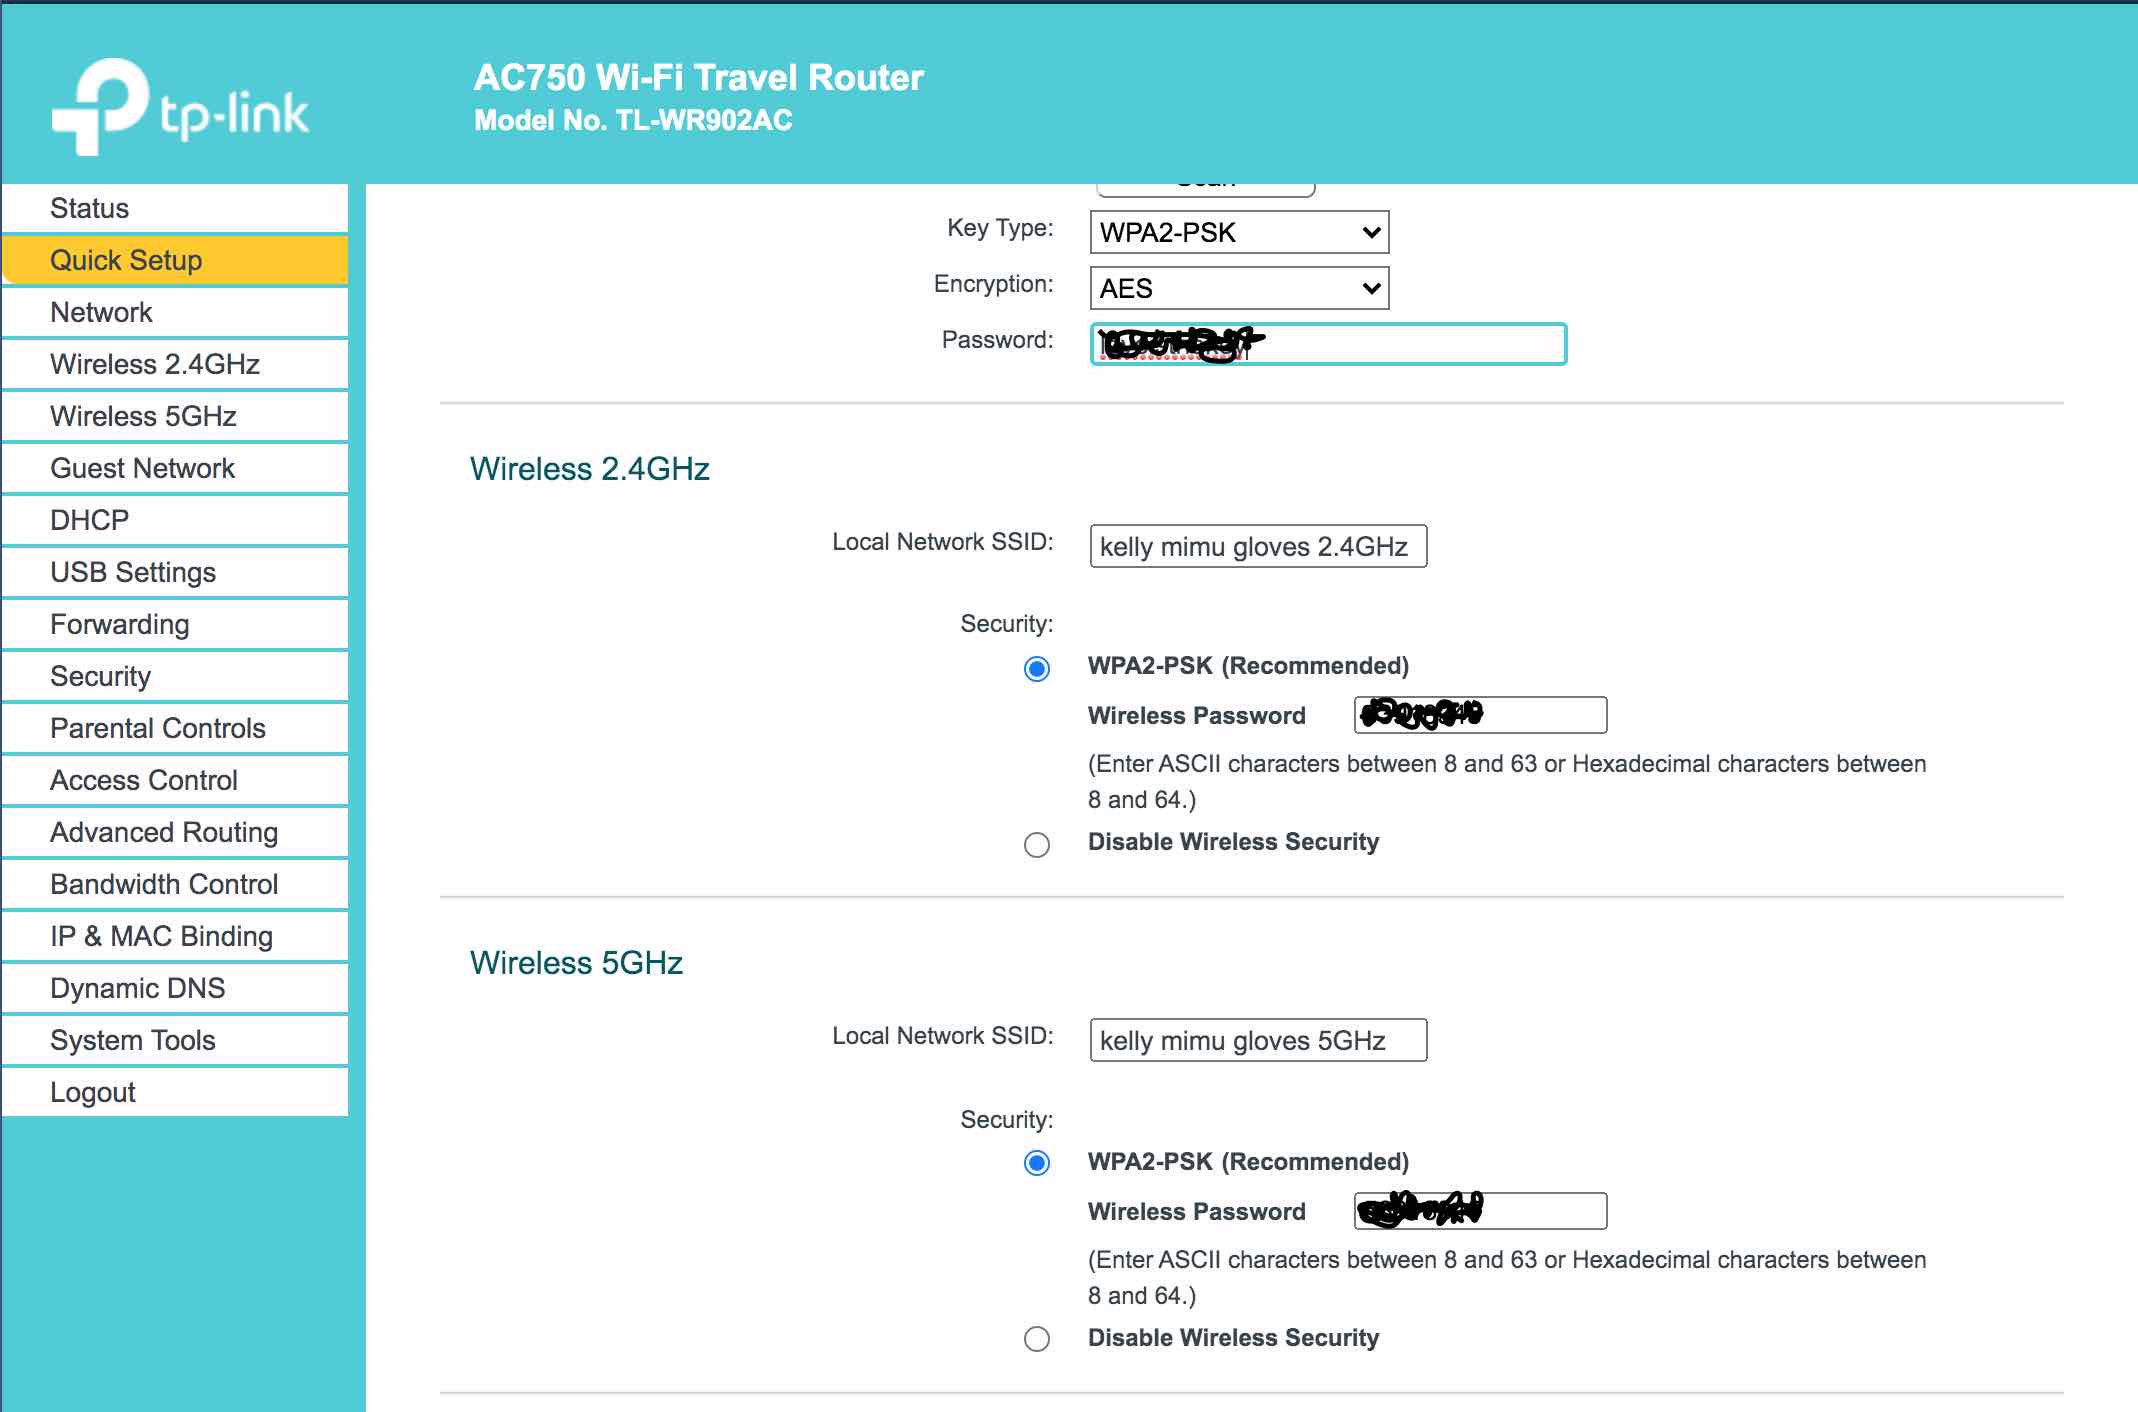
b. In the Wireless 2.4 GHz section, type in the name you would like to create for your Gloves 2.4 GHz router and change the password, as well, if you like.
c. In the Wireless 5 GHz section, type in the name you would like to create for your Gloves 5 GHz router and change the password if you like.
d. Click "next"
9. Click "Finish"
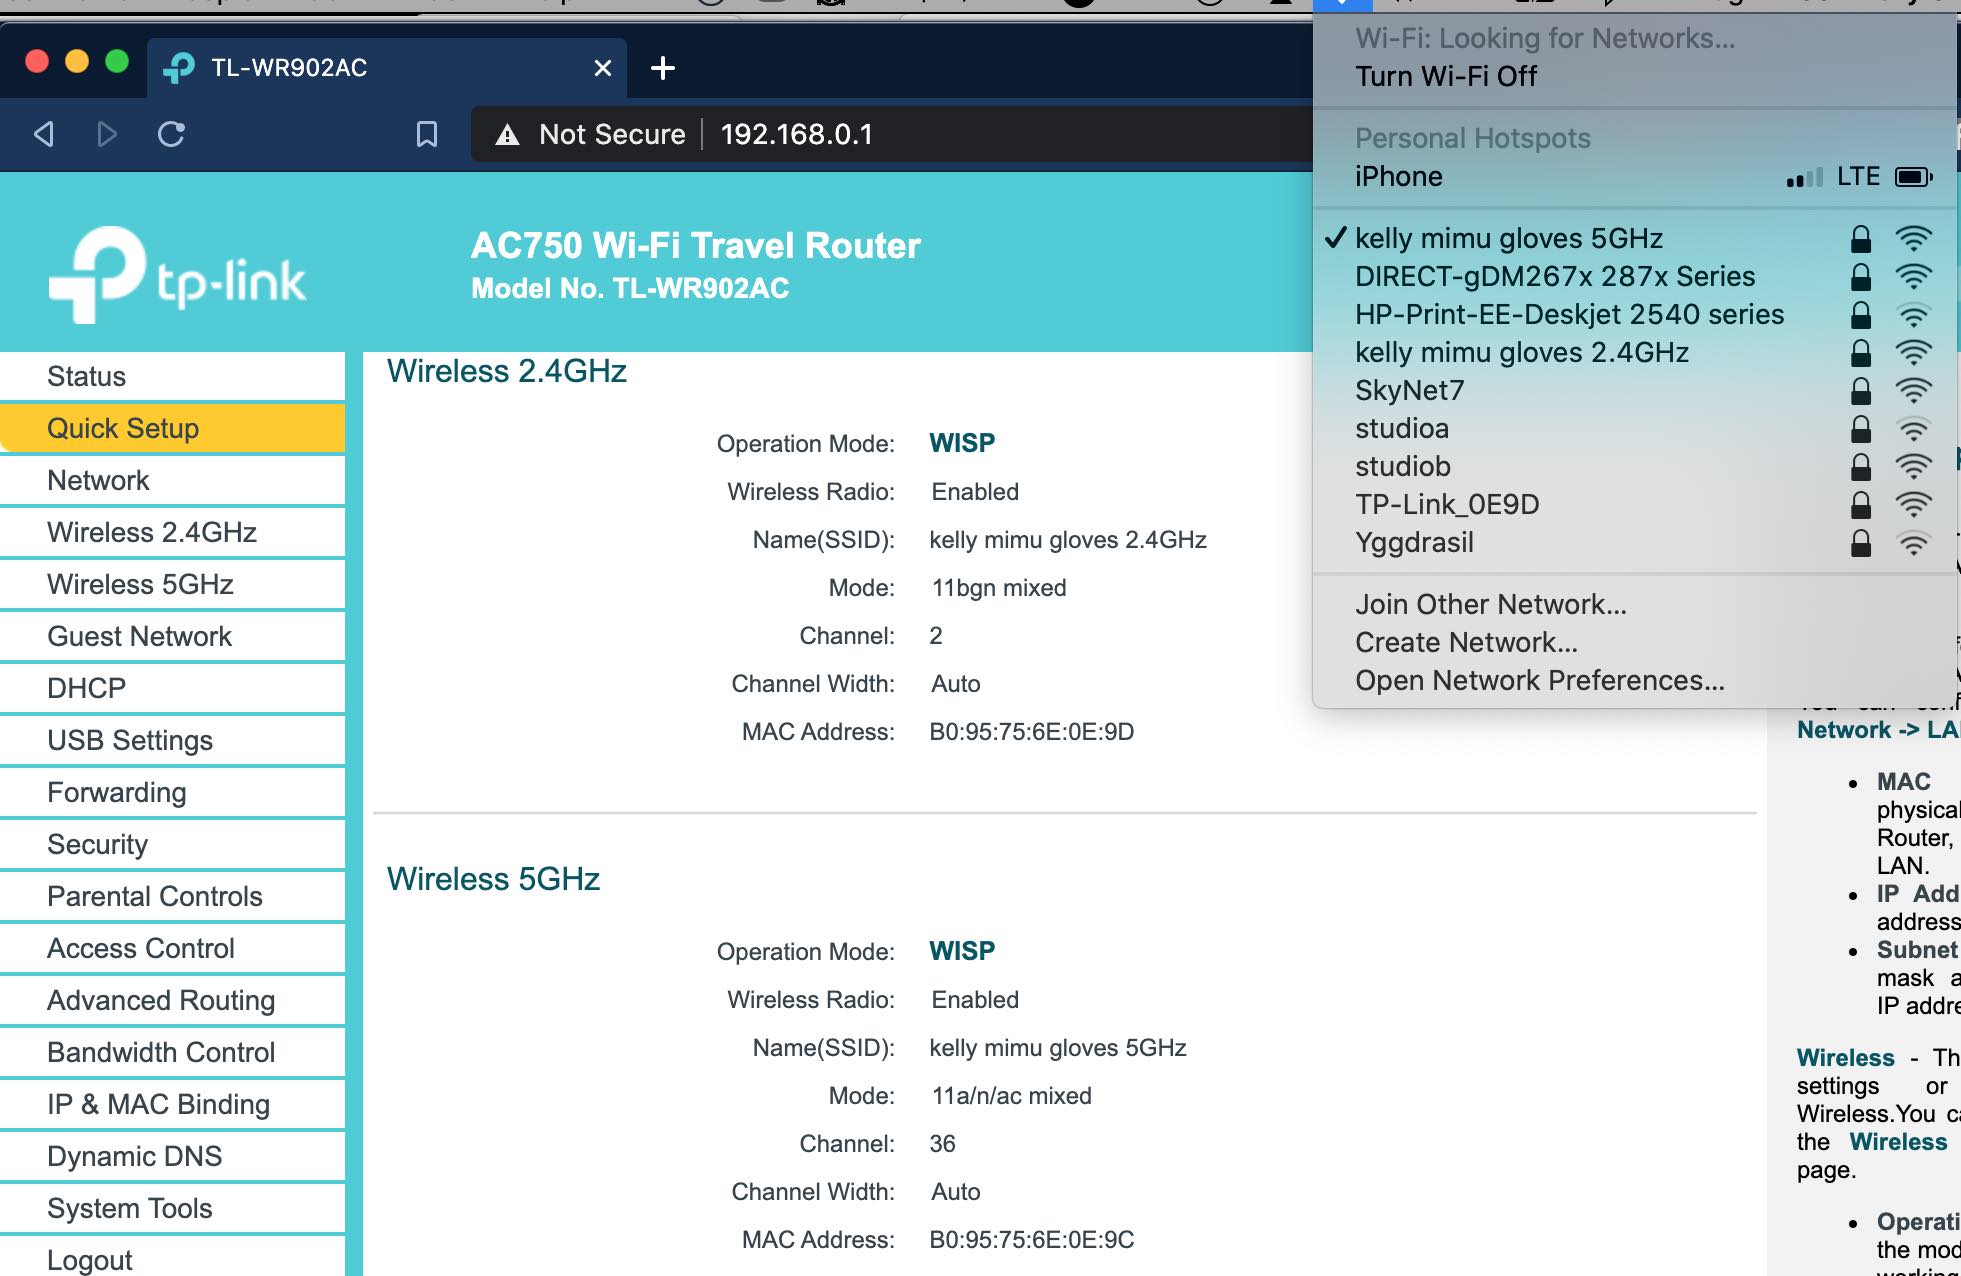
10. Give the TP-Link router a moment to reboot with the new settings then go up to your computer's Wi-Fi connections and select your 5 GHz router that you just named when you see it pop up.
11. Enter the password you just created in step 8.c for your 5 GHz router service
12. Once you are connected to your computer's Wi-Fi, the TP-Link address might not work anymore, so in your browser, type the URL you found in step 3 (should be 192.168.0.1 or 192.168.1.1). The password to open the settings here is still what it was before - "admin"/"admin". You will want to access these settings from time to time, so remember this address. For example, if you want to change your router's channel or if you change your home internet wifi or go to a new location and want to use that location’s wifi for streaming. The gloves will still work with your computer regardless of whether or not your location’s WIFI is working or connected.
Advanced Settings (Wired options)
>In some more complex setups, you might wish to use your Wi-Fi port for other networking duties, in which case it is often handy to be able to route the glove router traffic directly into the computer via a wired ethernet connection so the computer's Wi-Fi can either be turned off. This is particularly useful if you anticipate interference in a venue and want to minimize wireless vulnerabilities, or if you have high-bandwidth, time-sensitive triggers that will benefit from absolute minimum latency.Additional hardware that might be required:
- Ethernet cable of desired length (Cat5)
- Ethernet adapter for your computer's ports (see description below)
Router configuration
Following the steps in the basic setup section above should make connecting over the ethernet connection straightforward.
1. After completing all the above steps and with the router's switch still set on the middle setting ("share hotspot"), connect the ethernet port on the Router to a port on your laptop via an ethernet port (if you have one, or an appropriate adapter, such as ethernet to thunderbolt).
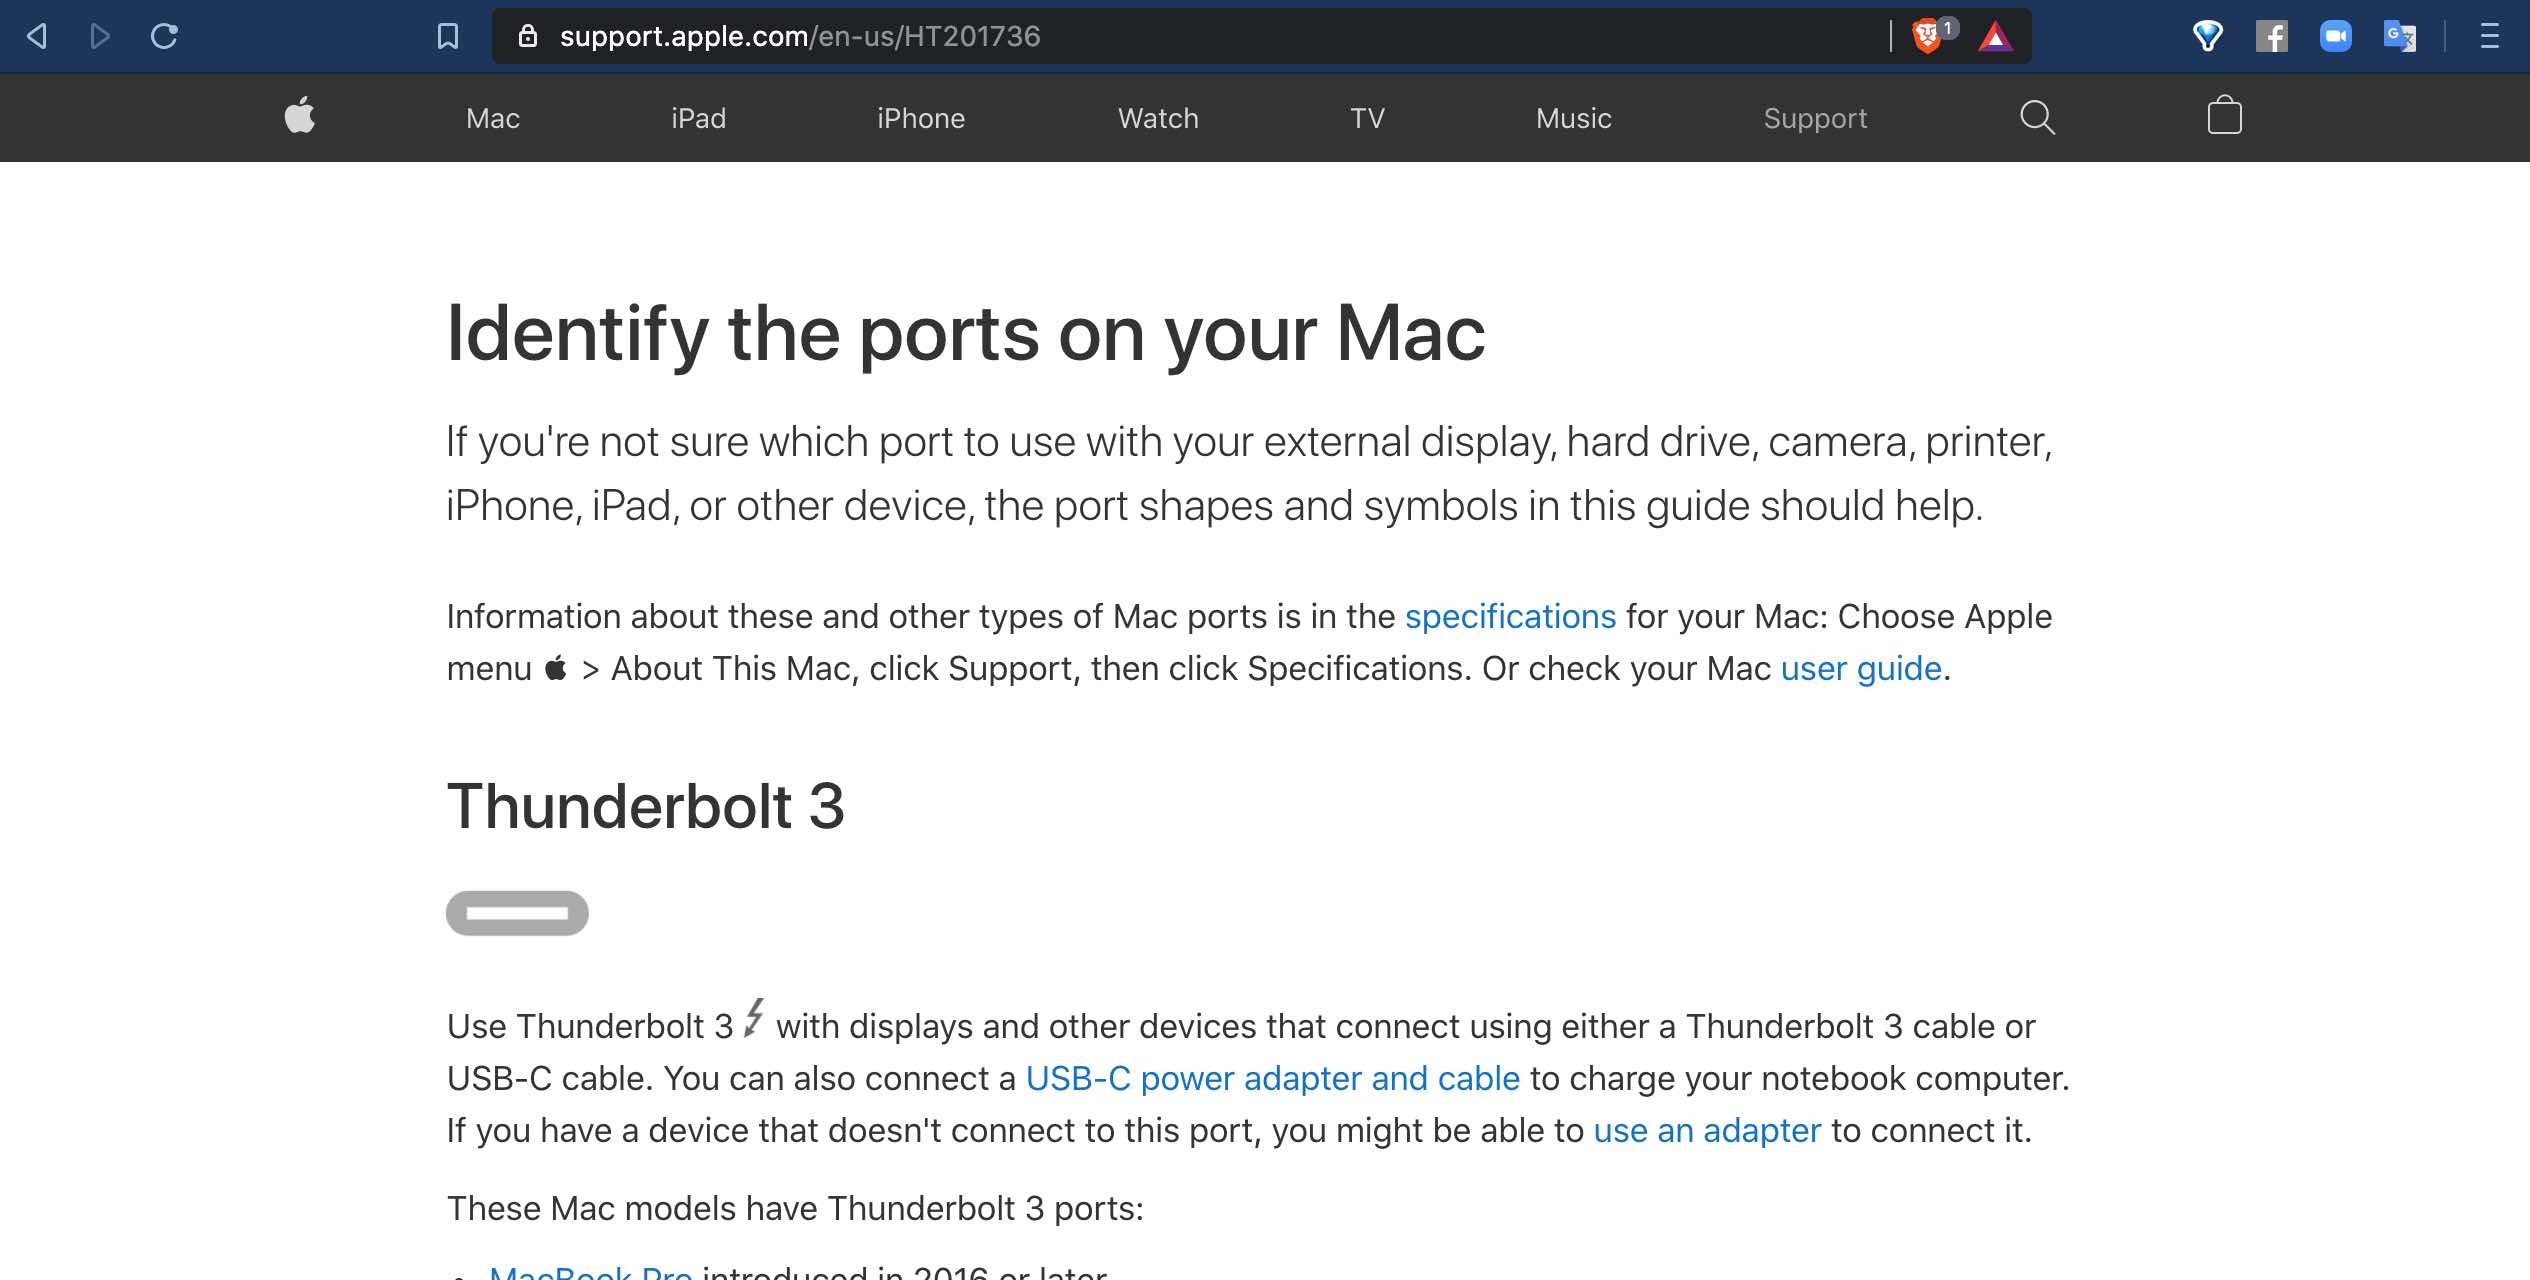
At this point, it is very helpful to understand what ports you have available on your laptop, and for this, there are some very useful websites to consult, like this one for Identifying ports on your Mac on Apple's support pages.
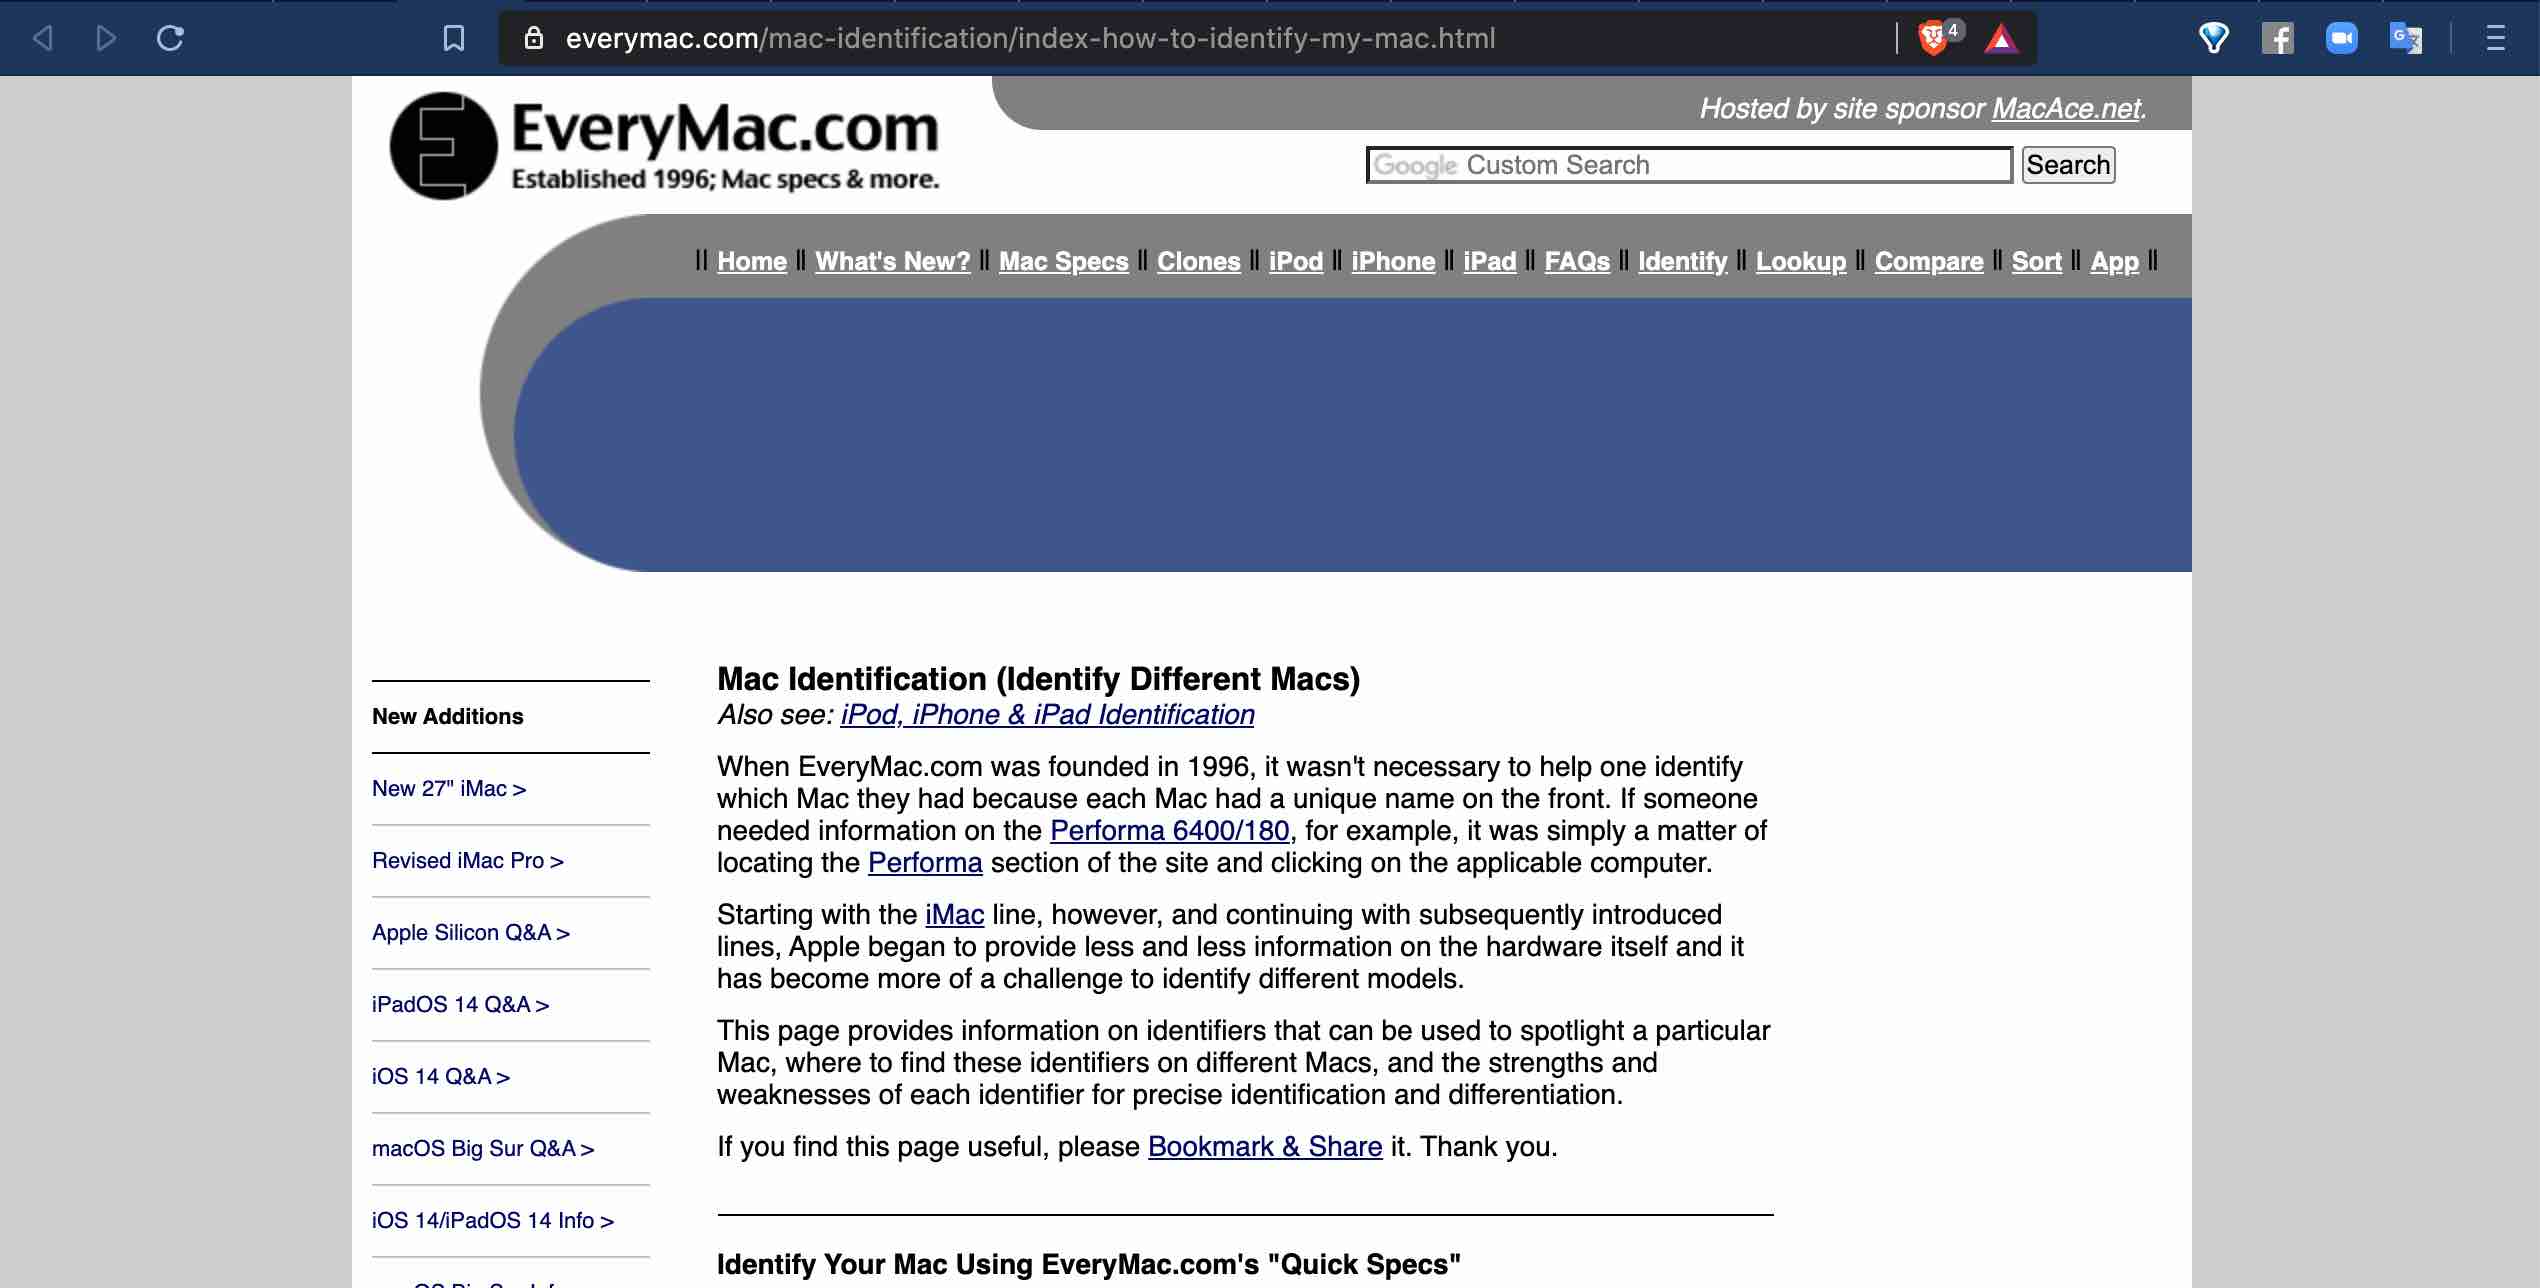
If you're not sure which Mac you have, here's a helpful tool for Identifying which Mac you have.
2. Open your network settings and confirm that the ethernet adapter port's connection indicator has turned green.
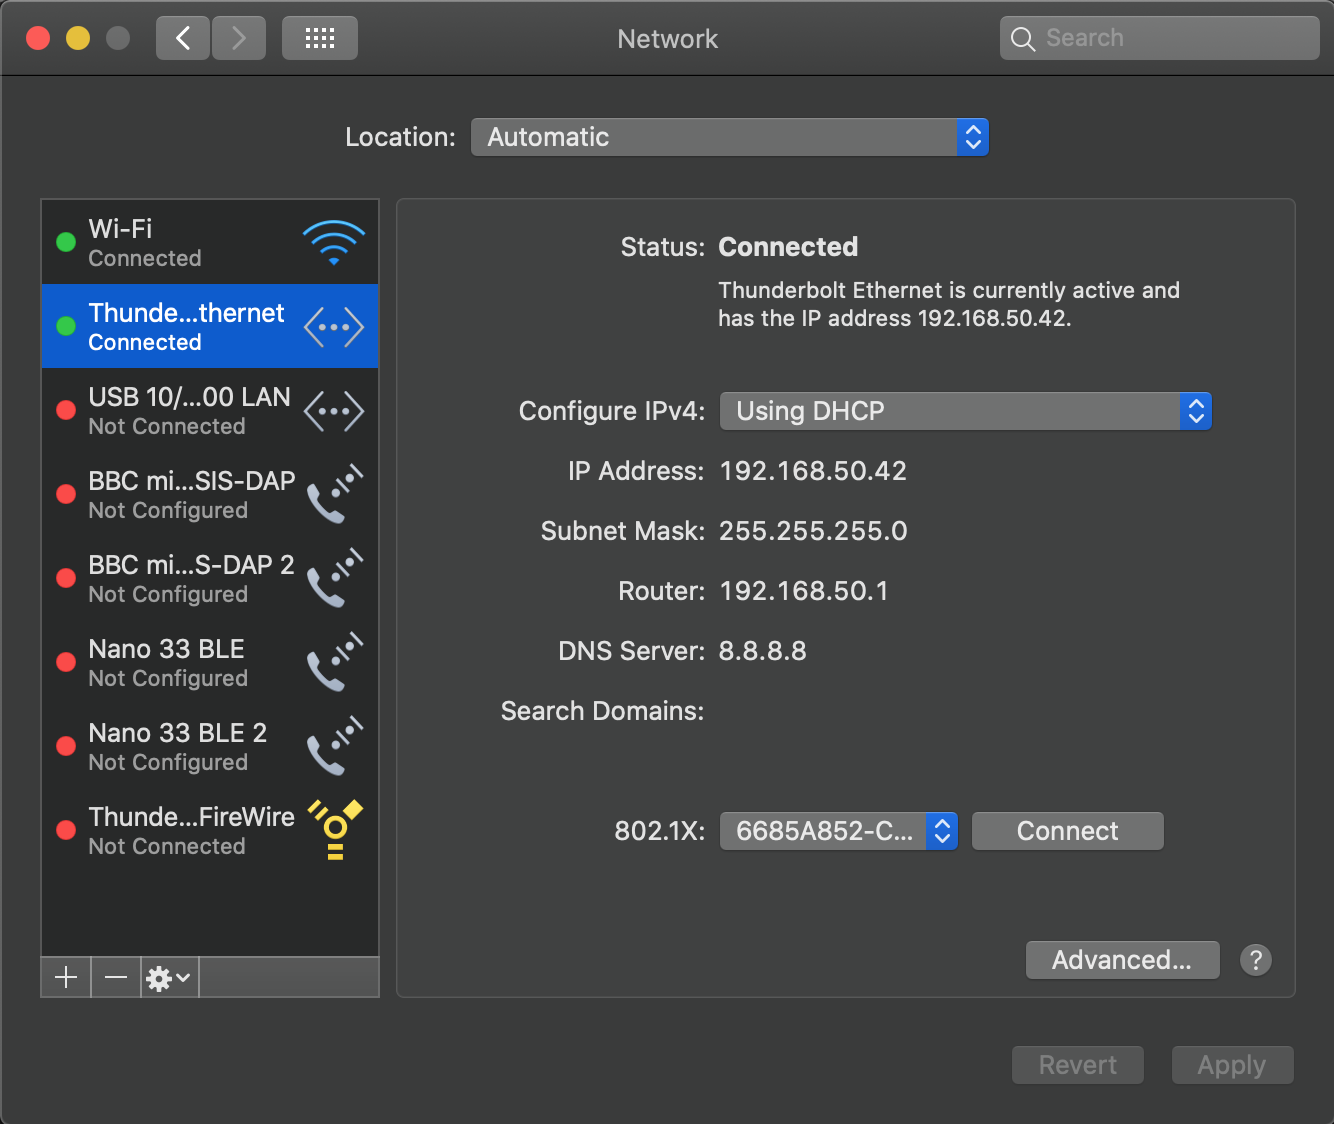
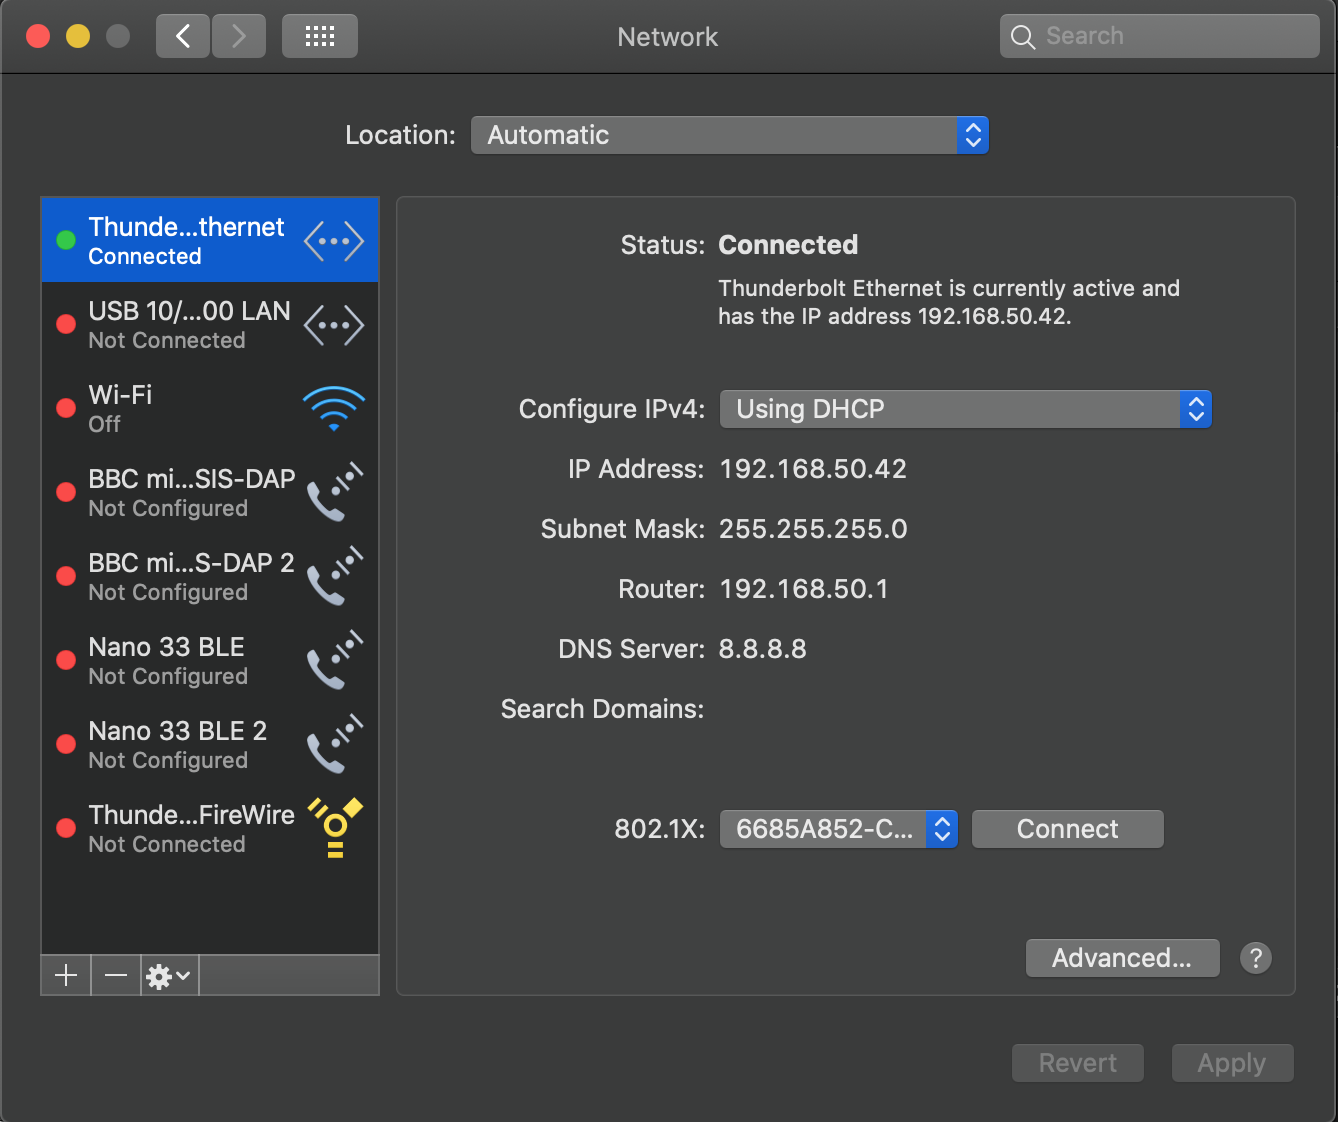
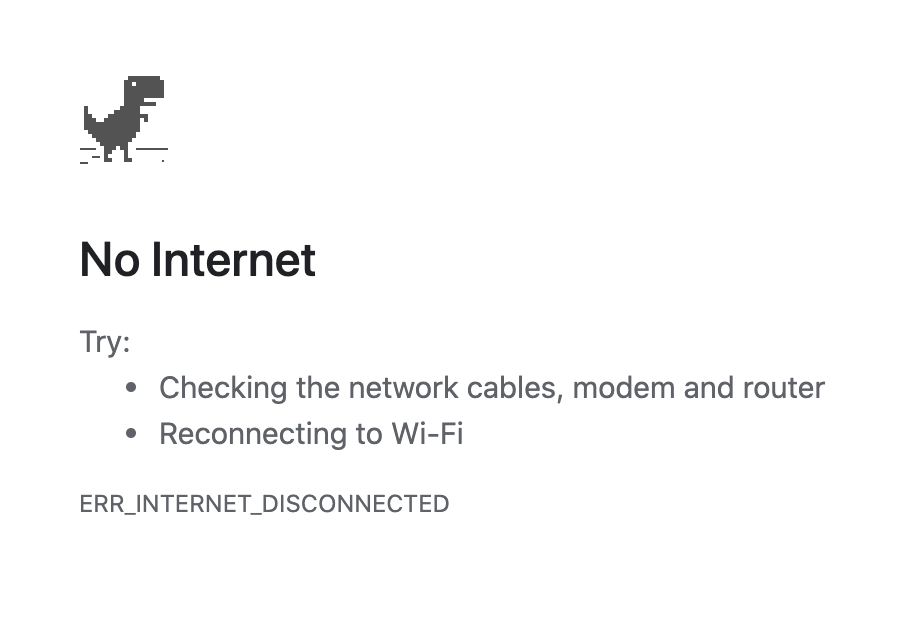
3. Turn the Wi-Fi off. You should see the Wi-Fi connection icon go red and the Ethernet connection will move to the top of the list. The gloves and the internet will now both work via the ethernet rather than your computer's Wi-Fi. If you notice Glover not connecting to your gloves, make sure your computer's Wi-Fi is off!
NOTE: This configuration is the most stable for performing in venues and/or live streaming for most setups. If you need to use your computer's Wi-Fi for other network connections, read the fine print below.
Configuring Your Gloves with the External Router
Now that your new router is ready, you will need to reconfigure your gloves to connect with it.
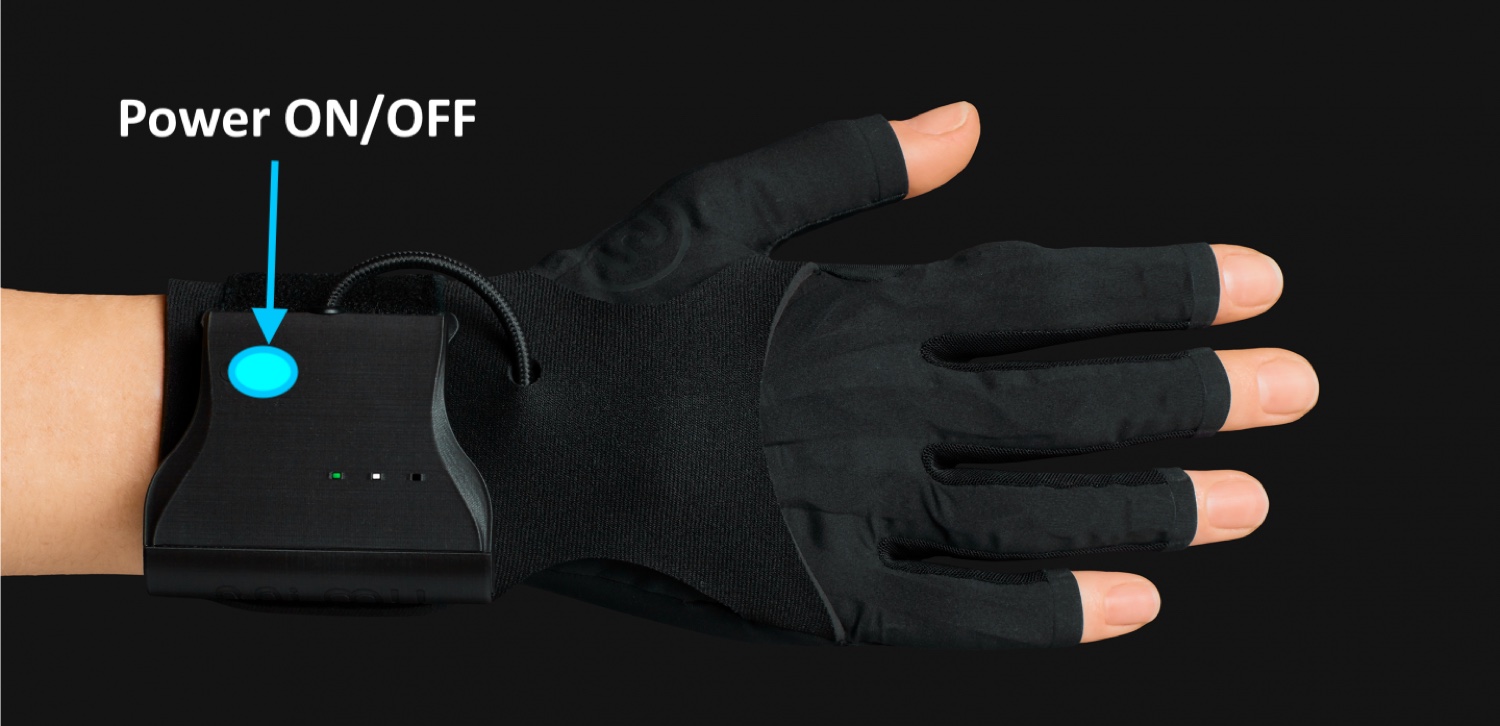
1. Plug one or both gloves into USB 3.0 ports on your laptop using the USB cables provided and power the glove(s) on.
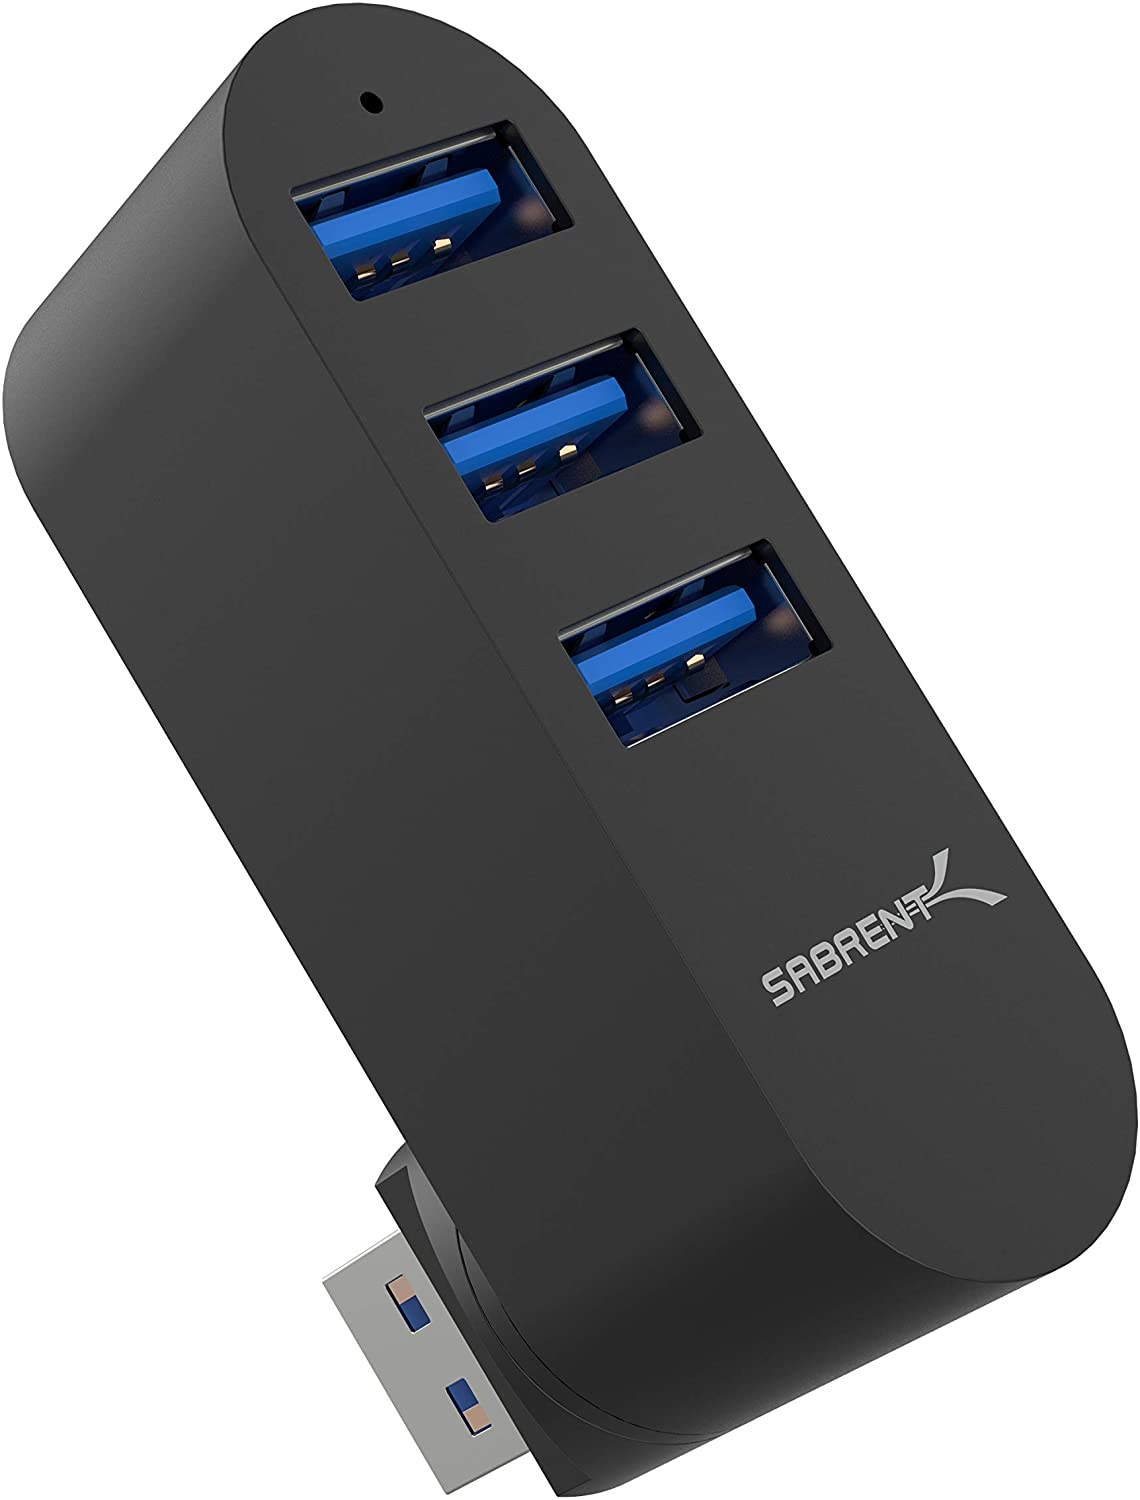
NOTE: This step requires at least one free USB port on your computer. The gloves can be configured together or one after the other. If all your USB ports are occupied, you will need to get a USB 3.0 Hub. We suggest this one, or another by the same company. You may also need an adapter to connect this USB Hub to USBC/Thunderbolt3.

2. Open a EMPTY Glover session by clicking on the Glover icon. Ensure you are using the latest version of Glover, available in the downloads section of your mimugloves.com profile.
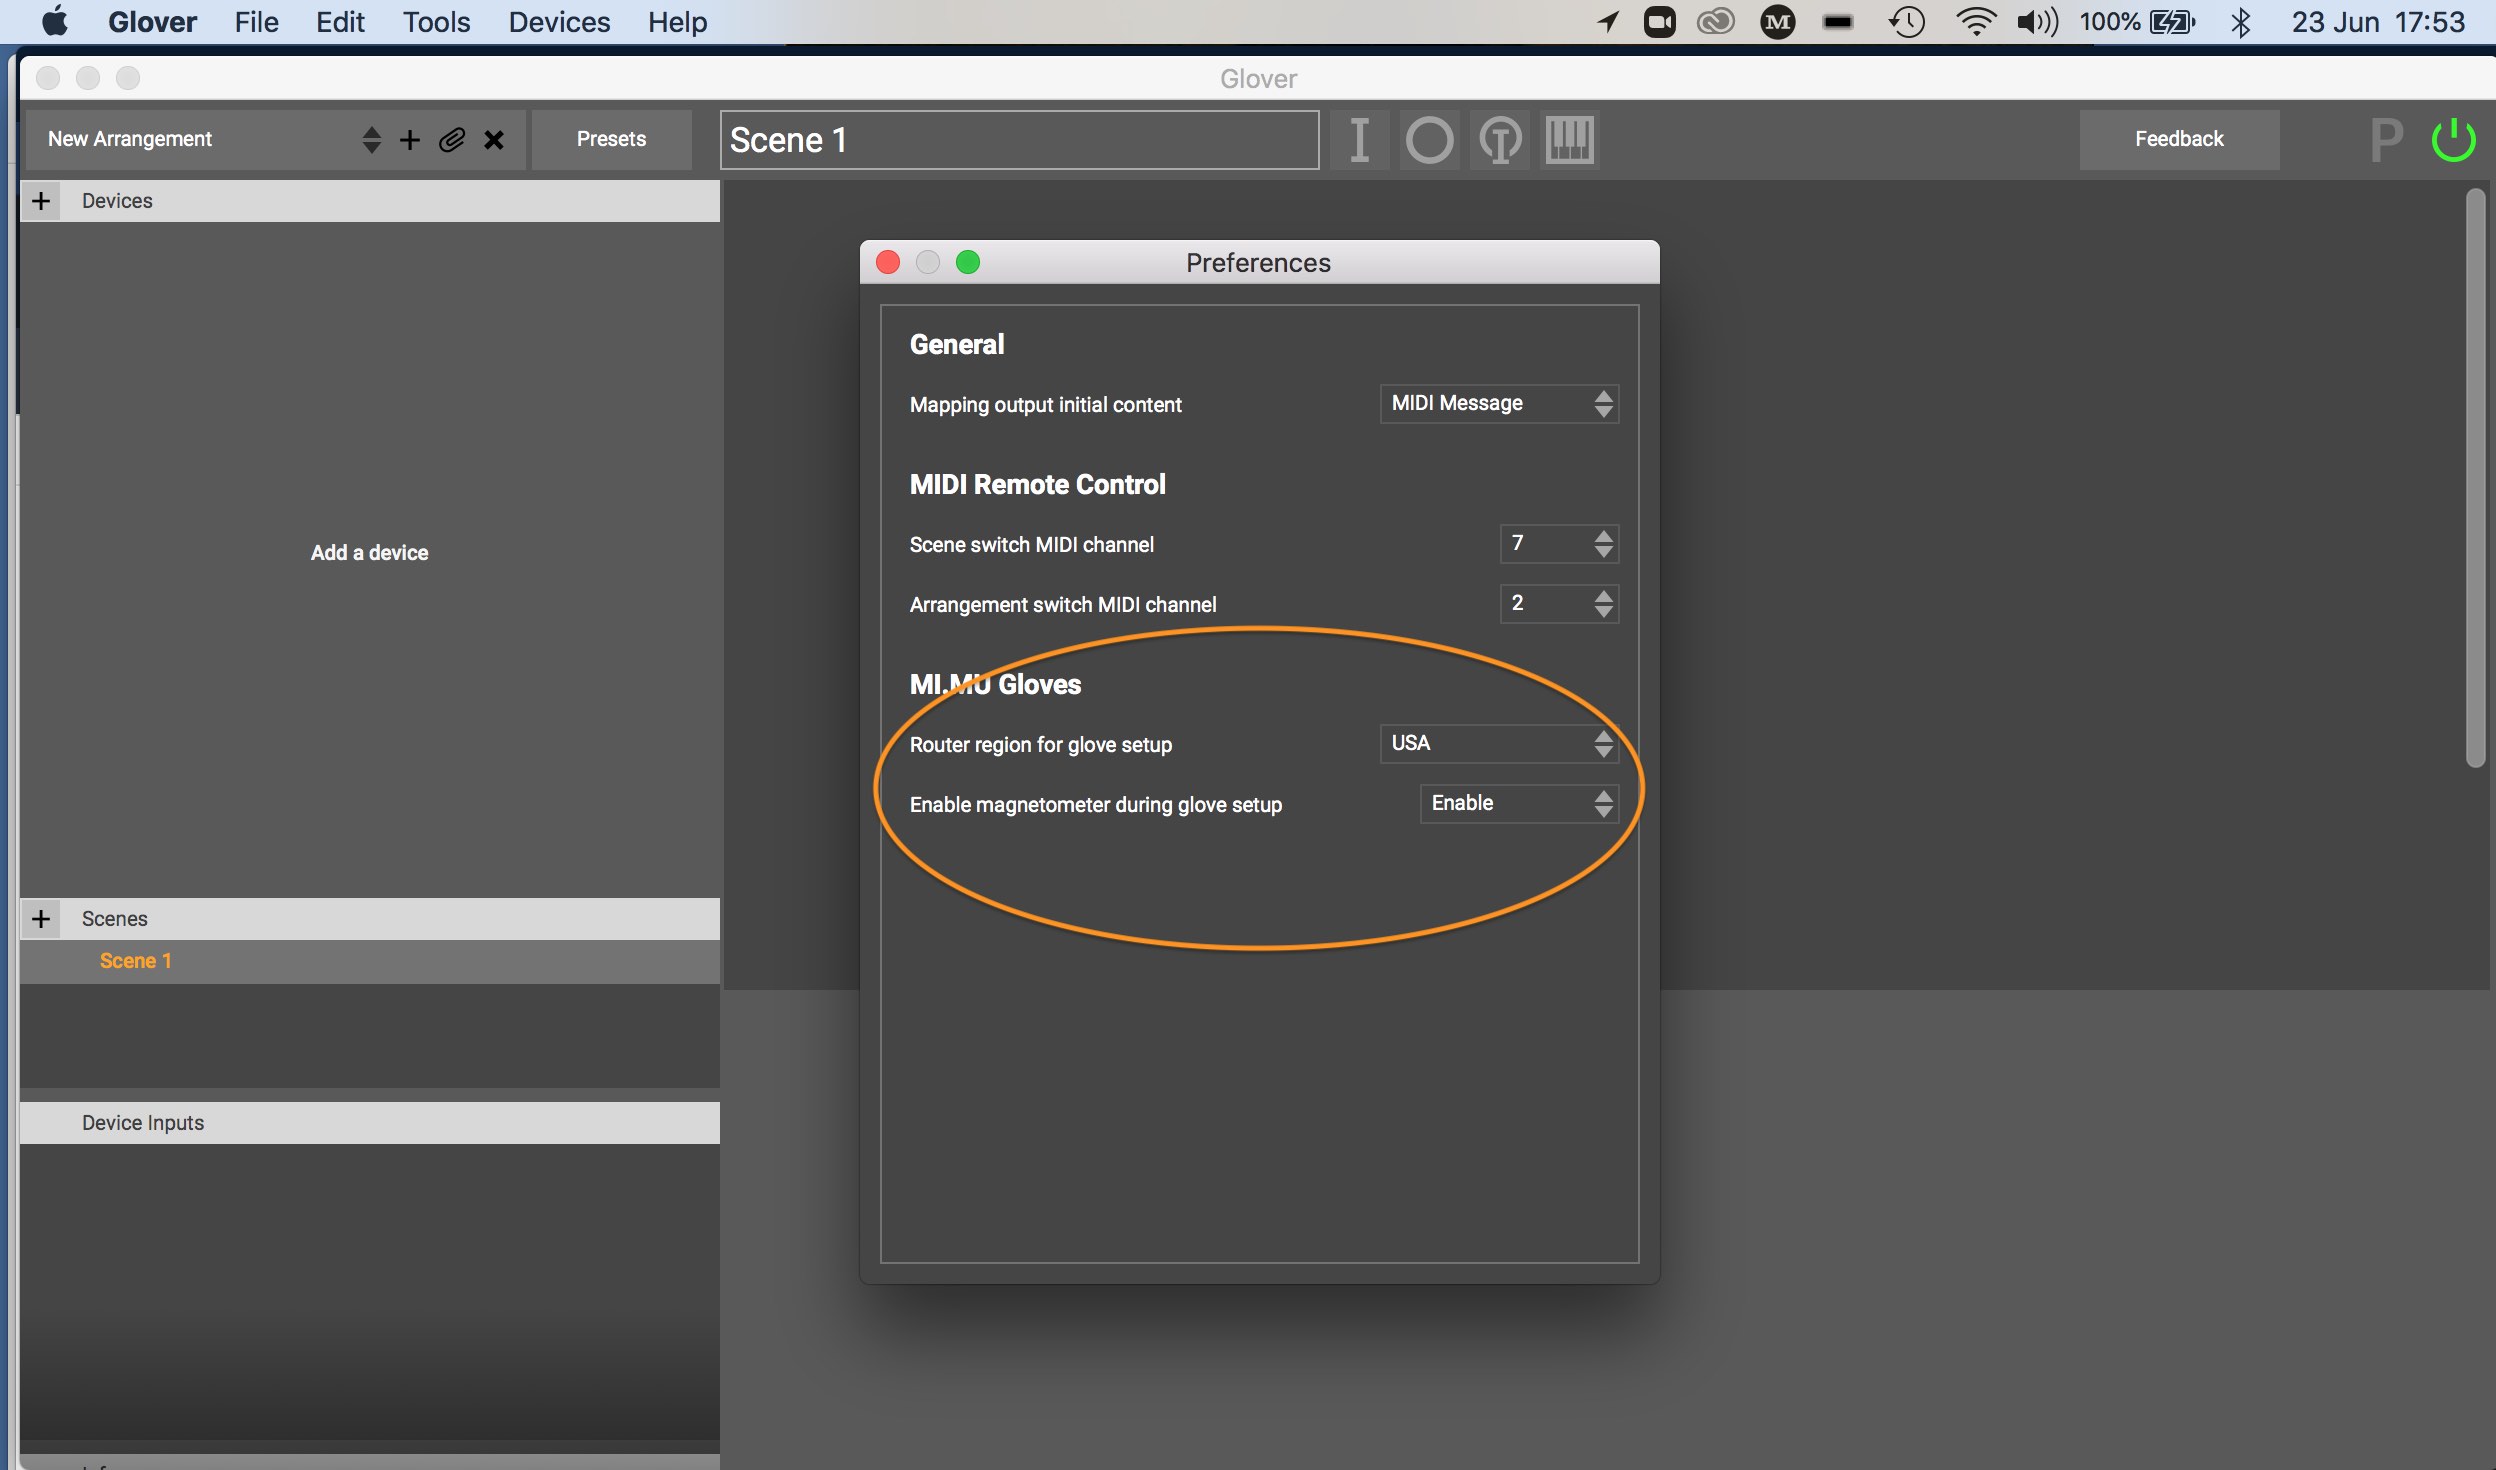
3. Check your Glover preferences to make sure you are configuring for the correct region and have the magnetometers enabled or disabled as desired
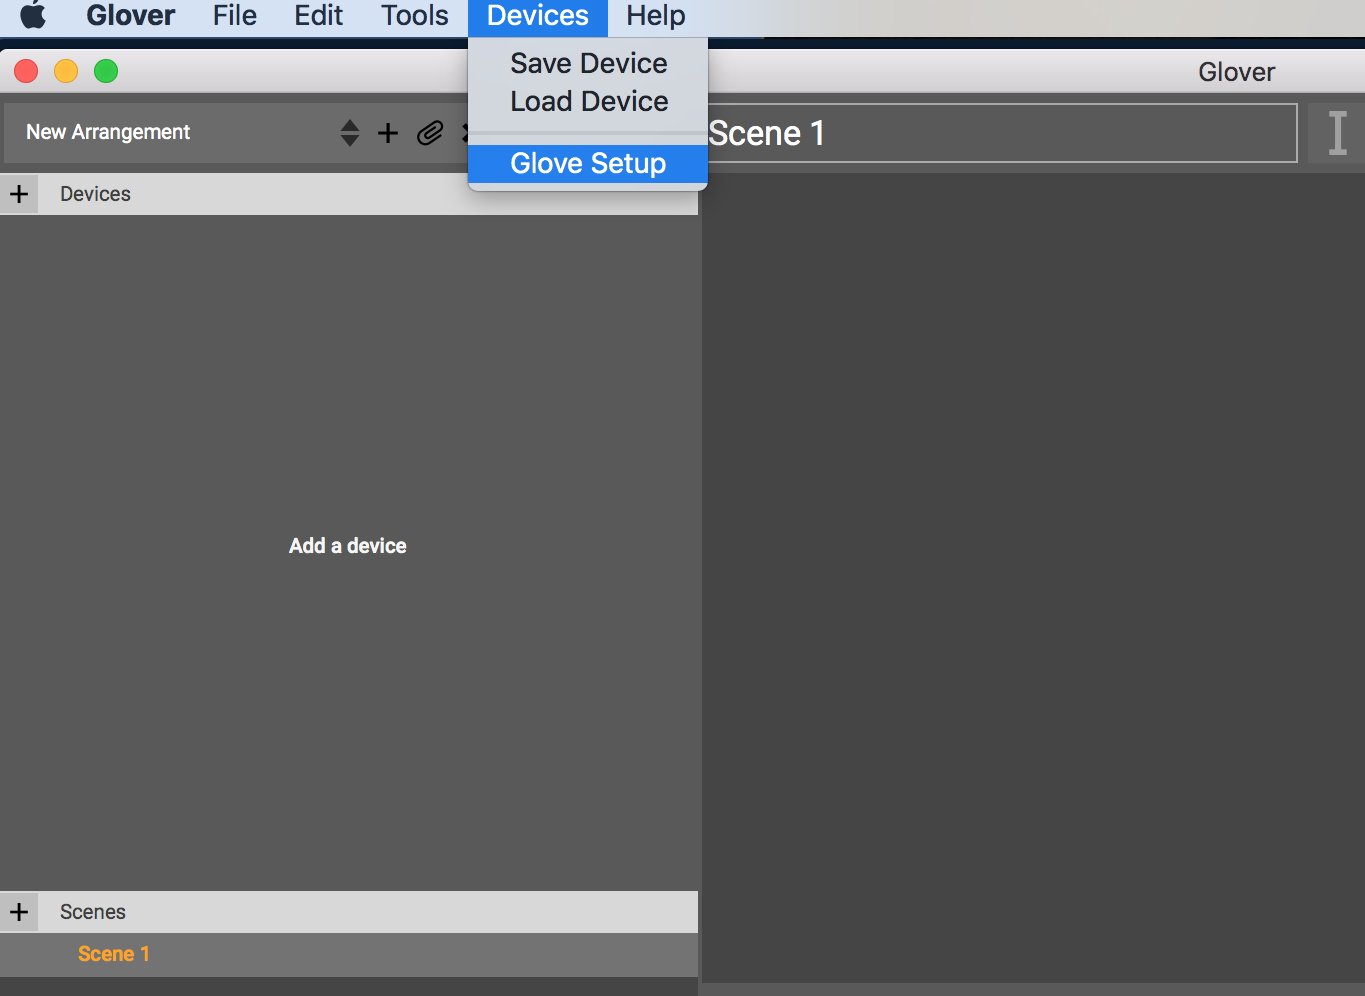
4. Go to Devices -> Glove Setup in Glover's toolbar
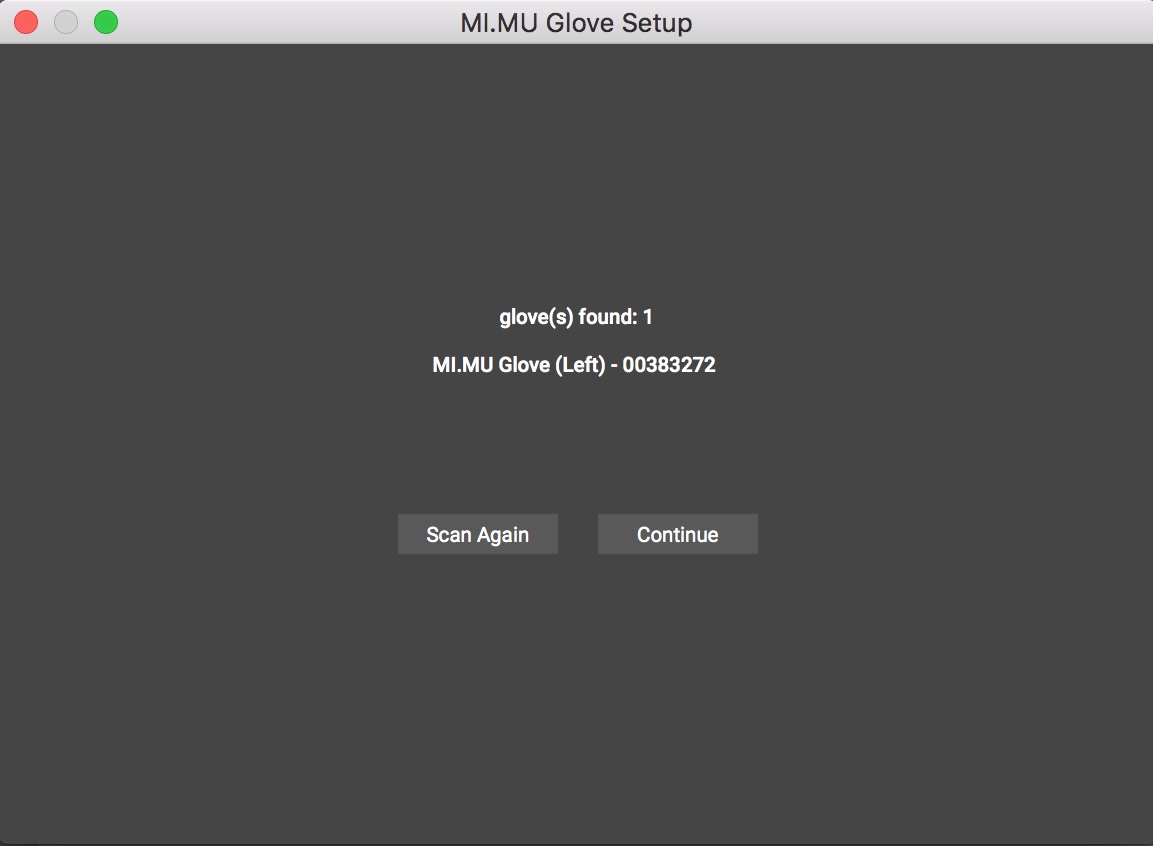
5. Make sure the Glover configuration recognizes all the gloves you have plugged in
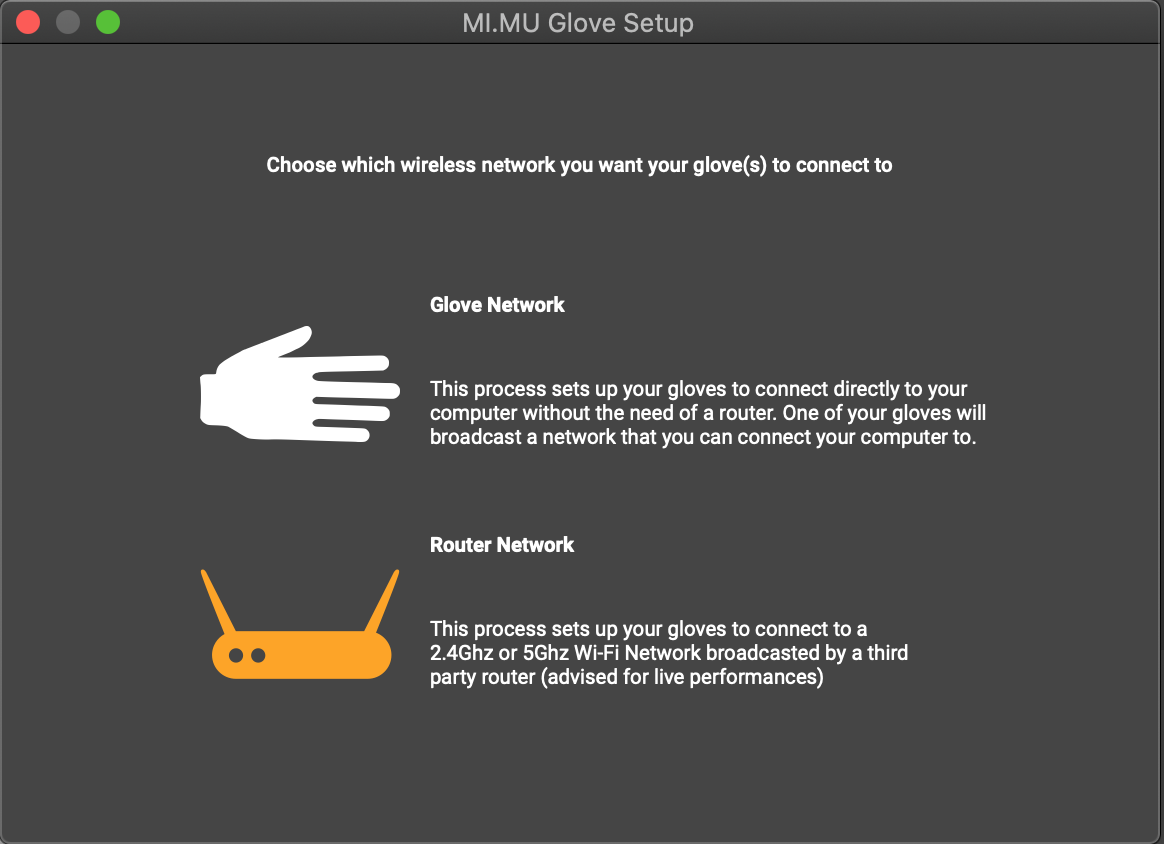
6. Follow the setup instructions, clicking OK through the steps. Choose "Router" when the network choice is presented. IMPORTANT: Ensure your gloves router's name and password are typed EXACTLY as you named it in Step 8c, including capital letters and spaces!
7. Watch the white light on your gloves' wrist housings. Each will turn solid white when it has successfully connected to the router. If a white light continues to blink and will not connect, go back to the beginning and try again, ensuring you have typed everything exactly correctly.
8. You can now disconnect your USB cables to use the gloves wirelessly, or continue to use them plugged in, as you wish. IMPORTANT: Power your gloves off and back on again to ensure they find your gloves router, indicated by the flashing white lights going solid.
9. Your gloves are ready to use, with your gloves router also acting as a range extender for the internet so you should be able to stream with no problems.
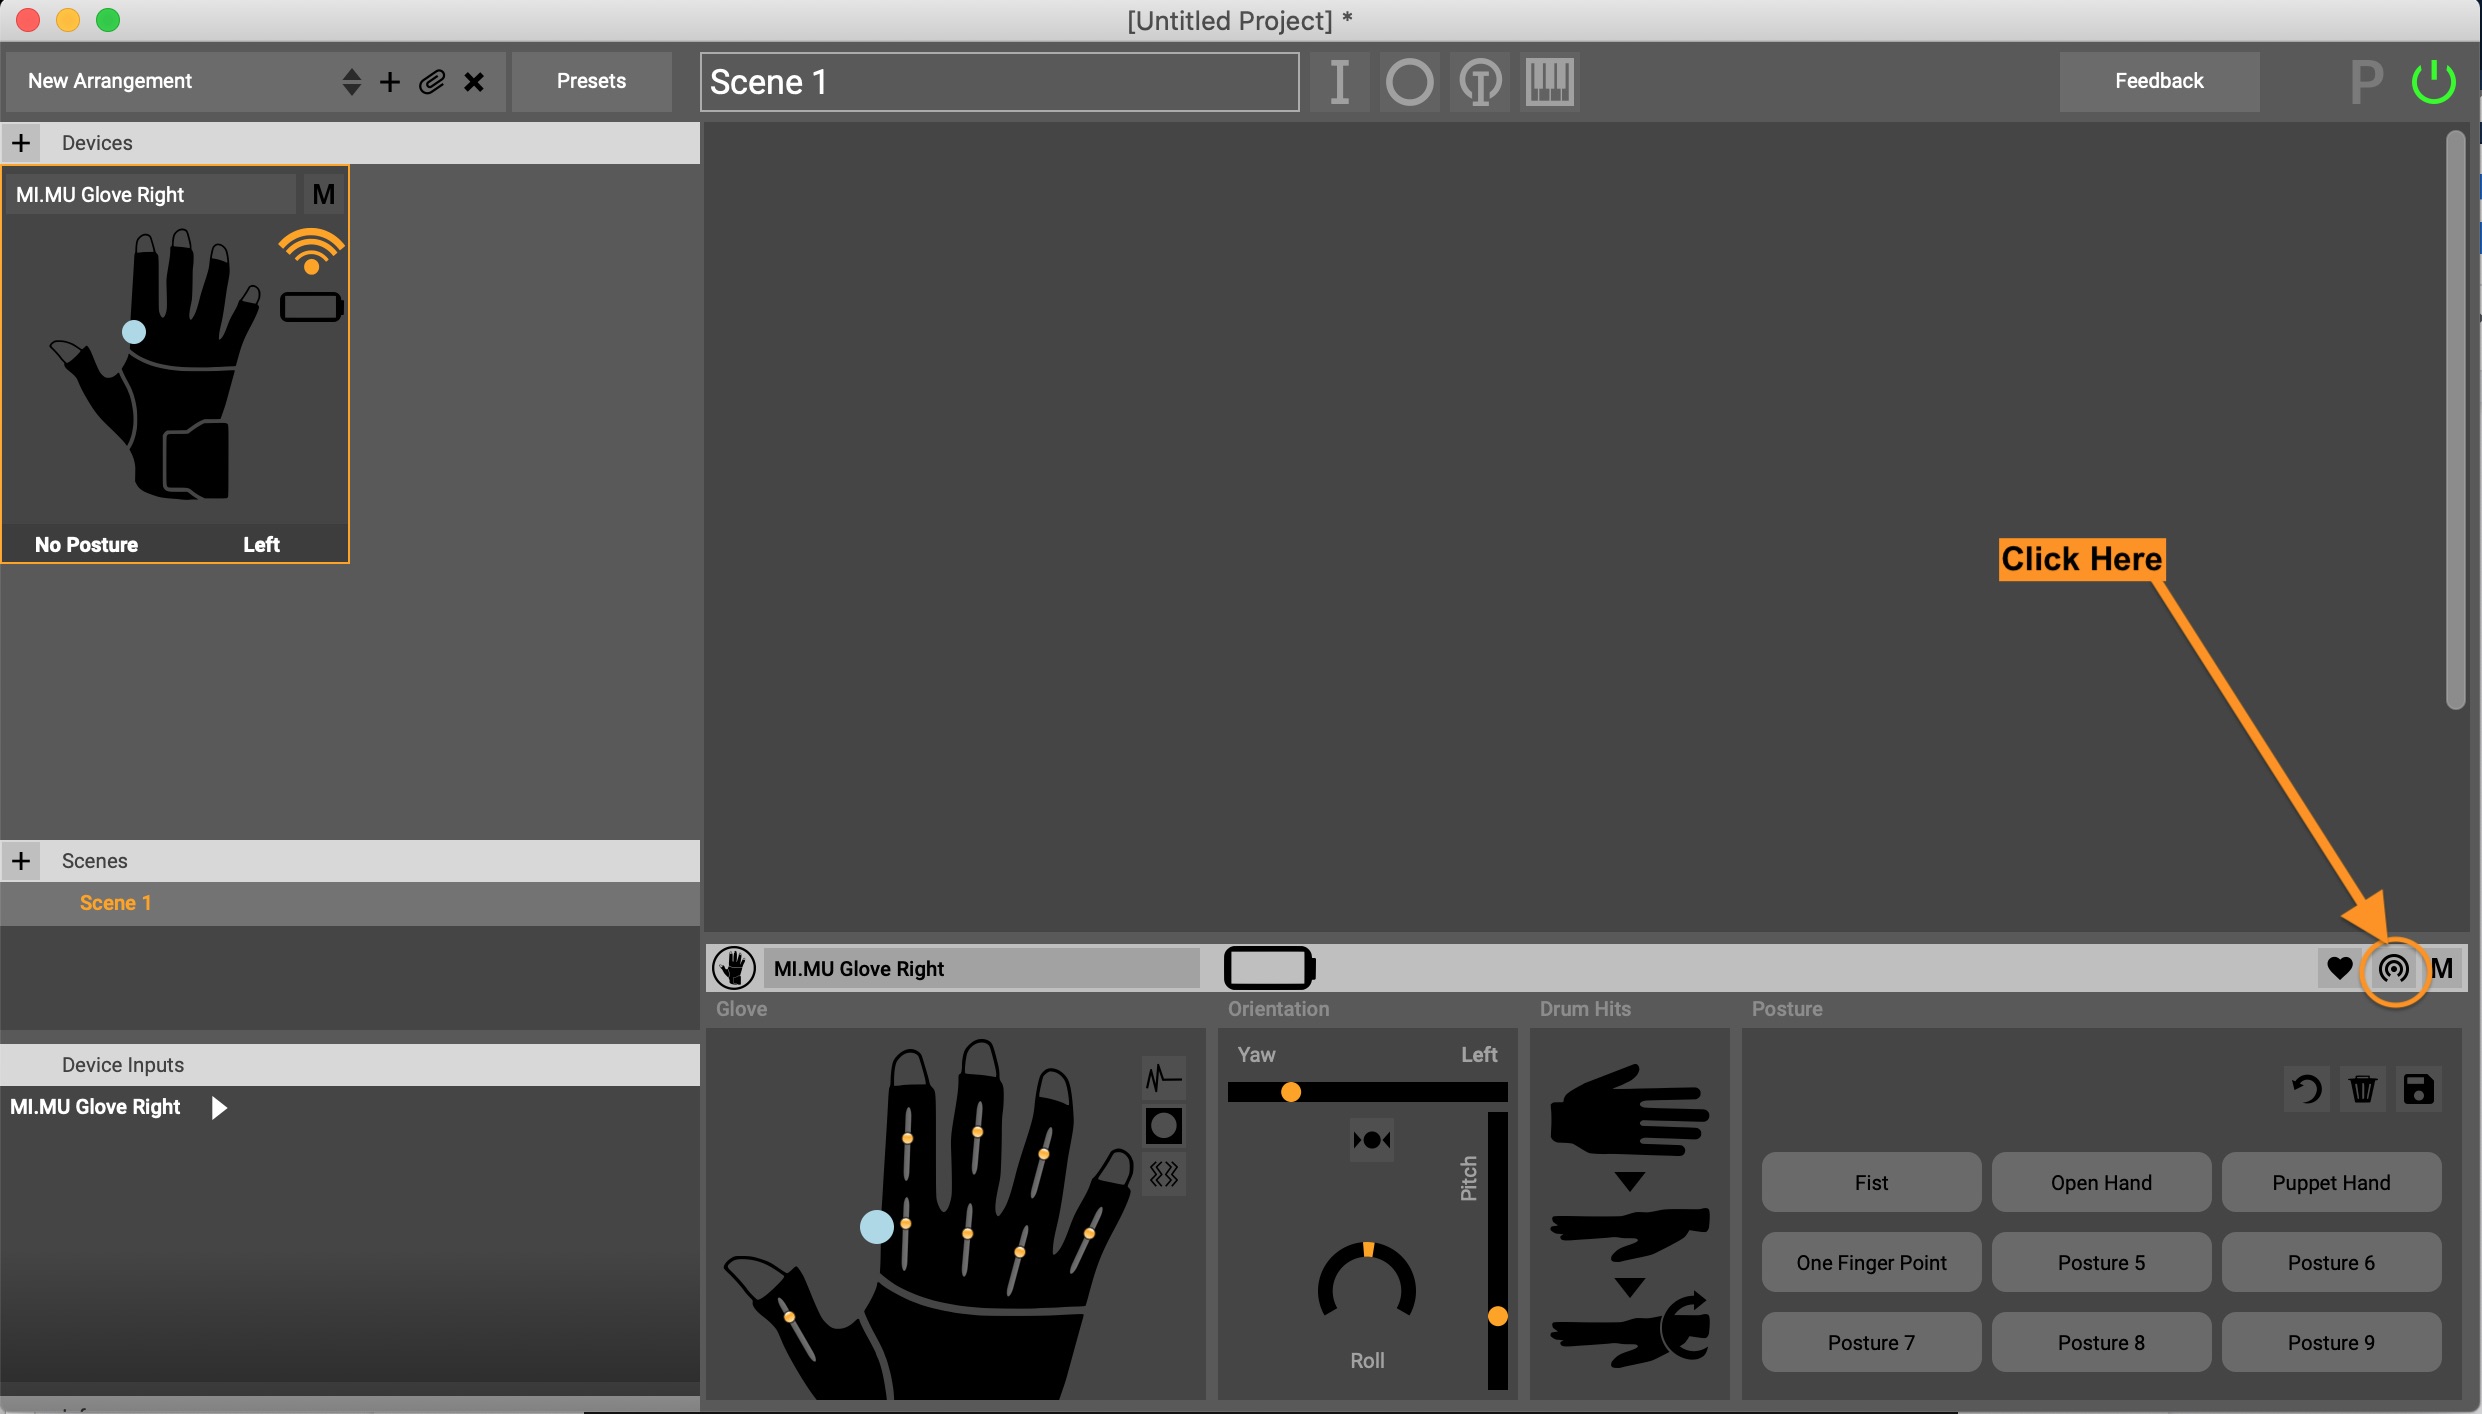
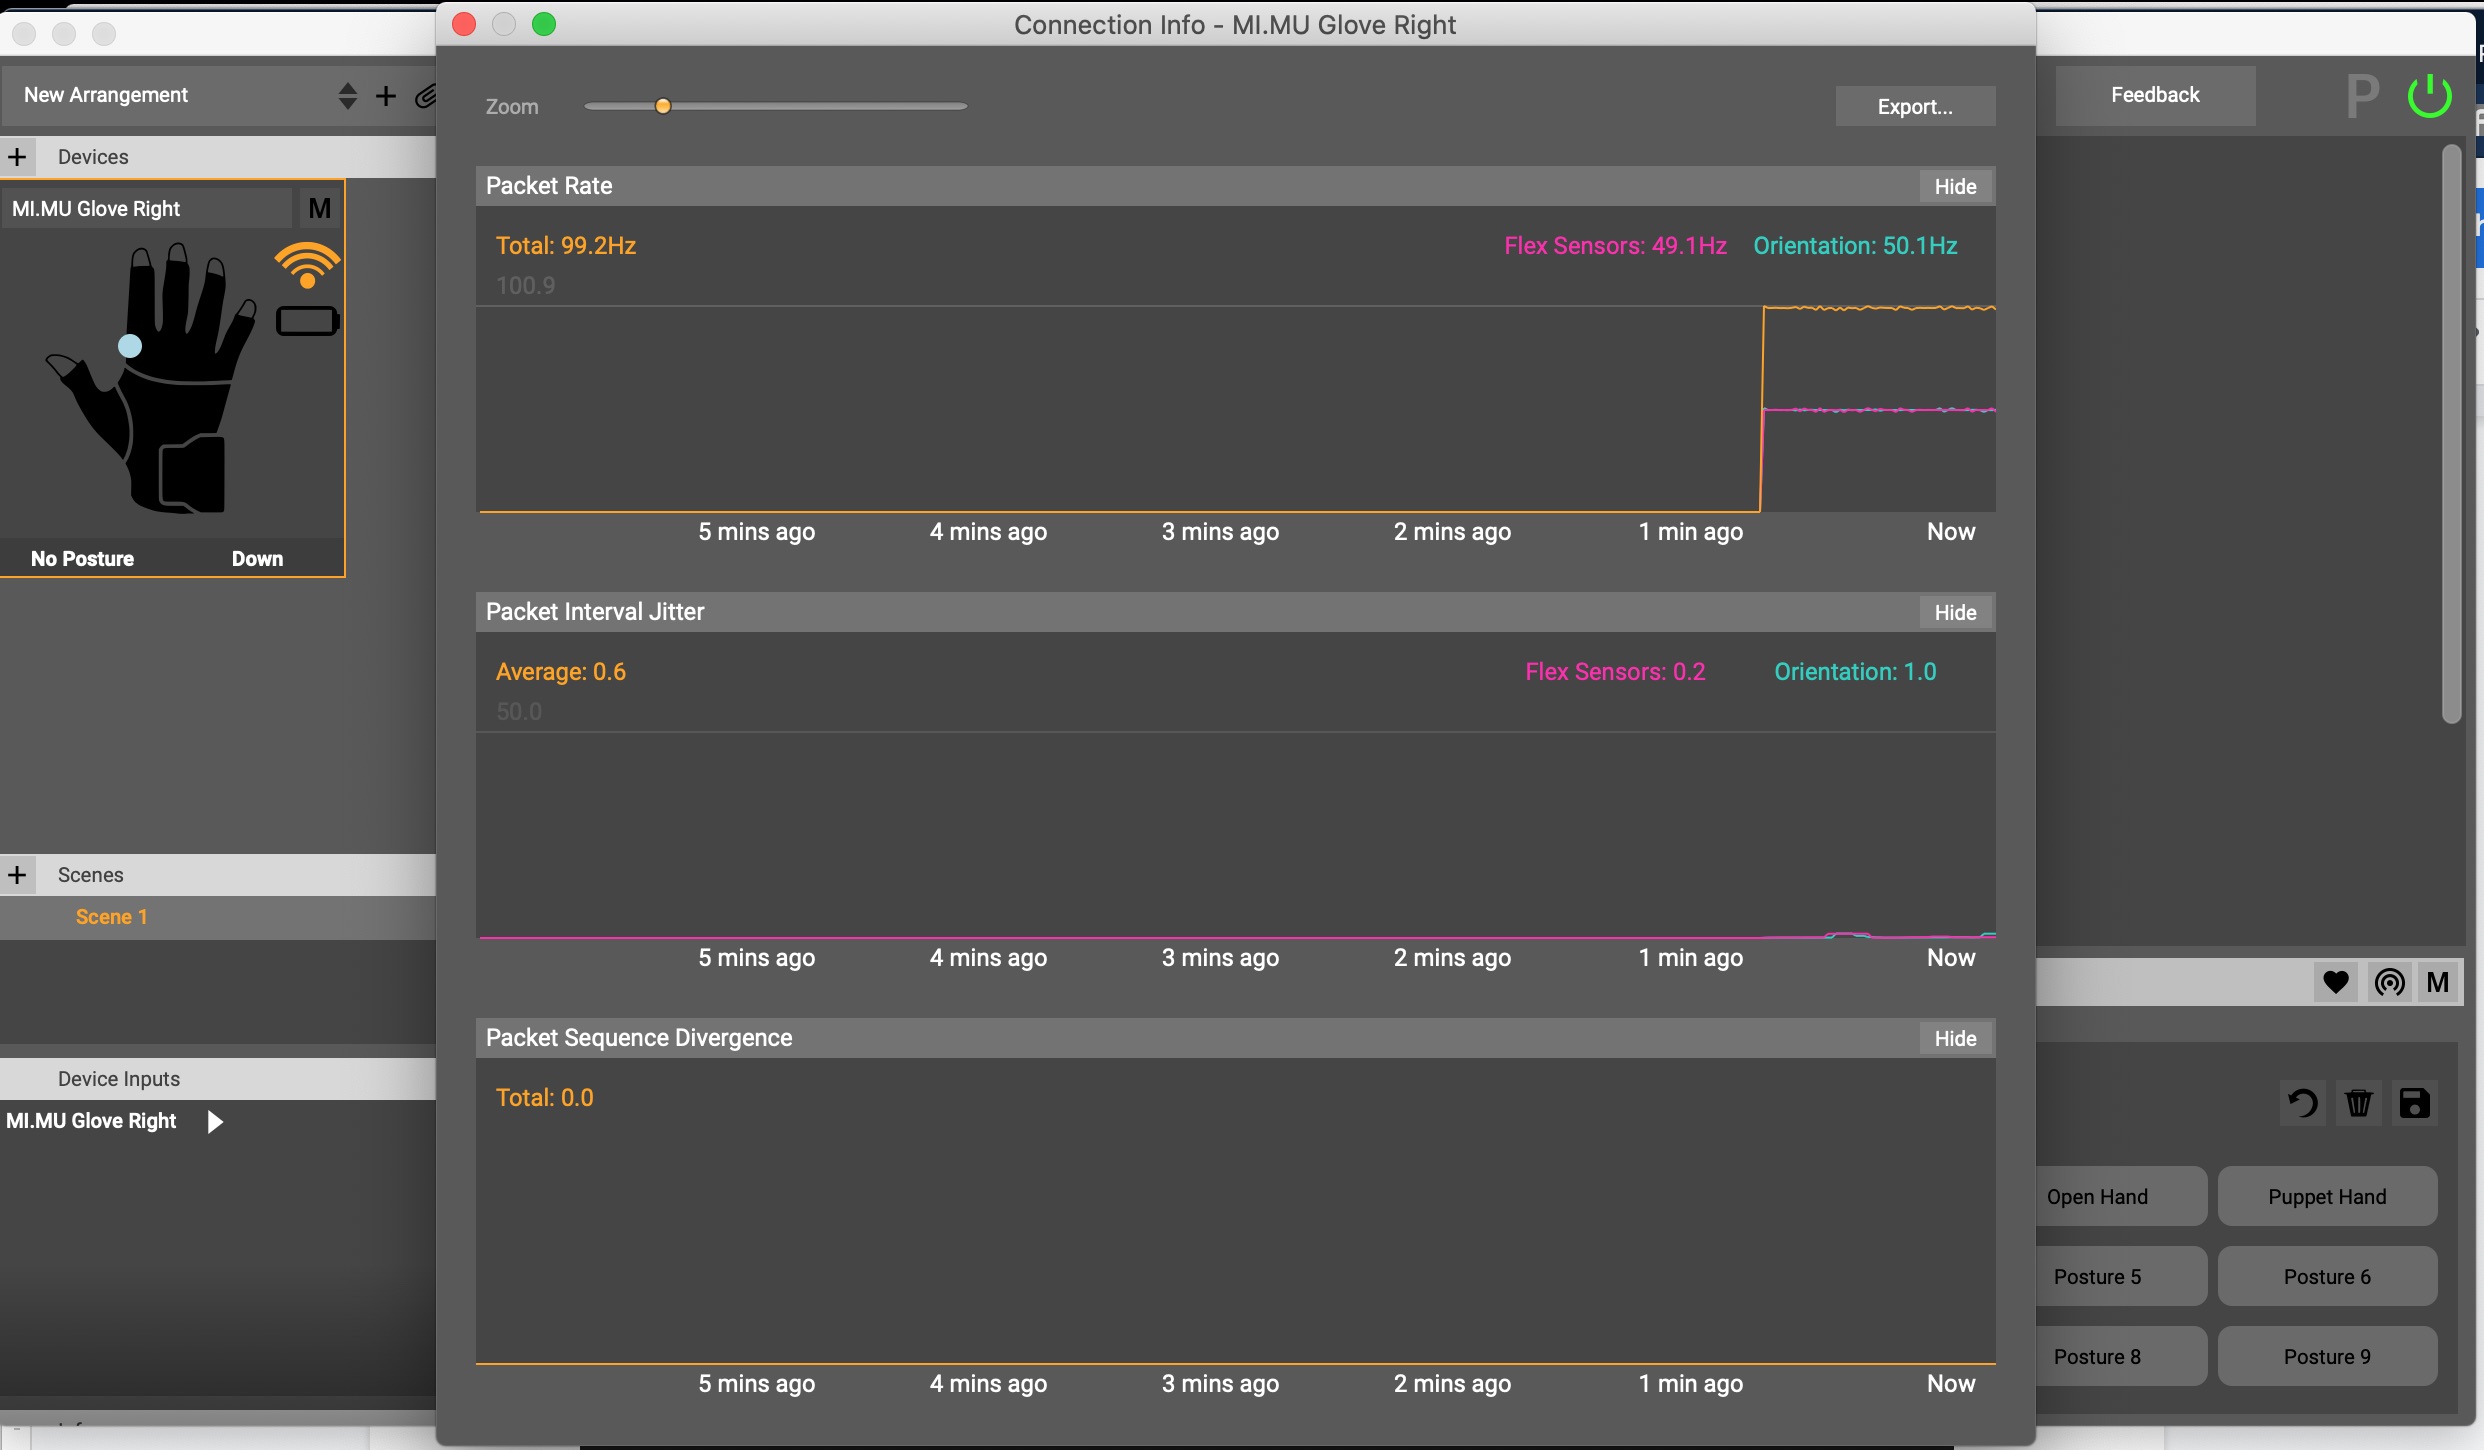
Give them a test in the Glover session by adding the glove devices in and checking that Glover connects to them. The 5GHz connection should be stable. You can check the connection stability by using the connectivity viewer inside Glover.
A Word About Setting Network Service Order
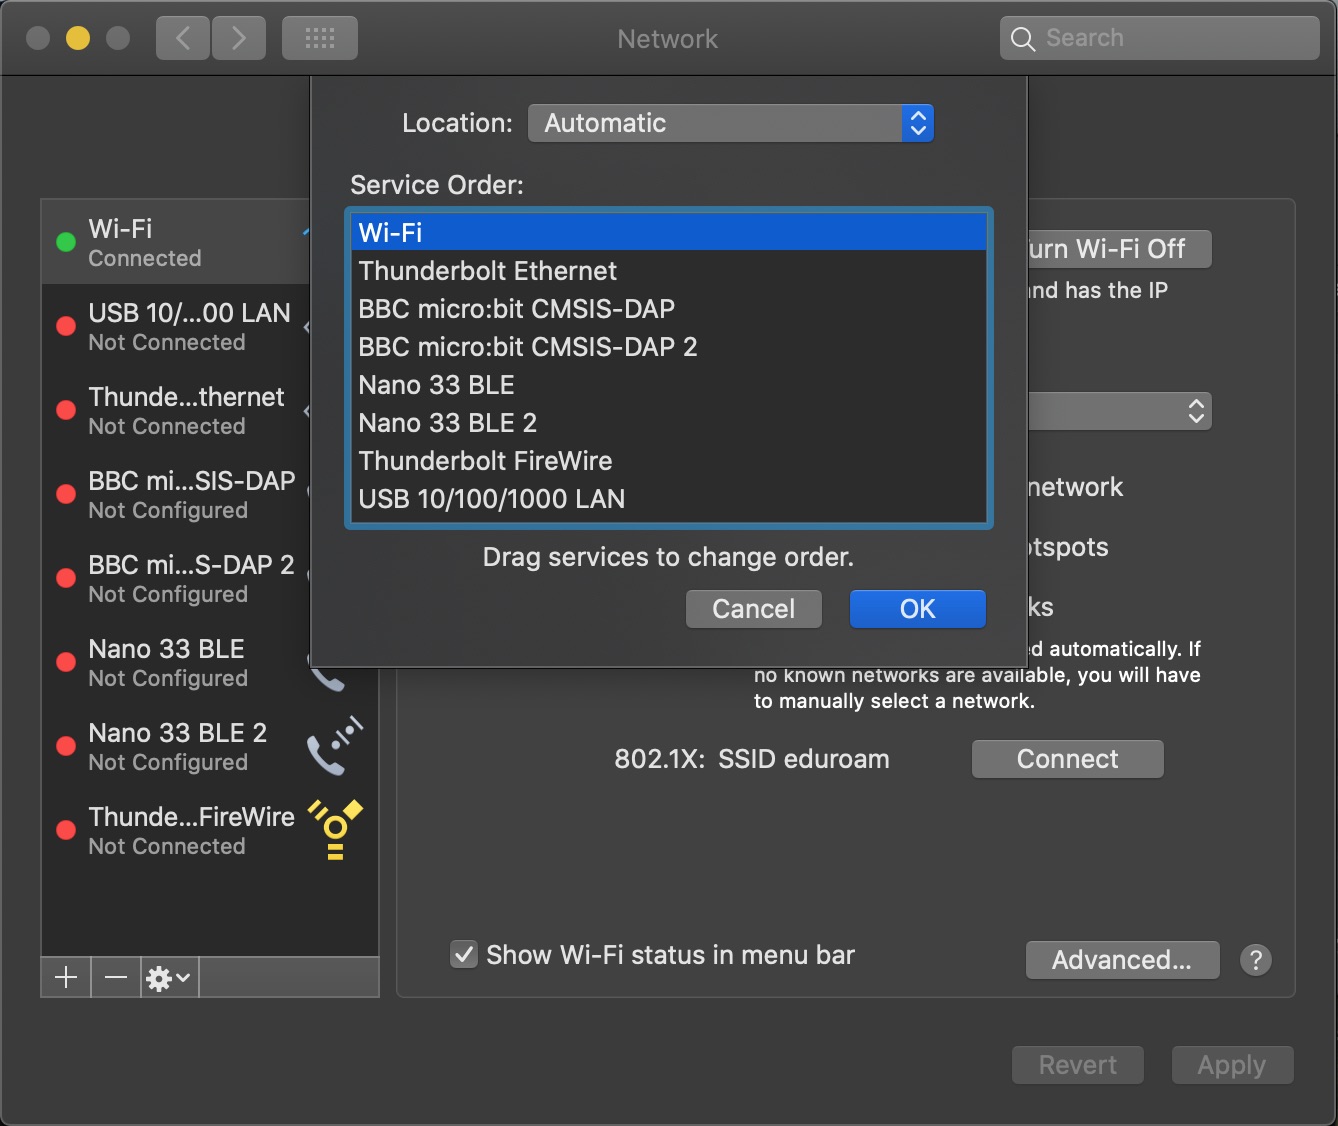
The "Set Service Order" at the bottom of your network settings screen comes heavily into play when attempting to use multiple networks simultaneously with the gloves (e.g. a gloves router and a separate internet router).
For Glover to communicate with the MiMU Gloves and Gliss, the network on which the glove traffic is incoming must be first in the service order if more than one network port is active.
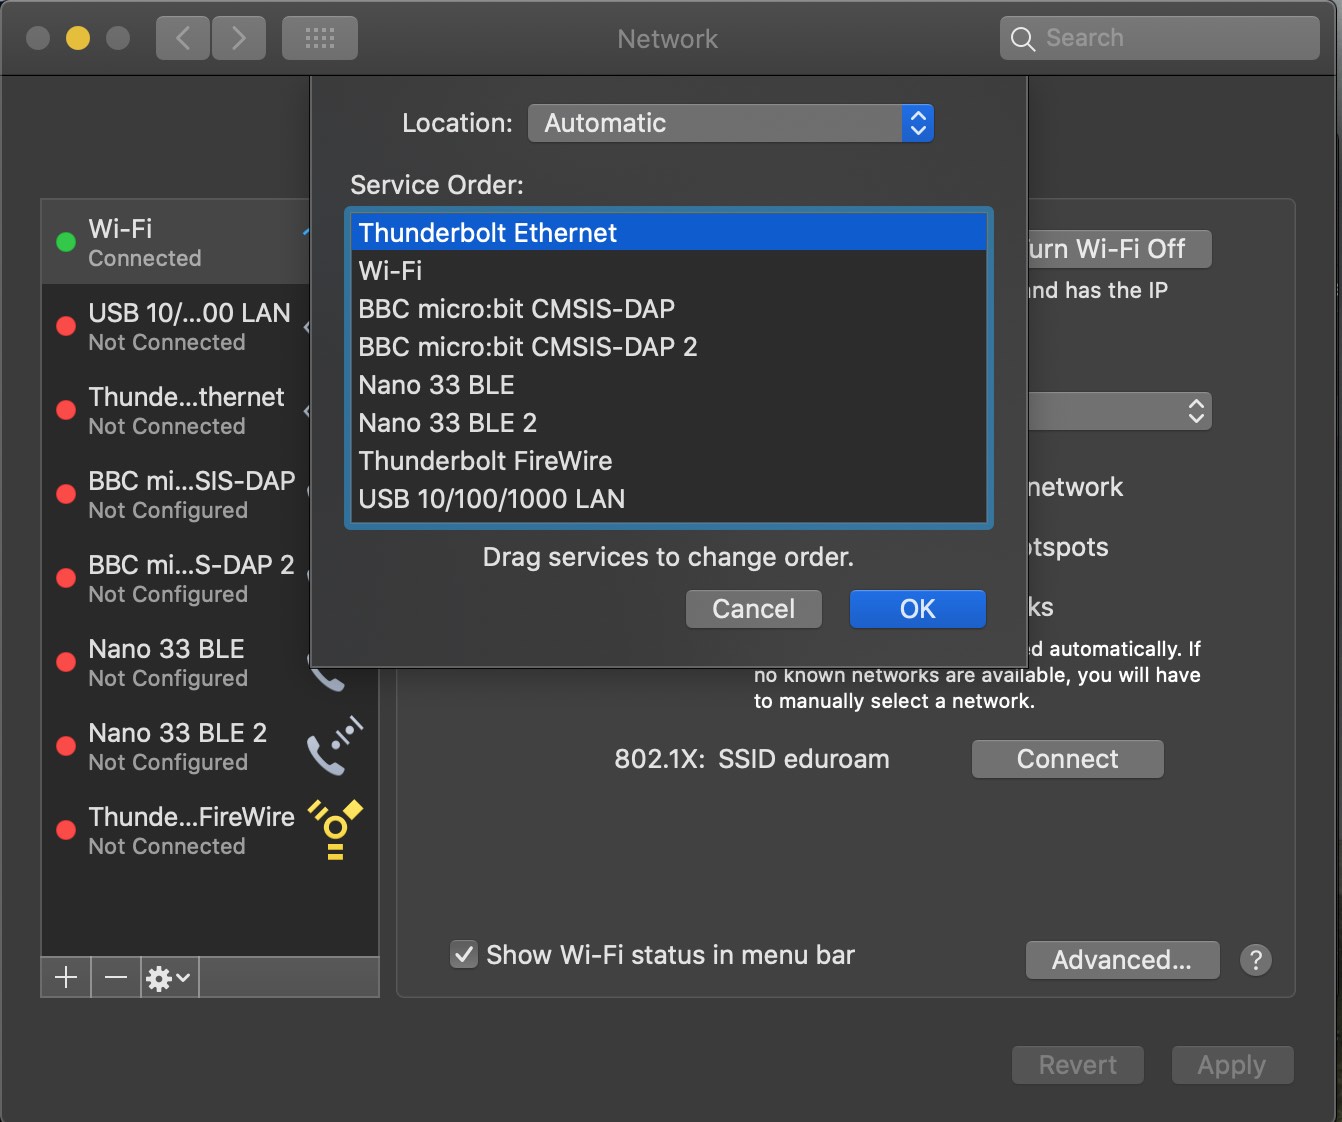
However, for a browser or networked application on the computer to see the internet, the internet network must be first in the service order.
This can create conflicts and if the service order is wrong, you will likely either have trouble connecting to the gloves or to the internet (or both).

5. This means if you are configuring the gloves as above with a dedicated external router, but wanting to use the internet on a different network, you will need to be very careful about the order in which you turn things on and connect them, as well as the order in which the networks appear in the "Set Service Order" settings. Connect the Gloves in Glover first, then change the service order to what you will need for internet.
As always, the MiMU team is available to help by emailing [email protected].