Devices
Device Setup
In Glover you can map gestural or other data from devices - such as the MiMU Gloves or Leap Motion - to musical messages like MIDI or OSC. You can use multiple devices simultaneously and combine the data in your mappings.
Adding a New Device
To add a device, click on ‘+’ button left of the word 'Devices' in the sidepanel, and choose your device from the drop down menu.
Currently Glover supports the following devices:
- MiMU Gloves
- MiMU Gloves Pioneer version (2014-2019)
- MiMU Gliss (iOS)
- Leap Motion
- BBC Micro:bit
- OSC Device
Connecting a device
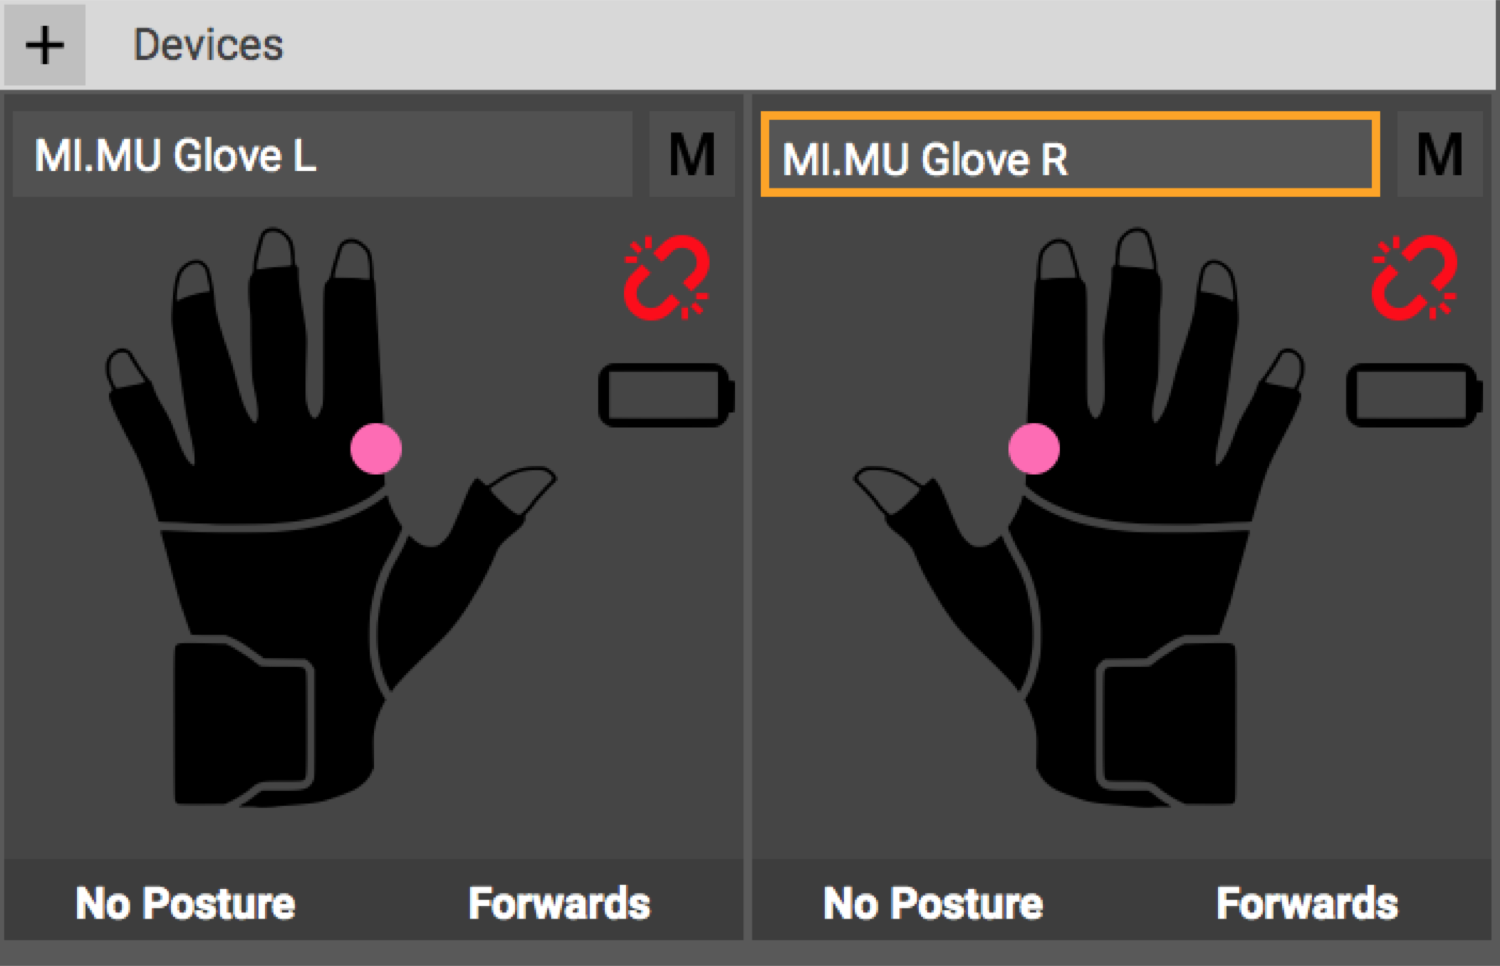
The connection process is different for each device and is described in the documentation for that specific device. In general, for a Wi-Fi enabled device like MiMU Gloves or Gliss, make sure your device and computer are connected to the same Wi-Fi Network and click the connection icon in the top right of the device pane. With USC connected devices like Leap Motion, you should only need to connect it to your computer and hold your hand above it to see it's tracking.
Naming Your Device
You can name your device something other than the default name it is given. For example, a new MiMU Glove will just be called “MiMU Glove Left” or "MiMU Glove Right" by default. To change it, click on the device in the device pane and type the name either into the title in the device pane or in the inspector window next to the glove icon. It is often helpful to include identifying information in your device names.
Device Inspector
When you click on a device in the devices panel, this will open the Inspector for that device at the bottom of the window. In the Inspector you can see more detailed information about the current inputs of your device and train postures. The Inspector looks a bit different for each device, as the available panels depend on the type of inputs it has.
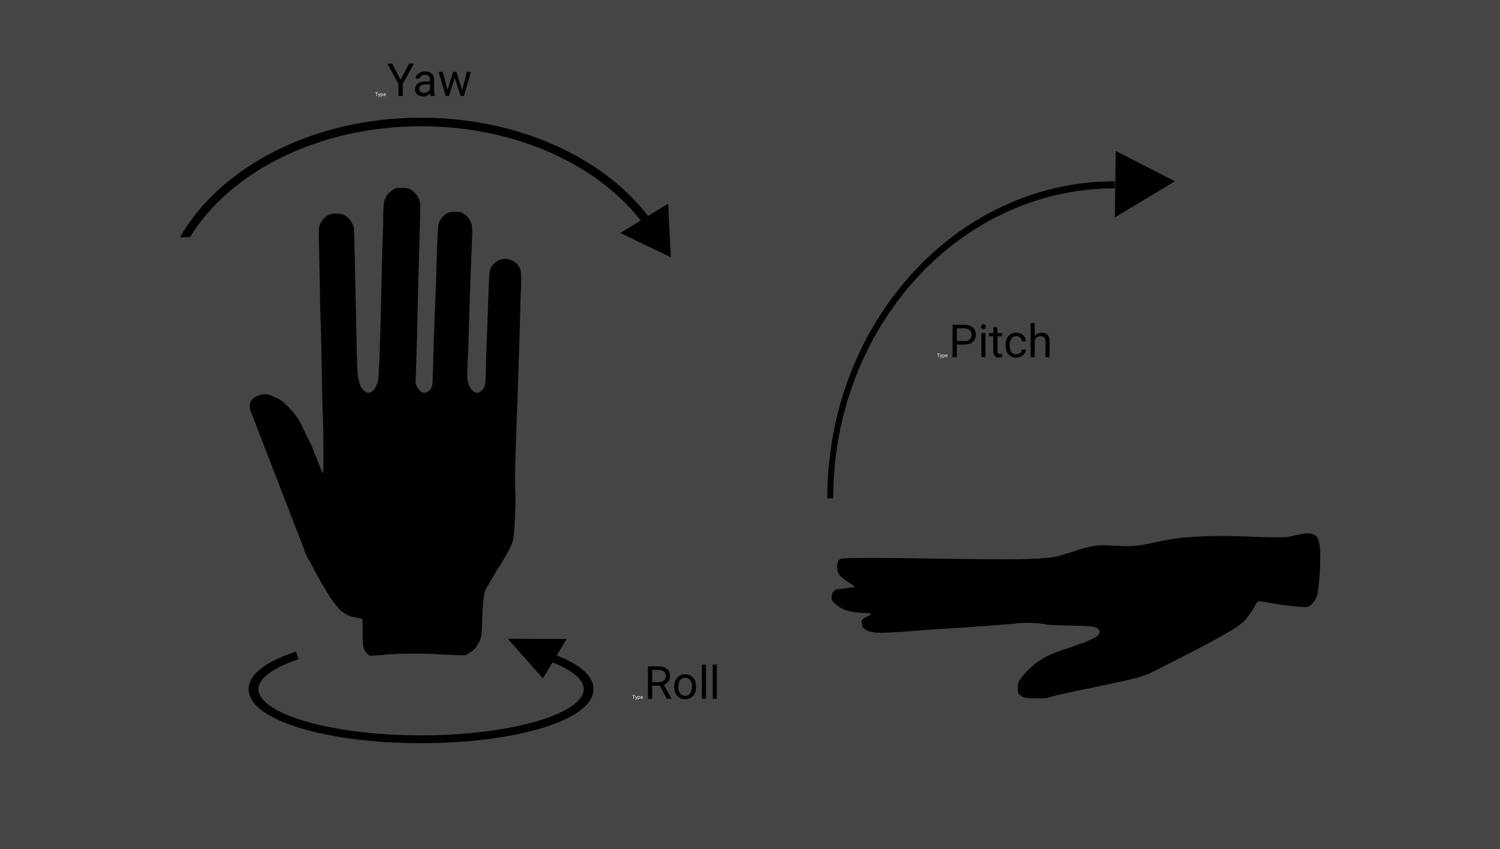
Orientation Panel
Most devices will have an Orientation panel in which you can view the real-time movement inputs of you device. These movements have three components: Pitch, Yaw and Roll.
- Directions The orientation movements are also divided into three to six directions depending on the device, these are static positions that can be used as inputs. The current direction is shown in the top right of the Orientation panel and at the bottom of the device pane.
- Setting Forwards For Glover to determine the correct horizontal orientation (Yaw / Left / Right / Forward / Backward), you must give it a reference point. Set "Forwards" by clicking the "Set Forward" icon
- Posture Training and Recognition Some devices like the Gloves and Leap Motion will have the capability for posture training and recognition.
![]()

Note: Even when you Set Forward the horizontal direction (e.g. Left, Right etc.) might drift, especially if you are near metal or magnets. It is recommended to Set Forwards regularly when making use of Directions and/or Yaw if it is critical for them to be precise and reliable. You will need to experiment to determine how regularly you need to reset it - drift could require resetting anywhere from never to every few minutes.
- Training
Glover can be trained to recognise a device-dependent finite number different hand postures, like ‘Fist’ or
‘Open Hand’. The gloves can recognize nine postures, which are associated with any given Glover session.
Postures are saved with the device.
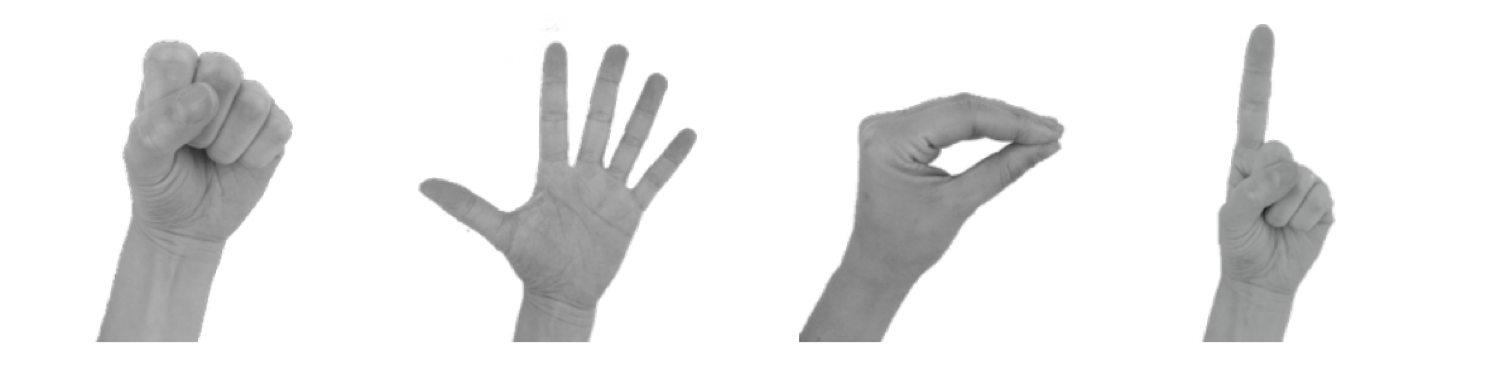
In the training panel on the right hand side of the screen there are nine labels. Four of these are pre-labeled “Fist”, “Open Hand”, “Puppet Hand” and “One Finger Point.” You can rename a posture by right-clicking (or Ctrl-clicking) on a posture and selecting “Rename posture.” Postures can be renamed at any time and new names will propagate immediately throughout all your mappings.
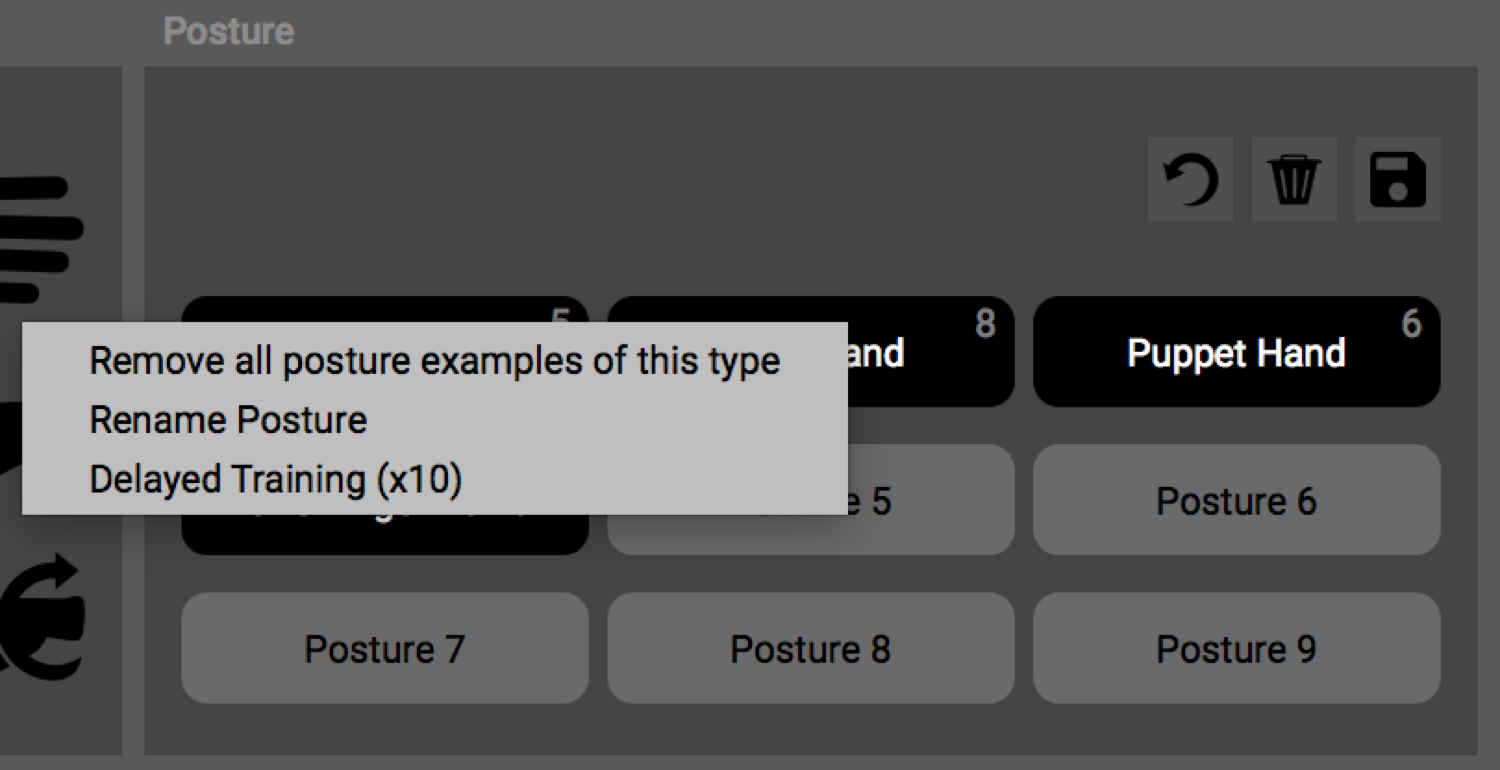
Train a posture by clicking the label of the posture you want to train while making the posture with your hand. Click a few times to get several examples of the posture. You can make the posture slightly different each time you click to get a varied set of examples (you might not always make the posture exactly the same). One this has been done click the save icon (), and your postures will now be saved. Train up to nine postures per device.
Note: From the Devices menu at the top of the window, devices including their trained postures can be saved to and loaded from a file on your laptop to reduce training time or to use the same postures across many different sessions.
- Posture Recognition For the best posture recognition it is recommended to train only a small number of different postures. But if you do want to use all 9 posture options, try to choose postures that are as different from each other as possible. For example, the difference between “Fist” and “Open Hand” will be recognised more accurately than “Straight One Finger Point” and “Slightly Bent One Finger Point”.
Device Inputs
The inputs available to you for a device can be seen by clicking on that device in the Device Inputs pane in the sidebar. The available inputs are listed in nested menus.- Movements (pink) These inputs are found for example in the Orientation section of the inputs and represent the continuous movements like Pitch, Yaw and Roll.
- Events (blue) An event is an instantenous occurance - like a drum hit, or a wrist flick. Events are blue.
- Qualifiers (teal) Qualifiers can be thought of as "states". They can be framed as a yes or no question, such as "Is my arm pointed up?" or "Am I making a fist?". These types of inputs are useful as both triggers or as ways of distinguishing movements from each other. When used in the Glover interface on their own, they behave like Events. When combined with another event or movement, their state is used to 'qualify' whether that input is active. For example, the posture 'Fist' is a qualifier. When it is combined with the movement 'roll' (as in the roll of your wrist), the movement value only sends when you are making a fist.