MiMU Gloves Overview
What's in a glove?
MiMU Gloves are a fusion of textiles and electronics with a complex anatomy. This section gives you a tour of the textiles, input sensors and measurements, and the glove's visual and haptic feedback.
Textiles
The textile of the MiMU glove is optimised for music making! Heres how:
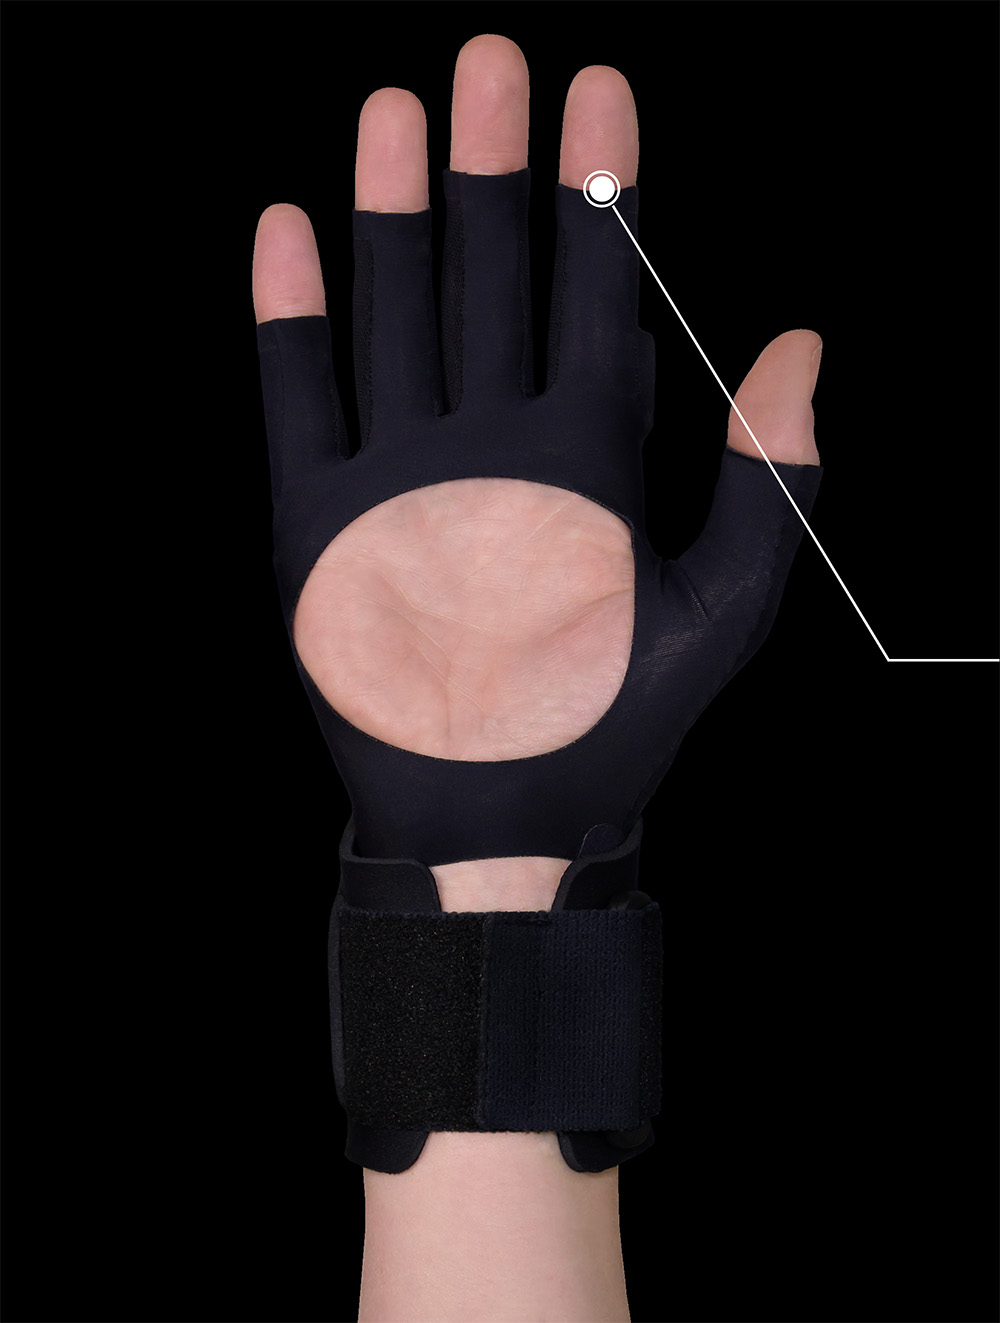
- Open fingertips / palms for unrestricted and easy use with other instruments, trackpads, keyboards, and touch screens
- Designed for aesthetics and comfort using thin, stretchy, breathable fabrics that are also washable!
- Pattern and sewing technology designed for robustness and resistance to wear and tear
Glove Sensor Inputs
The gloves use measurements from flex sensors in the fingers and an Inertial Measurement Unit (IMU) in the wrists. These raw measurements are processed through Glover's algorithms to provide a suite of finger and arm position, movement, and acceleration data available to you for mapping inputs.Flex Sensors
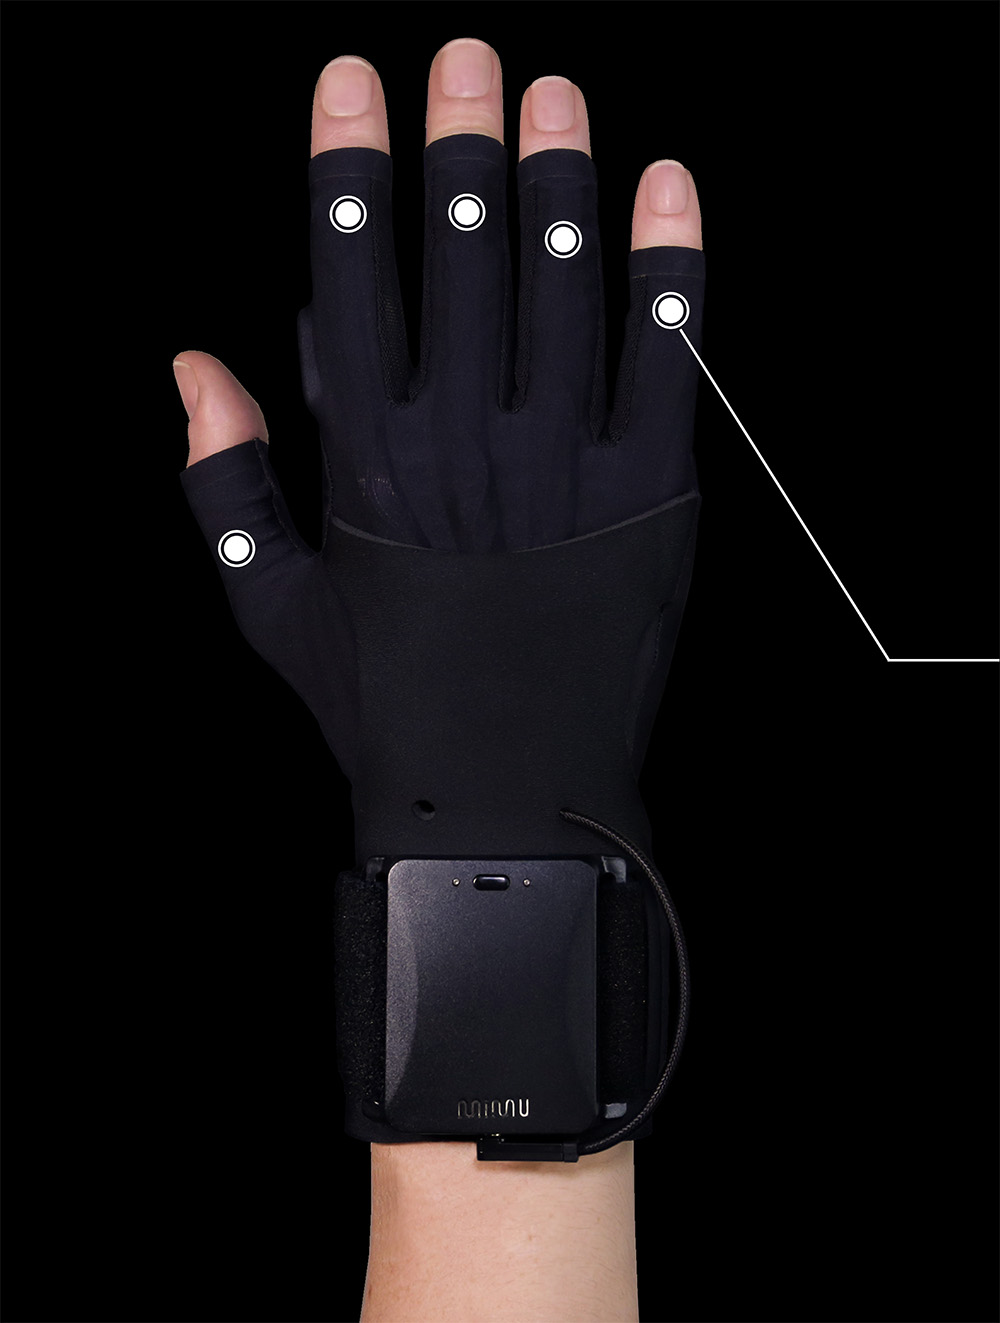
The gloves each contain eight flex sensors, which measure the bend of the fingers. It’s the measured flex from these eight sensors that is the input for the posture recognition in Glover.
Your pinkie and thumb have only a single flex sensor on them, while all other fingers have two flex sensors each. For fingers that have two sensors in them, the one closest to the fingertip is called "Distal" (think of it as "distant" from your body), and the one closest to your wrist is called "Proximal" (remember it as in close proximity to your body). You will need to know these names if you want to map individual finger bend.
Two kinds of finger flex are available as movement inputs using the flex sensor data:
Individual Finger Flex
Eight sensors are available for use:- 1. Thumb
- 2. Index Proximal - the main knuckle of the index finger closest to the hand
- 3. Index Distal - the middle knuckle of the index finger halfway down the finger
- 4. Middle Proximal - the main knuckle of the middle finger closest to the hand
- 5. Middle Distal - the middle knuckle halfway down the middle finger
- 6. Ring Proximal - the main knuckle of the ring finger closest to the hand
- 7. Ring Distal - the middle knuckle halfway down the ring finger
- 8. Pinky - The little finger
Average Flex
This value gives a general value for the degree of flex of the hand's fingers all together.A Note on Calibration
Calibrating is recommended if you want to use individual flex sensors or Average Flex as inputs. The posture training ignores the calibration so it's not essential to go through this process if you are only using postures as inputs. Calibrating your Gloves will allow you to get the most accurate flex sensor data reading from your Gloves for individual flex measurements. Click the “Calibrate” button in the Device Inspector and slowly open and close your hand for about 10 seconds. Click "OK" when done.Posture Recognition
Glover uses machine learning to enable you to train up to nine postures per Glover device in a session. The postures then appear as event inputs in the Device Inputs pane. See the Postures section for more on posture training and recognition.
IMU - Measuring Orientation
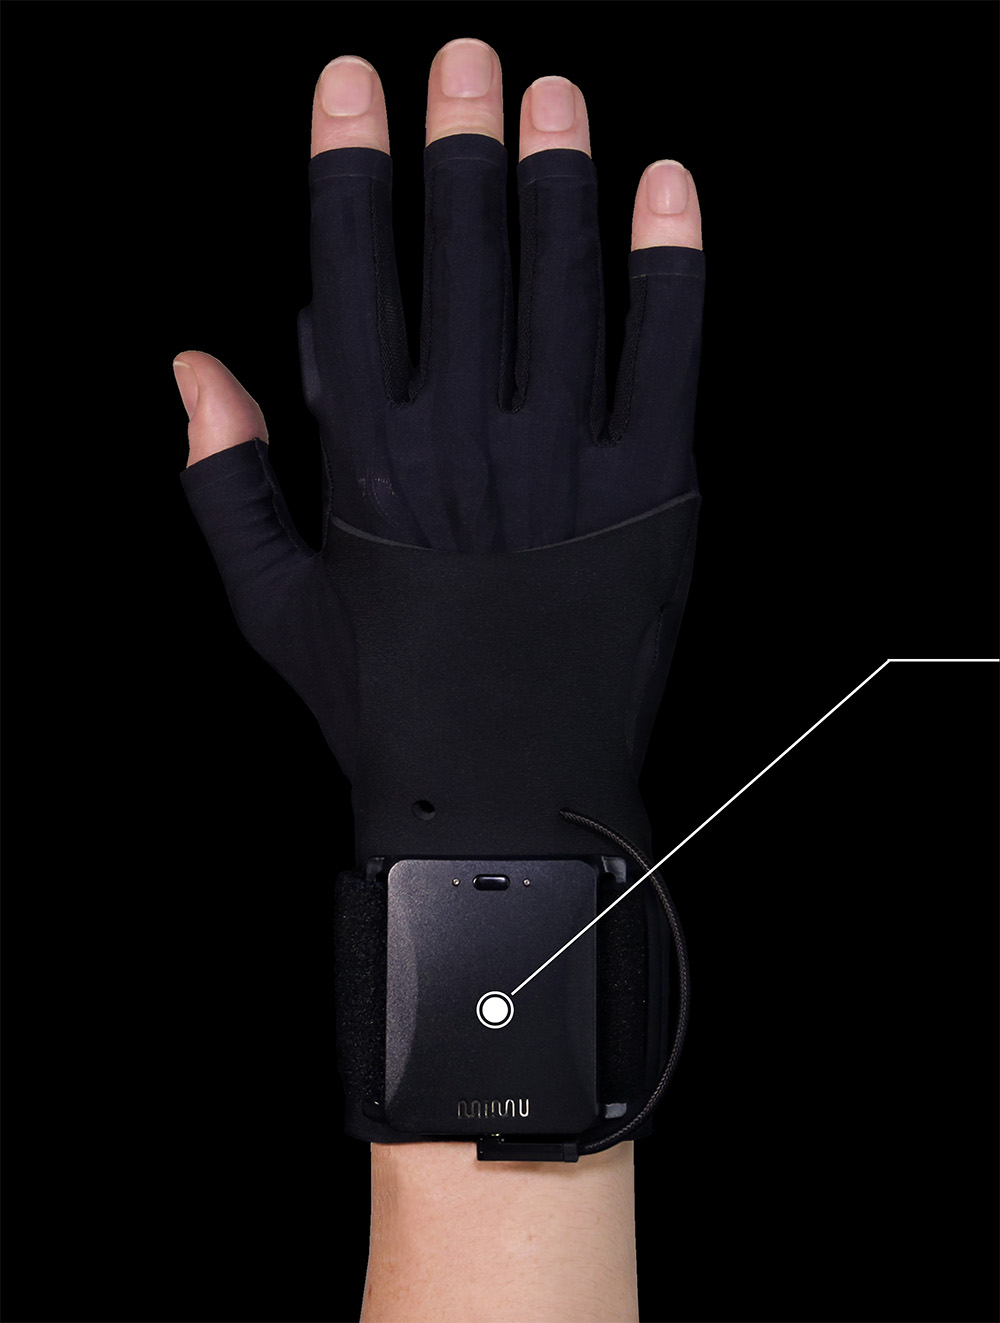
The chip inside the black plastic wrist housing is a motion-sensing Intertial Measurement Unit (IMU) device that measures the movements and orientation of the gloves. It can also detect sharp movements ('drum hits') with accelerometer peaks.
Orientation
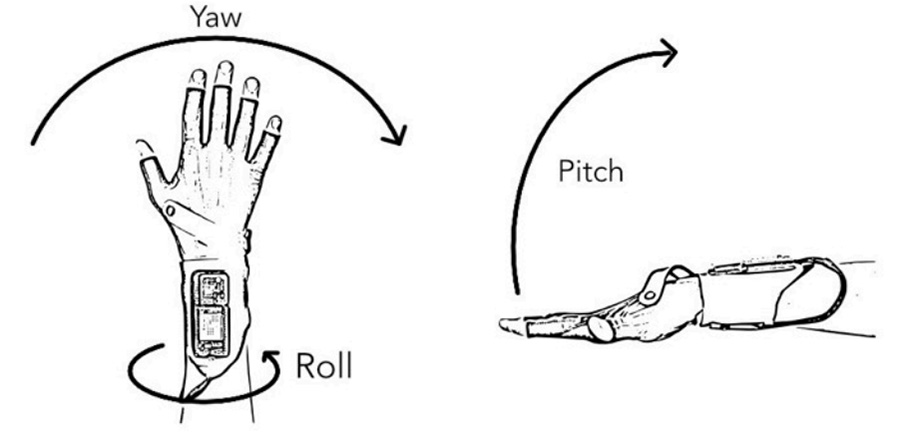
Orientation inputs are movements and have three components:
-
Pitch:
Pitch is the vertical movement of your hand, measured from the angle of your wrist. So Pitch is all the way down when your fingers are pointing to the floor and Pitch is all the way up when your fingers are pointing to the sky. -
Yaw:
Yaw is the horizontal movement of your hand, from left to right. You can manually set the orientation indicator to the middle of the bar by clicking the Set Forwards button. Read more about the importance of setting forwards below. -
Roll:
Roll is the rolling movement of the wrist, from palm up to palm down.
Direction
The continuous orientation movements are also divided into six directions, which can serve as event inputs:-
Forwards
- The forwards direction is defined relative to "forward" which has been set as described above. -
Backwards
- The backwards direction is defined relative to "forward" which has been set as described above. -
Left
- The left direction is defined relative to "forward" which has been set as described above. -
Right
- The right direction is defined relative to "forward" which has been set as described above. -
Up
- Up is up! -
Down
- Down is down!
Drum Hits
Drum Hits are event inputs and measure accelerometer peaks of three different directions of sharp movements. When you make an "air drum" movement downwards, you will see one or more of the Drum Hit boxes light up.-
Drum Hit
Drum Hit is a quick movement of the wrist in the sideways direction (like a Karate chop), or down if you have your right palm facing left (as if holding a drum stick).
-
Slap
Slap is a drum hit upwards or downwards with the hand flat, such as how you might play a hand drum.
-
Wrist Flick
Wrist Flick is a quick rotation of the wrist as occurs in a finger snap. This peak is registered when you flick your wrist sharply either inwards or outwards.

Palm Tilt
Palm Tilt is the final kind of event input enabled by the IMU in the gloves. The four possible palm tilt directions refer to the orientation of your palm relative to your forearm.NOTE: this is not an absolute direction relative to the direction you have set as "forward" for your body, but rather a direction relative to your arm. So, for example, if your arm is pointed FORWARD then palm tilt Left will have your palm facing Left. However, if your arm is pointed LEFT then palm tilt Left will have your palm facing backward.
Important Note: The sensors for palm direction are actually in the wrist, so these could more precisely be thought of as the direction the inside of your wrist is facing.
Button - A Simple Switch
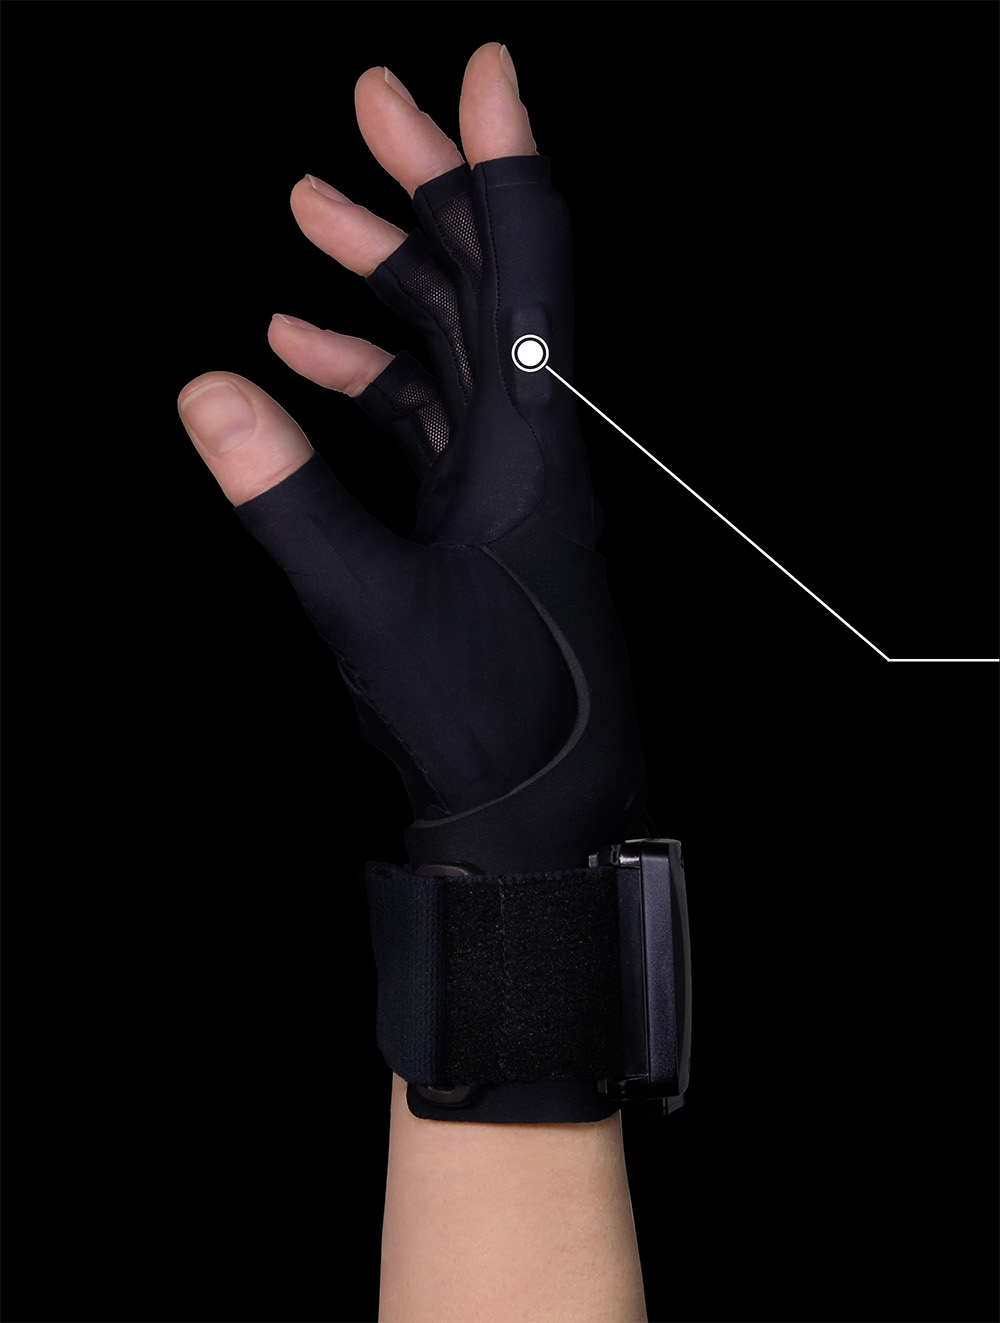
Each glove has one button that you can map to any MIDI or OSC message, just like the postures and directions. For simple 'utility' actions, it is sometimes preferable to quickly push a button instead of making a difficult set of postures to trigger something. Try for example to set forwards using the button. Glover can detect "button down" and "button up" as separate inputs for maximum control.
The MiMU Gloves have one button located on the side of the index finger between the two main knuckles. There are two possible button inputs that are detected:
-
Button Down:
This is triggered the moment the button is pressed -
Button Up:
This is triggered the moment the button is released
Glove Feedback Outputs
It can be very helpful to receive haptic and visual feedback from the computer to the gloves, removing the need to see the computer screen. Two feedback modes are built into the gloves and available for use.
LED
The LEDs on each glove act as a type of feedback. Each LED can be programmed by the user to notify the user of changes in the software or to give an indication of positional information through changes in colour or patterns of blinking. You could, for example, map your lights to turn orange when you’re playing the bass and yellow when you’re in drumming mode.
Vibration Motor

A vibration motor (sometimes called a "buzzer") on the back of the hand acts as another form of feedback. Vibration Motors provide haptic feedback to the glove user and can be programmed to vibrate in different modes directly from Glover. They vibrate automatically when you turn the gloves on and they can be mapped to vibrate to give yourself signs that something has happened. For example, you could set them to vibrate when you have set forwards.