Scenes and Arrangements
Contents
- A Scene is a collection of mappings and instruments. Each of these collections represents a set of things that the gloves can do at any one time. You might want to think of them as 'modes' - maybe you have drums mode, chords mode, etc. Others use them for different sections of a song.
- An Arrangement is a collection of scenes. As such, an arrangement might represent a whole song. You can have multiple arrangements within a single Glover project.
Scenes
A scene contains mappings and instruments. A scene can contain an unlimited number of mappings and instruments that you want to be able to use at any given moment.
- Add New Scene: You can add a new scene by clicking 'Add Scene' in the left pane or by using the shortcut SHIFT-s. A scene can contain an unlimited number of mappings and instruments that you want to be able to use simultaneously. The scene you are in, the active scene, is the one that is highlighted. As a general rule, only one scene is active at a time. This means that when you are in one scene, the mappings in other scenes are by default deactivated. The advantage of this is that by spreading mappings over different scenes you can use the same mapping inputs (e.g. the same glove posture) to control different mapping outputs in different sections or modes of a song.
- Scene Options:
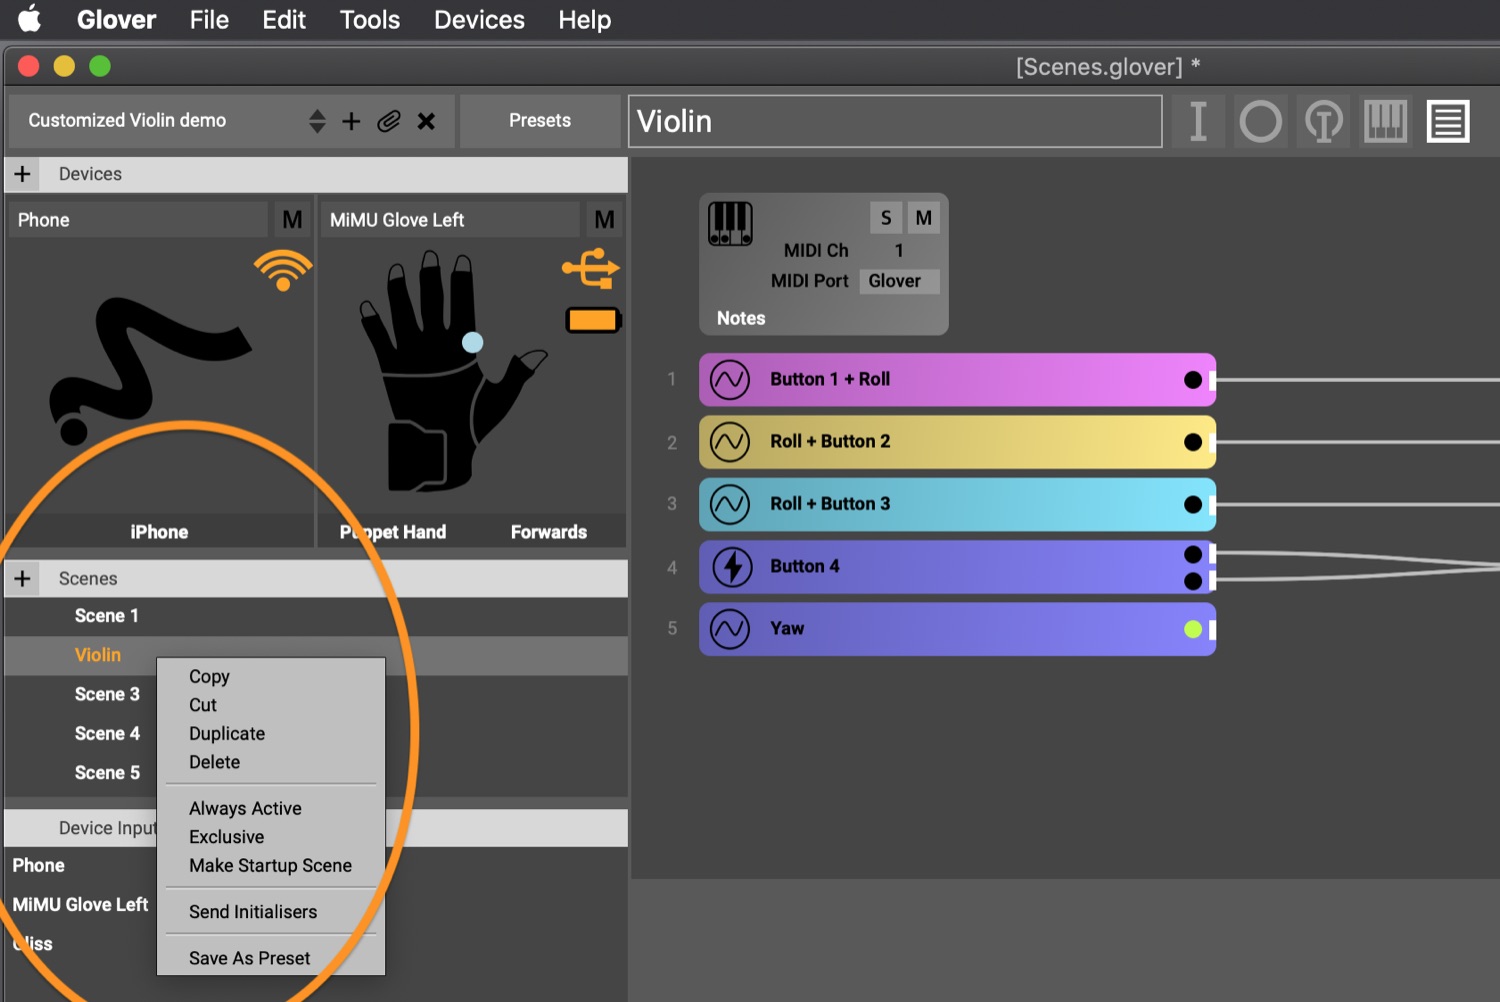
Scene options are accessed by right-clicking (Ctrl-Clicking) on the scene name in the left pane. These options
allow for manipulating scenes or for special behaviors for each scene that depart from the default behaviors.
- Copy, Cut, Duplicate and Delete: A scene may be copied, cut, duplicated, or deleted. This allows for copying and pasting scenes within an Arrangement or between Arrangements.
- Always Active: Select this option if you wish for its mappings and instruments to remain active even when other scenes are active. This is extremely useful for functions that you always want immediate access to, such as setting which direction is forward. An Always Active scene is indicated by a circular icon that looks like a wheel with spokes.
- Exclusive: Select this option if you wish for it to turn off all other scenes, including others that are labeled as “Always Active” such that it is exclusive to all other scenes. This can be useful as “panic buttons” or to fully reset things. An exclusive scene is indicated by a circular icon that looks like a wheel without spokes. It is not possible for a scene to be both Always Active and Exclusive. An exclusive scene trumps an Always Active scene.
- Make Startup Scene: Select this option if you wish to enter the Arrangement with this scene active. Glover defaults to the first scene in the list if no scene is specifically selected as the startup scene. It is not possible to select two startup scenes.
- Send Initialisers: This is a one-time action that can be performed if you would like to make sure that all initialisers are working properly in a scene or to reset it as you’re programming.
- Save as Preset: Any scene can be saved as a preset so that it can be easily saved, loaded and shared with other glovers. Presets are discussed in section [].
- Switching Scenes: If you want to switch between Scenes remotely you can use a Mapping Output for this. Create a Mapping Output in the Scene you want to switch from and select "Scene Switch" as an Output Format. Then, in the Settings of the Output choose the Scene you want to switch to. You can use any Qualifier or Event to trigger a Scene switch.
- Scene Order: You can change the order of scenes by simply dragging and dropping them in the scene list pane.
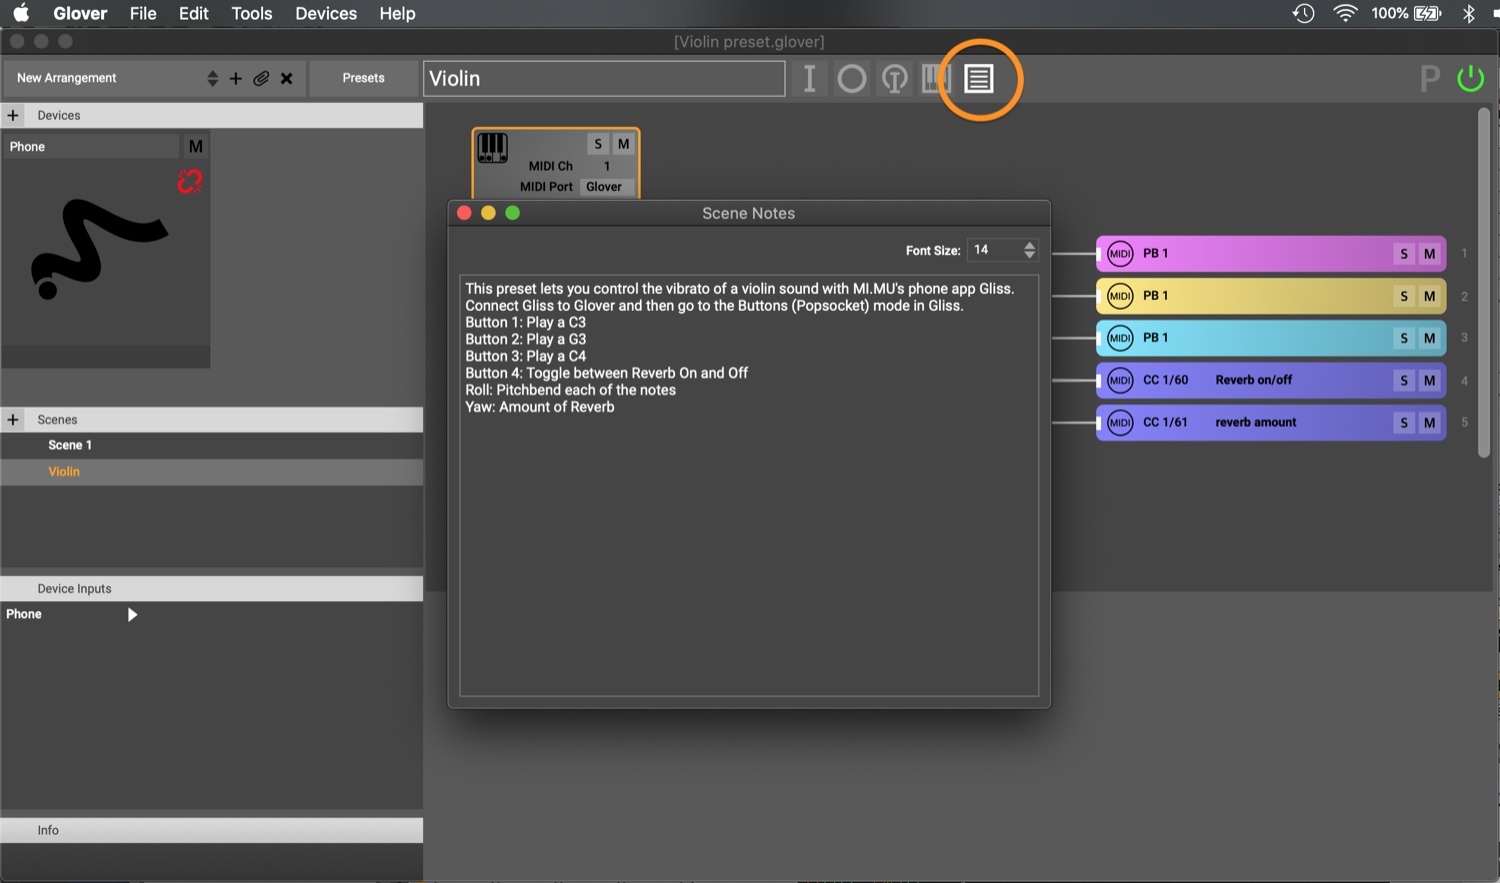
- Scene Notes
You can make and access notes for each scene by clicking the Scene Notes symbol at the top of the
mapping page. If a selected scene has notes in its notes file, the notes icon will be highlighted white.
Arrangements
An arrangement is a collection of one or more scenes. You might think of arrangements as different songs in a performance set, where each song has its own unique set of scenes. An arrangement can also have its own external files that it can open automatically during a performance.
- Arrangement selector:
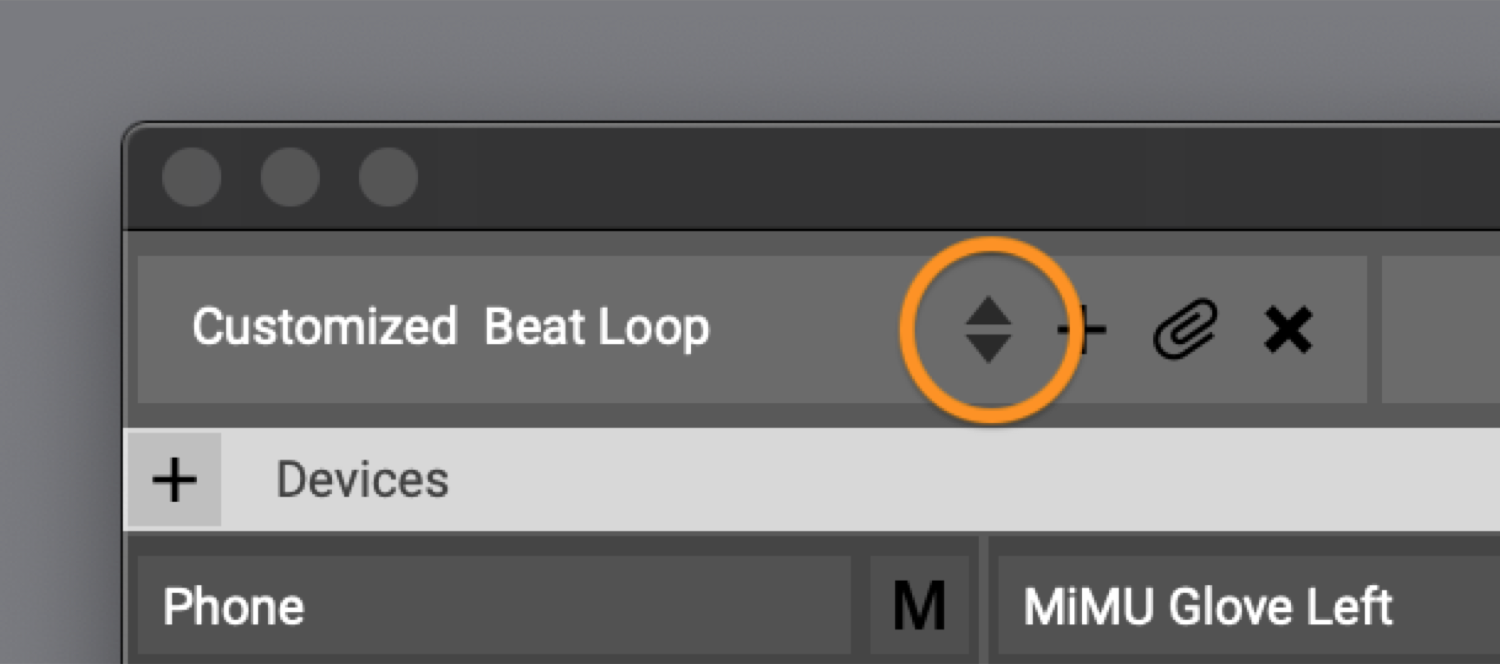 Arrangements can be selected from the dropdown menu on the top left of the Glover window or by sending a specific
OSC or MIDI message to Glover from another device or app, such as a foot pedal or keyboard.
Arrangements can be useful, for example, for quickly changing songs or artists in a lineup.
The scenes belonging to the arrangement are viewed as a list in
the sidebar.
Arrangements can be selected from the dropdown menu on the top left of the Glover window or by sending a specific
OSC or MIDI message to Glover from another device or app, such as a foot pedal or keyboard.
Arrangements can be useful, for example, for quickly changing songs or artists in a lineup.
The scenes belonging to the arrangement are viewed as a list in
the sidebar.
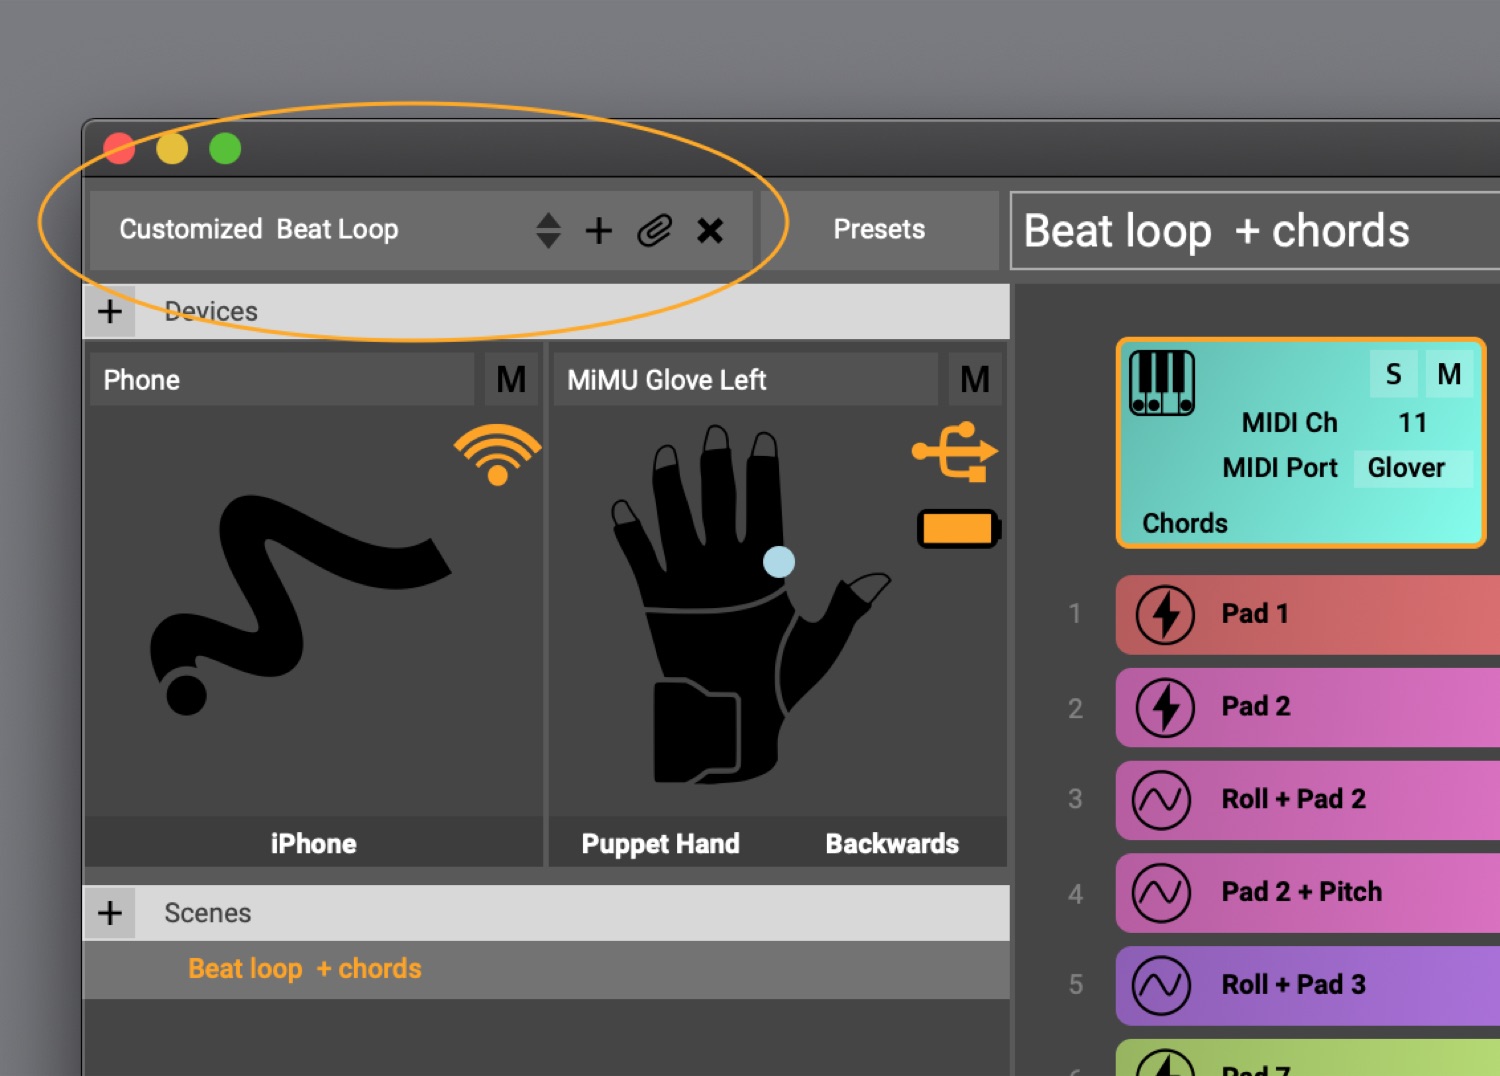
- New Arrangement:
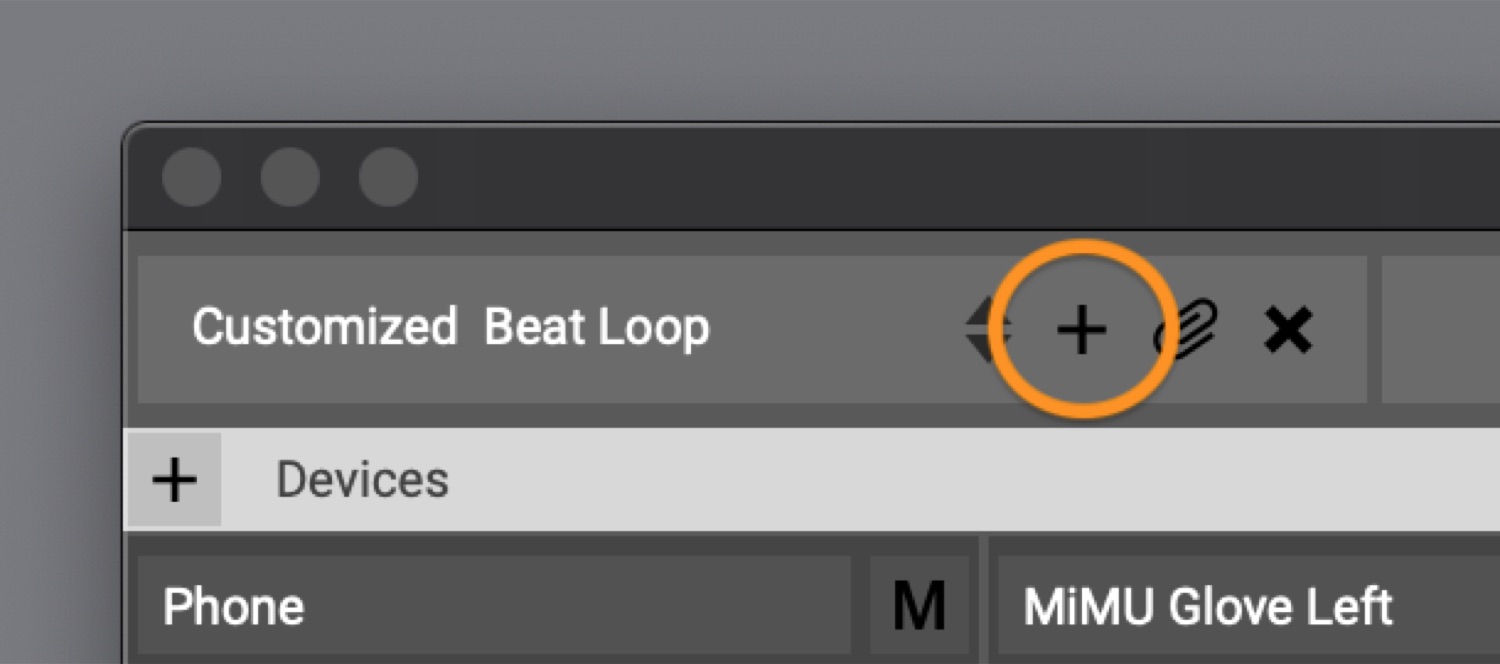 Click the plus symbol next to the Arrangement name to add a new Arrangement.
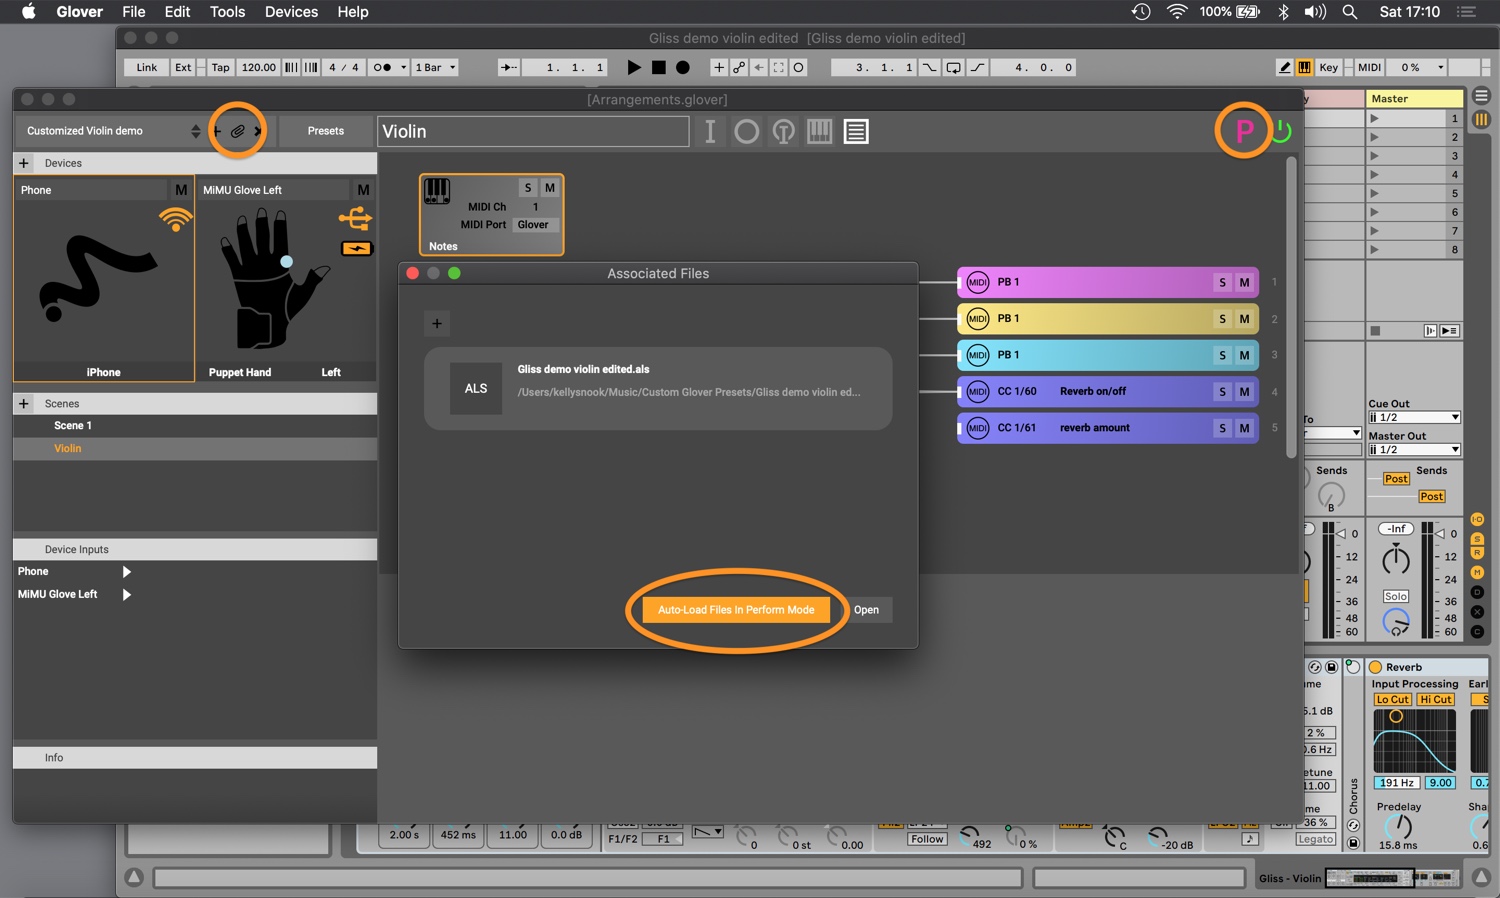
- Associated Files:
 Any number of non-Glover external files can be associated with an Arrangement and opened upon selecting the
Arrangement. This is very useful for opening a new session in your DAW or opening visuals that you would like to
start when the new Arrangement is entered. The Arrangement’s associated files can be auto-loaded when in ‘Perform
Mode’ if desired by clicking on the button in the Associated Files dialogue window. This feature can also be
disabled so that Associated Files will only be manually loaded when desired.
Any number of non-Glover external files can be associated with an Arrangement and opened upon selecting the
Arrangement. This is very useful for opening a new session in your DAW or opening visuals that you would like to
start when the new Arrangement is entered. The Arrangement’s associated files can be auto-loaded when in ‘Perform
Mode’ if desired by clicking on the button in the Associated Files dialogue window. This feature can also be
disabled so that Associated Files will only be manually loaded when desired.
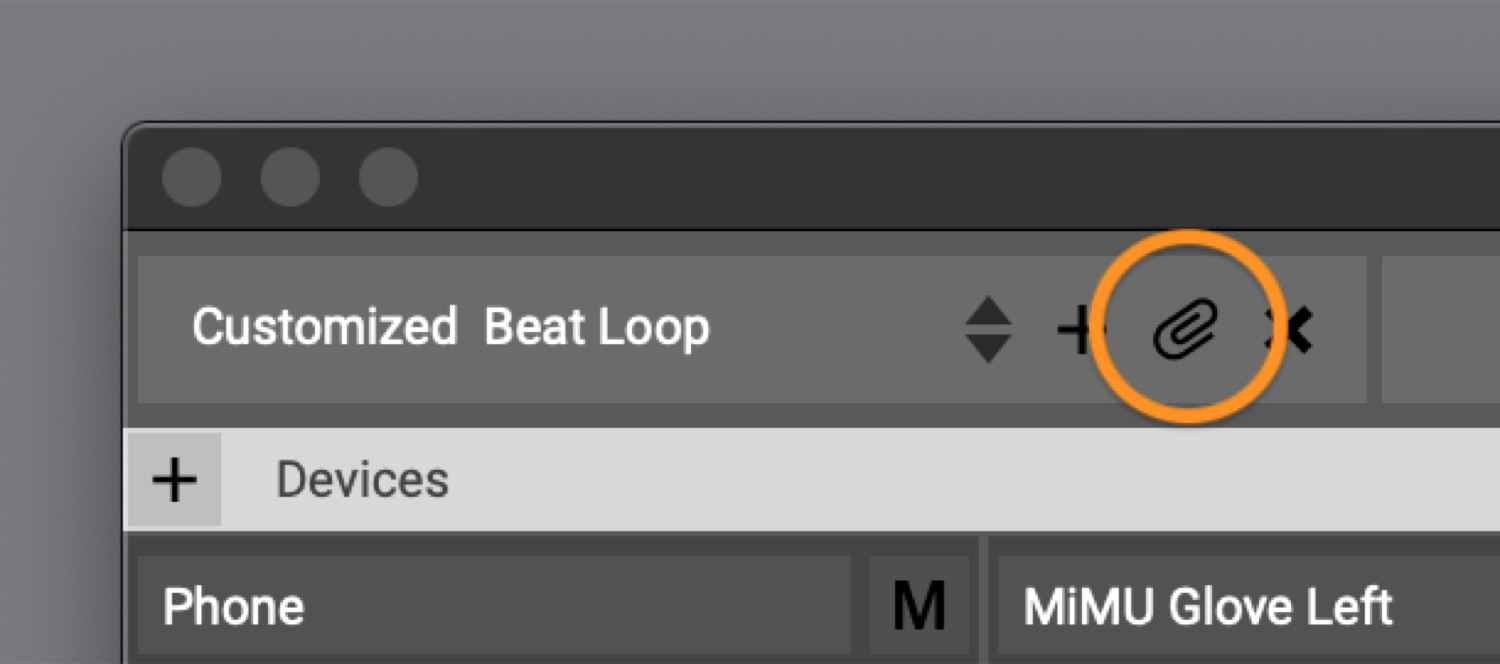
- Working With Associated Files
To associate one or more files with an arrangement, select the arrangement and click on the paperclip icon next to the name of the arrangement. In the pop-up dialogue box, there are three buttons:Tip: make sure your computer knows the correct application it should use to automatically load the files.
- Adding Associated Files to Arrangements The + button allows you to add files to the list of associated files - drag files onto the window or navigate and select each desired file. Now, if you are in Performance Mode and the Auto-Load Files option is turned on, all listed associated files will automatically open when you switch into this arrangement.
- Open The "Open" button will manually open the files listed in this window so you can check that it's what you want.
- Auto-Load Files In Performance Mode
"Auto-Load Files In Perform Mode" is a nifty trick. This allows your associated files to load every time you switch to
that arrangement. This is great because it means you can switch arrangements in Glover and your Ableton Live session (or
whatever you use) will automatically load to keep in sync!
But, what if you don’t want your massive Ableton Live project and all its samples to load every time you switch arrangements when you are just programming? Perform Mode makes it easy to control.
Tip: When using the Arrangement Manager, it can be handy to quickly disable Auto-Load while you're programming, then re-enable them when you practice or perform. - Performance Mode
Click the ‘P’ Icon in the upper right hand corner (or use the keyboard shortcut Alt-P) to toggle Performance Mode on and
off, which enables you to auto-load associated files whenever a new Arrangement is opened. When it's pink, it's on.
When you are in performance mode, if you have set your associated files to auto-load, they will load automatically when you switch into that Arrangement. When you are not in performance mode, none of the associated files will auto-load.
Arrangement Manager
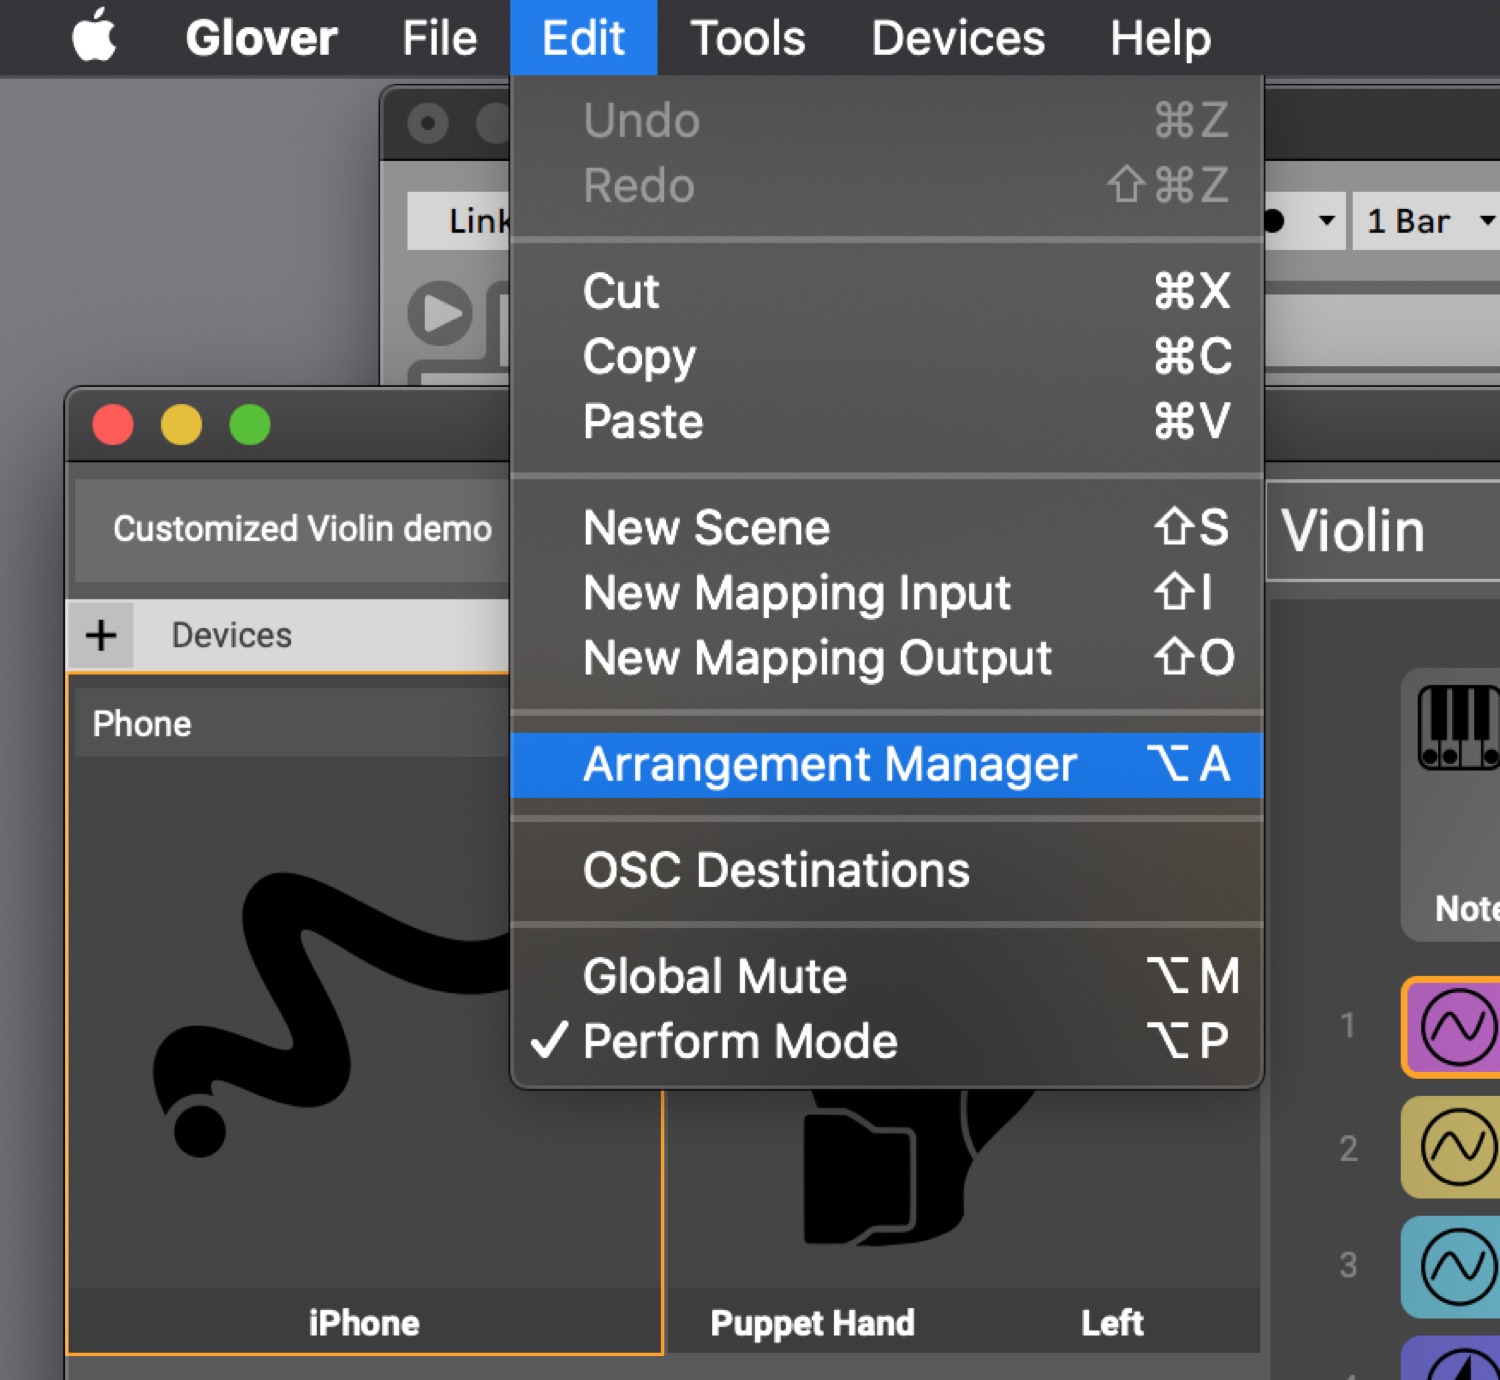
You can see an overview of your arrangements in the Arrangement Manager, which can be accessed from the menu bar: Edit -> Arrangement Manager.
In the Arrangement Manager, you can easily see and program all aspects of your arrangements, including the order in which they appear in the drop-down menu in Glover.
- Arrangement Order by Name
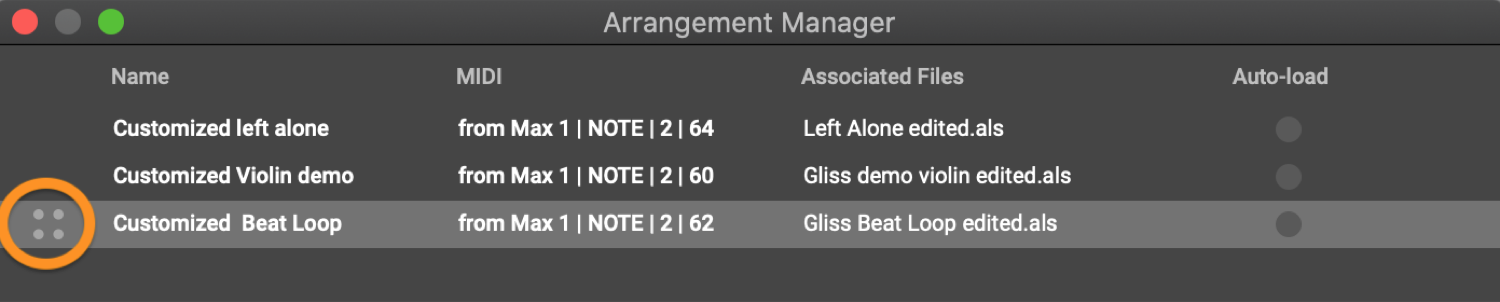
Your arrangements will be listed by name in the order you created them, but the order can be easily changed by dragging and dropping the temporary box that appears to the left of the name. - MIDI Control of Arrangement Switch
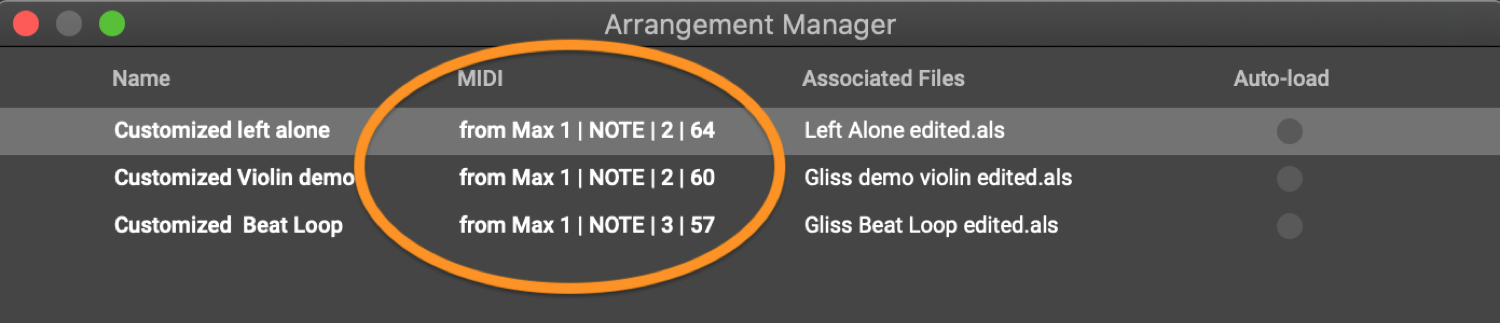
You can switch scenes using external MIDI instruments or apps by double clicking in this field and then performing the MIDI event that you wish to use. Glover will listen on all channels during this MIDI learn process. - Associated Files
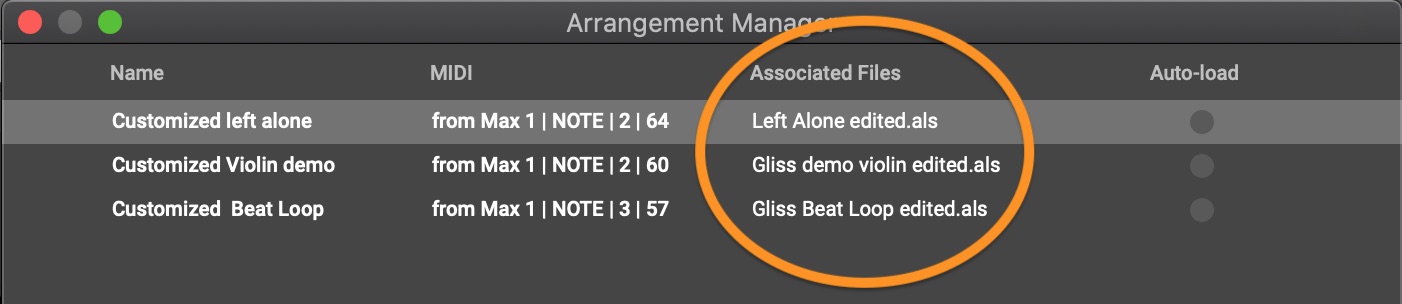
The Arrangement Manager lets you quickly see all files associated with your arrangements. Double clicking on any file in this list will bring up the same dialog box as in the main Associated Files selector. - Auto-Load Files
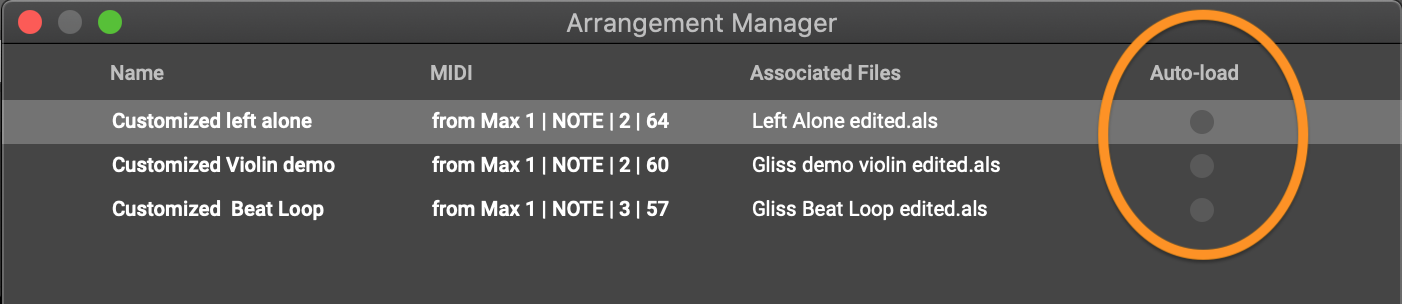
This is a quick way to turn on and off an arrangement's associated files auto-loading, which allows for more efficient workflow while programming. The functionality is the same as clicking the Auto-Load button in the Associated Files dialogue box selector. Grey indicates auto-load is OFF and orange indicates auto-load is ON.